In this series, we're focusing on the bone-based 2D animation tools provided by the Unity engine. The main idea is to present and teach the fundamentals of 2D animation in order for you to apply it to your own games. In this tutorial, we'll use Unity's excellent Mecanim tool to blend animations, and we'll add some simple scripting to demonstrate the final result.
Before we start the tutorial, we would like to thank Chenguang (DragonBonesTeam) for providing us with the game art used to produce this tutorial series.
Where We Left Off
In the previous tutorials, we set up the project, assembled a 2D dragon character, and created three different animations. If you haven't completed the previous tutorials yet, we strongly recommend you do so before continuing.
Final Preview
This demo shows the animated dragon we're aiming for—hit Space to make it jump:
Mecanim
At this point, you have your dragon completely assembled with three defined animations. However, there's no connection between them. So, our initial goal is to connect the different animation clips and blend them together. For this, Unity provides an awesome tool called Mecanim that does exactly what you need.
Mecanim is a powerful and flexible animation system. Since it's integrated with Unity itself, there is no need for third party software. You can easily animate anything, from sprites to blend shapes or even lights. Mecanim allows you to create state machines and blend trees to control your character.
But, before we go any further, let's talk a little bit about blending animations and state machines so you'll have a better understanding of what we are about to do.
What is a State Machine?
In Unity, you can blend two or more similar motions—for example, you may want to blend running and walking animations depending on the character's current speed. Basically, you have two different ways to blend animations in Unity. In some situations you may want to use Transitions; in others you will need to use Blend Trees:
- Transitions are used for transitioning smoothly between animations. This usually works well if the transition is quick.
- Blend Trees allow multiple animations to be blended smoothly, while incorporating parts of them in variable amounts. These amounts are controlled by numerical parameters. To give a practical example, imagine that we have a shooter game; you may want the character to fire and run at the same time. Blend trees allow you to blend the two animations together, letting the character run and shoot at the same time, without needing to create a third animation for that specific mixture of actions.
A state machine stores the state of an entity at a given time, and can react to an input to change the state of that entity, or to cause an action or output. For more information, see Finite-State Machines: Theory and Implementation.
In Unity, you use state machines to control the state of the game's characters. For example, one state for a character could be Walk, and another could be Jump. The character can change from the Walk state to the Jump state based on input from the player (probably hitting the Jump button).
Here you can see an example of a (more complex) state machine from the Unity documentation. Each box represents a state, and the arrows represent possible transitions between them:
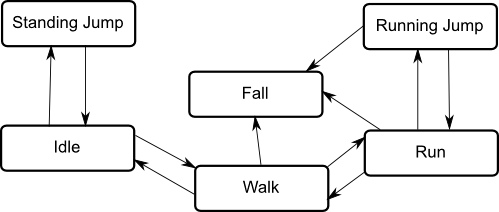
We're going to create a state machine with our existing animations, and then use transitions to blend them together.
Building Our State Machine
If you check the Animations folder where you have been saving your .anim files, you will find a Dragon.controller file. This is the mecanim file associated with the character that Unity automatically generated when you saved your first animation.
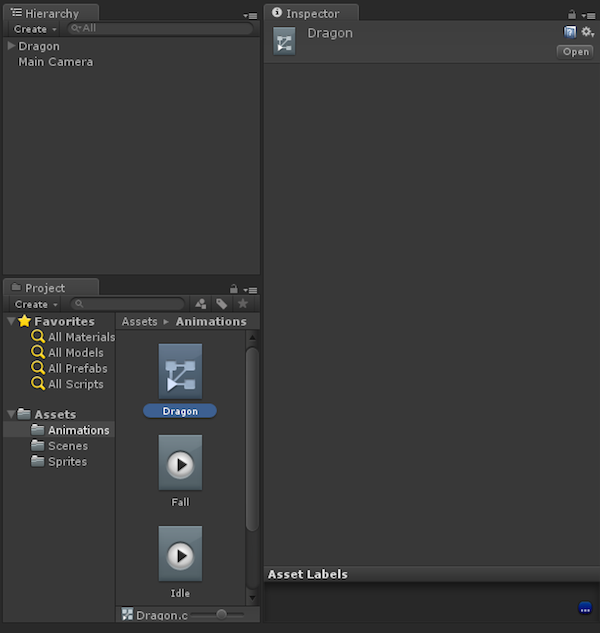
Double-click on the Dragon.controller file, and Unity will open a Animator view tab next to your Scene and Game tabs.
As you can see, Unity already added the three animations to the file. Since the animations are already in place, there is no need to add them, but, if you wanted to add an extra animation to the controller, all you'd need to do is drag the .anim file to the Animator view. In the same way, if you want to remove an existing animation from the controller, you should just select on the Animator view and press Delete. Feel free to try this for yourself.
We have four different boxes in the Animator:
- Any State
- Idle
- Jump
- Fall
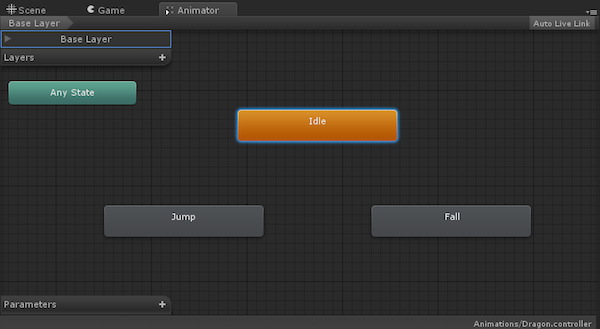
Any State is the default state that the mecanim creates, and you will not use it. You can drag it to any corner of the Animator window and leave it there.
The other three boxes refer to the three animations that we created. As you may notice, Idle is colored with orange, while the other two are grey. That's because Idle is the root animation; it's the animation that the character is going to play by default. If you press the play button on your editor and test it, you will see that the character does this Idle animation. In this particular case, that's exactly the behavior we want; however, if you wanted, say, the Fall animation to be the root animation, all you'd have to do is right-click it select Set As Default.
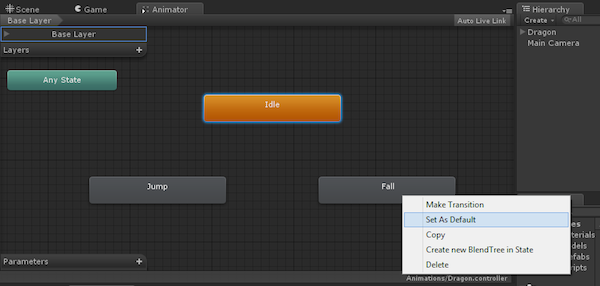
As you can see, the Fall animation is now orange and the Idle is grey.
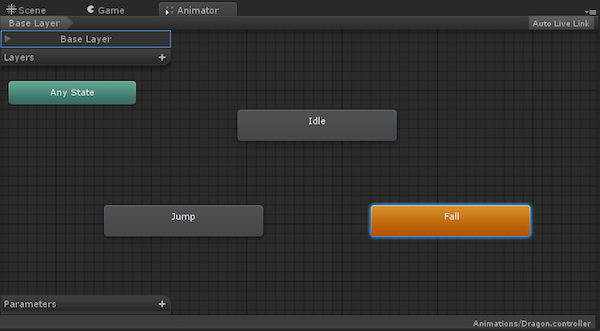
Since you want Idle to be the root animation, just repeat the process to make it orange again.
It is now time to connect the animations. Right-click Idle and select Make Transition.
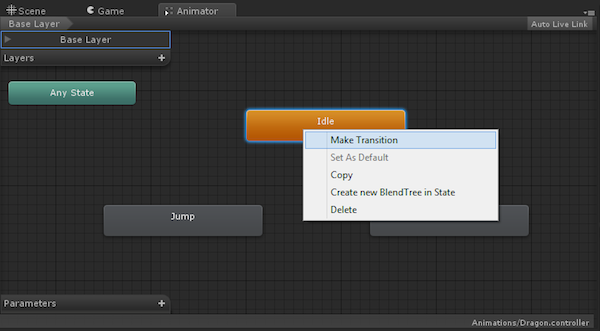
This will create a small arrow that starts from Idle. Click on the Jump animation to make the arrow connect the two animations.
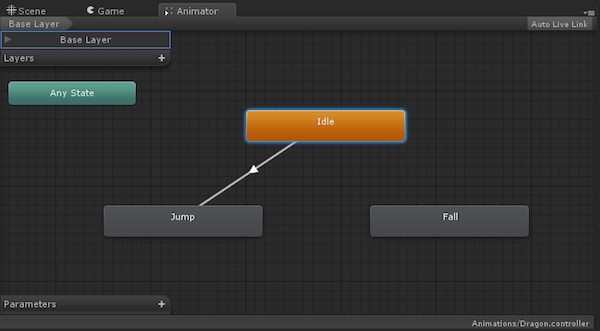
If you select the arrow you just created, you will see that new properties show up in the Inspector tab.
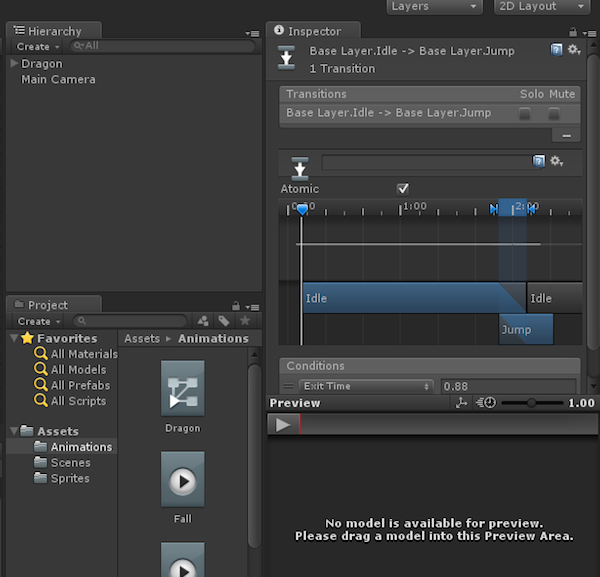
As you can see, you have a time-line, and the animations Idle and Jump. There is a blue band over the animations that starts on Idle but then changes to Jump. Also, there is a period in time during which the two animations overlap.
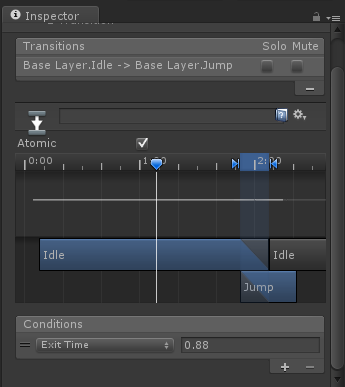
Since the Preview area is empty, even if you click on the play button over the preview, you can't see what is happening.
To preview the transition that you are working on, just select the Dragon game object from the Hierarchy tab and drag it to the Preview area. Now you can see the character in the preview and, if you press play, you can see the transition between the two animations.
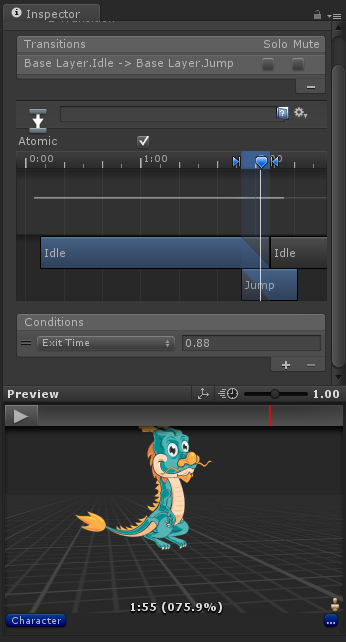
In the Inspector, the area where the blue band changes from Idle to Jump is our transition:
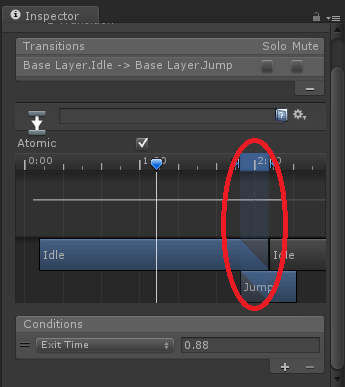
You can edit the transitions by dragging the two blue arrows on the timeline that limit the transition area. By changing their position, you can make the transition quicker or softer.
The next thing you need to do is define when you want this transition to happen. To do that, create a new parameter by clicking on the + sign in the Parameters list.
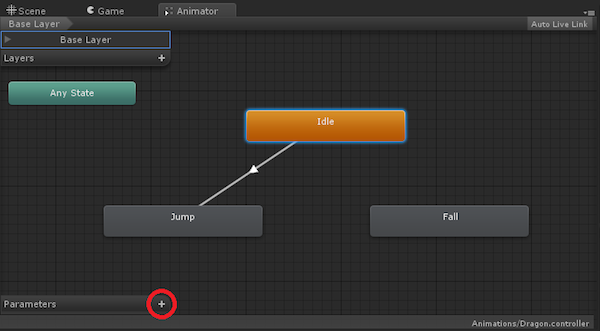
Next, select the Float option and call it VerticalMovement:
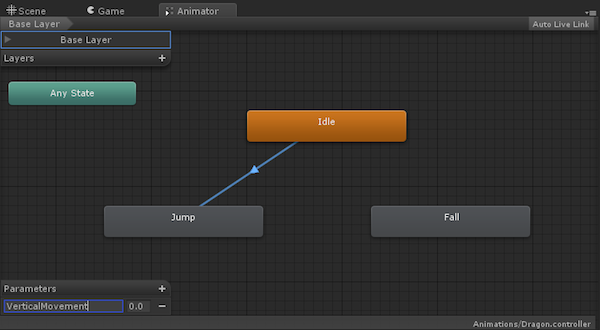
Now, go back to the Inspector, and under Conditions the variable VerticalMovement will show up. Select it.
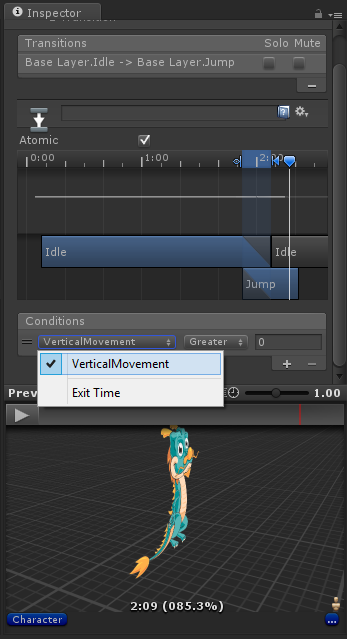
You've just defined the condition to determine when to change the state in the state machine: if the value of VerticalMovement is greater than 0, then the character will start the Jump animation.
We also want a transition between the Jump animation and the Fall animation:
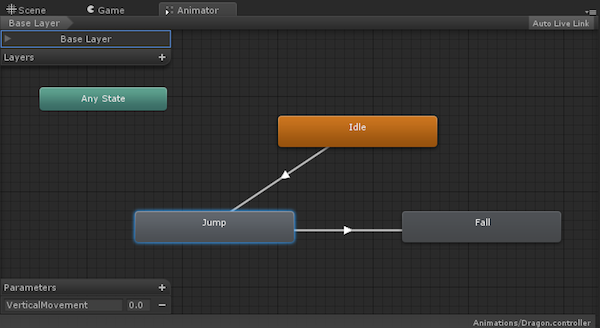
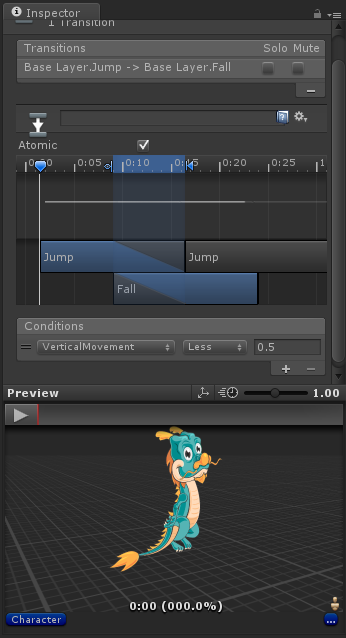
The maximum value that VerticalMovement is going to reach is 1, so, for the transition between Jump and Fall, we can activate it when that value is less than 0.5.
Now we need to make the character return to the Idle animation after the fall. Since Idle should be playing when the character is on the floor, you should create a transition between Fall and Idle.
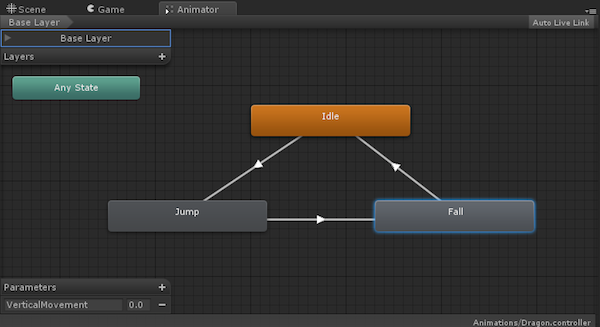
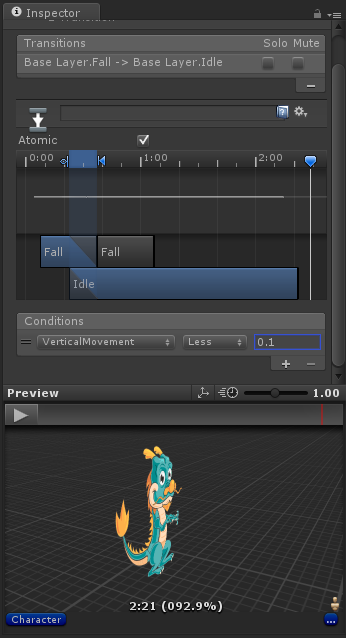
To finish, you have to make sure it activates when the character is on the ground. You can do that be setting the transition parameter of VerticalMovement to less than0.1—that basically means that the VerticalMovement is 0, meaning that the character is on the ground.
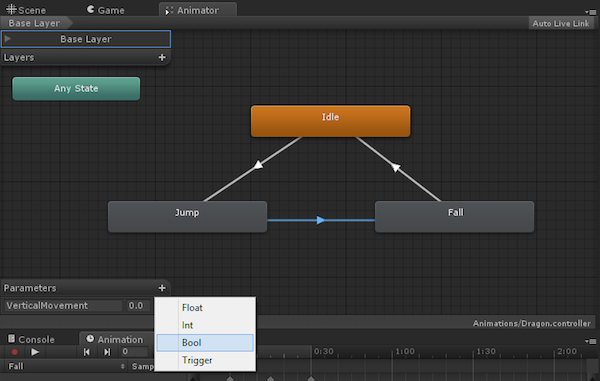
We now need to make sure that we don't see any Idle animations while the character is in the air between the Jump and Fall animations. To do that, create a new parameter, this time a Bool.
Call it OnGround.
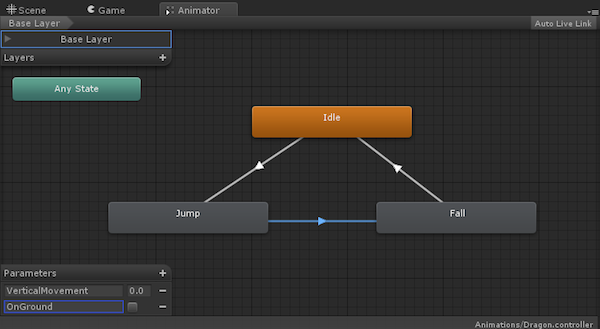
Select the transition between Jump and Fall. You want this transition to happen when the character is still in the air, right? So go to the Inspector, click the +, and add a new parameter to the transition. Basically, you want this to happen when the value of OnGround is false.
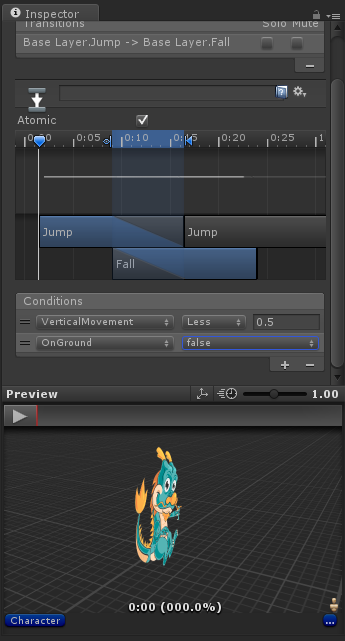
Next, on the transition from Fall to Idle, add the parameter OnGround and set the value to true:
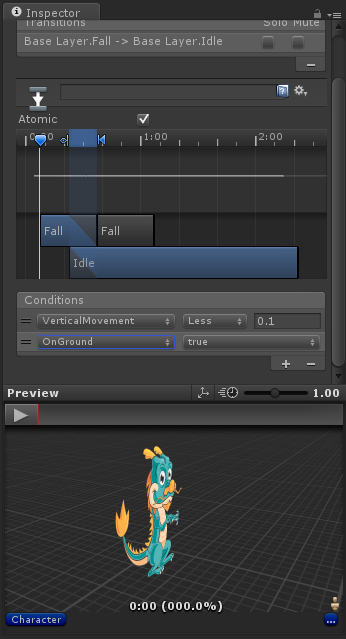
Our work with Mecanim is done. Now it's time to move to scripting.
Scripting Animations
In your asset directory, create a new folder called Scripts. Next, create a new C# script called CharacterMove.cs. Note that the script you are about to create is a very simple one, which the main goal is to show how you can change the animations of the character by code.
The best practice is to use Unity's physics when you want to create robust games. However, for the sake of simplicity and understanding, we'll just create a small simulation.
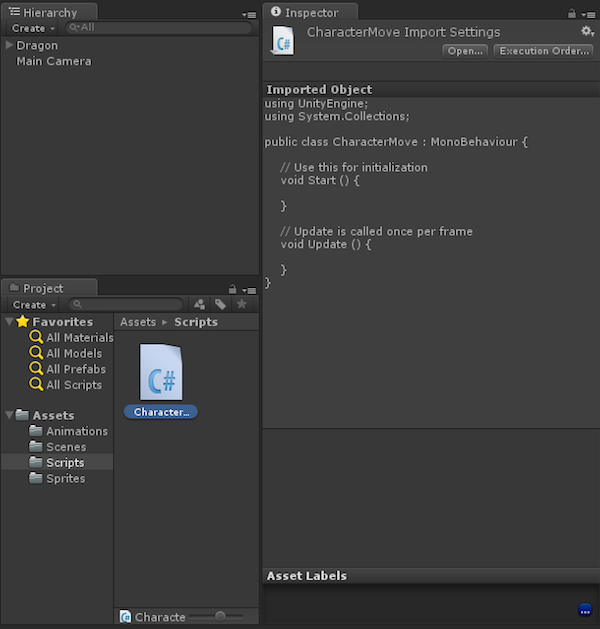
Create four variables in the script: one to reference the Animator component, another for the speed of the fall, a third one for the amount of vertical movement, and a flag to check whether the character is on the ground.
public class CharacterMove : MonoBehaviour {

    // Variables
	public Animator anim; // Refrerence to the animator
	private float fallSpeed; // The speed the character falls
	private float verticalMovement; // The amount of vertical movement
	private bool onGround; // Flag to check whether the character is on the ground
In the Start() method, you need to make sure that the speed is set to 0.03 (or whichever other value you feel suits your animations) and that the character is grounded.
void Start () {
    // The character starts on the ground
	onGround = true;
    // Set the fall speed
	fallSpeed = 0.03f;
}
Now, on the Update() method, there are several things you need to check. First, you need to detect when the Space Bar is pressed, to make the character jump. When it's pressed, set the vertical movement to 1 and the onGround flag to false.
void Update () {
    // If the space bar is pressed and the character is on the ground
	if (Input.GetKeyDown(KeyCode.Space) == true && onGround == true)
	{
		verticalMovement = 1f;
		onGround = false;
	}
}
What happens when the Space Bar is not being pressed? Well, you need to check if the character is in the air and its vertical movement is greater than 0; if so, you need to reduce the vertical movement by subtracting the fall speed.
void Update () {

	// If the space bar is pressed and the character is on the ground
	if (Input.GetKeyDown(KeyCode.Space) == true && onGround == true)
	{
		verticalMovement = 1f;
		onGround = false;
	}
	else
	{
		// Check if the character is in the air and the vertical movement greater than 0
		if(onGround == false && verticalMovement > 0)
		{
			// Reduce vertical movement
			verticalMovement -= fallSpeed;
		}
	}
}
As you'll recall, once verticalMovement drops below 0.5, the Fall animation will start playing.
However, we don't want to subtract fallSpeed from verticalMovement forever, since the character will land at some point. If the vertical movement value is equal to or less than 0, we'll say that means the character has hit the ground.
void Update () {
	// If the space bar is pressed and the character is on the ground		if (Input.GetKeyDown(KeyCode.Space) == true && onGround == true)		{
		verticalMovement = 1f;
        onGround = false;
	}
	else
	{
	// Check if the character is in the air and the vertical movement greater than 0
	if(onGround == false && verticalMovement > 0)
	{
    	// Reduce vertical movement
		verticalMovement -= fallSpeed
		// If the vertical movement is less or equal to 0, the character is on the floor
		if (verticalMovement < 0)
        {
            verticalMovement = 0;
			onGround = true;
		}
    }
	}
}
To end the Update() method, you need to pass the values of verticalMovement and onGround to the Animator component:
void Update () {

	// If the space bar is pressed and the character is on the ground
	if (Input.GetKeyDown(KeyCode.Space) == true && onGround == true)
	{
		verticalMovement = 1f;
		onGround = false;
	}
	else
	{
		// Check if the character is in the air and the vertical movement greater than 0
		if(onGround == false && verticalMovement > 0)
		{
	    	// Reduce vertical movement
	    	verticalMovement -= fallSpeed;
	    	// If the vertical movement is less or equal to 0, the character is on the floor
	    	if (verticalMovement < 0)
            {
	    	verticalMovement = 0;
	    	onGround = true;
	    	}
    	}
    }

	// Update the animator variables
	anim.SetFloat("VerticalMovement", verticalMovement);
	anim.SetBool("OnGround", onGround);
}
The script is finished. Now you have to add it to the Dragon game object and add the reference to the Animator component. To do this, once you add the script, drag the Animator to the proper field on the script.
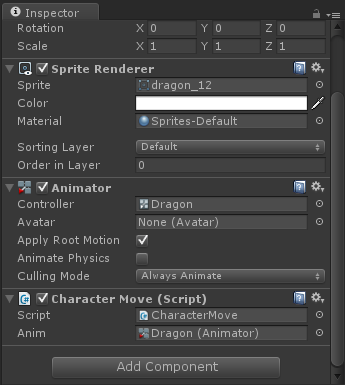
If you press play and test it, the animations should be changing like they're supposed to. The dragon starts on Idle, but once you press the Space Bar it will Jump and then start playing the Fall animation before returning to Idle.
External Tools and Technologies
Although in this tutorial series we've only used the default tools that come with Unity, there are a lot of great 2D tools on the Unity Asset Store that can help you make this process even easier and faster. Two good examples are Smooth Moves and Puppet 2D, each of which can help you to define the characters, the hierarchy and the animations in an intuitive and easy way.
Plug-ins like these offer some extras, like the ability to add 2D "bones", making the whole animation process easier and the deformations more realistic. If your idea is to use 2D animations with several degrees of detail, we strongly recommend you to check out those plugins.
Conclusion
This concludes our tutorial series about how to create a bone-based 2D animation with Unity. We've covered a lot of ground in this short series, and you should now know enough to get started with your 2D animations. If you have any questions or comments, as always, feel free to drop us a line in the comments.
References
- Dragon sprite sheet: used with permission from Chenguang from DragonBonesTeam
