In this tutorial, we will focus on the bone-based 2D animation tools provided by the Unity engine. The main idea is to present and teach the fundamentals of 2D animation in order for you to apply it to your own games. In this post, we'll set up the project, define the assets, and do the initial preparations for the animation.
Before we start the tutorial, we would like to thank Chenguang (DragonBonesTeam) for providing us with the game art used to produce this tutorial series.
Who is This Tutorial For?
This tutorial is primarily aimed at two groups of game developers:
- Those who are unfamiliar with Unity at all.
- Those who are familiar with Unity, but not the Unity 2D engine and tools.
We assume that you have some programming skills, so we won't cover the code in depth. In order to follow this tutorial, you will of course need to download Unity.
For a quick start using Unity, follow our previous tutorial that introduces you to the Unity 2D environment and its tools and characteristics. We strongly recommend that you do this if you are not familiar with Unity.
Final Preview
This demo shows the animated dragon we're aiming for:
Project Setup
Launch Unity and create a new project by selecting New Project... from the File menu. The Project Wizard will appear. Now, create a new 2D project, followed by a new folder called Sprites (inside your Assets directory).
Now that you have the project folder organized, it's time to import the game assets. You can find them in the Assets folder of this tutorial's GitHub repo. (You can just click Download ZIP on the latter page if you're not familiar with GitHub.) Note that this folder includes assets for the whole tutorial series, so there are some that you won't use until later on.
Bone Animation vs Sprite Atlases
Before moving on, compare the following two images:

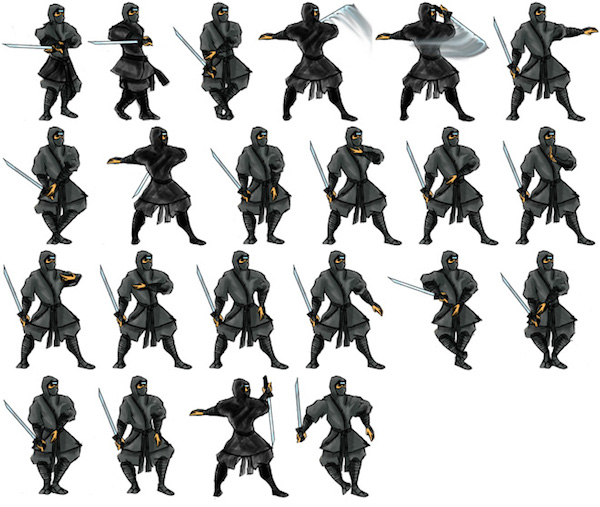
In the first image, the dragon is divided into several body parts (head, body, arms, and so on). In the second, the ninja is shown in several poses, with a sequence of poses for different actions. This lets you clearly imagine how the avatar will move in your game.
The ninja sprite is what we call a sprite sheet or sprite atlas. This type of sprite was very popular on the classic 2D games, and it's still very common today.
The dragon sprite requires a more recent 2D animation technique, normally called bone-based animation. As the name suggests, the animation will be on a per-bone basis, where each body bone can have a specific action or animation. Having all the main body parts of the character separated allows the developers to create the animations directly in the engine. This new animation technique is very similar to what is used in 3D animation.
In this tutorial, we're going to focus on bone-based animation. However, note that Unity does not do true bone-based animation, so we will simulate it.
Preparing The Sprite For Animation
Drag the sprite file to the editor and drop it on the Sprites folder, like so:
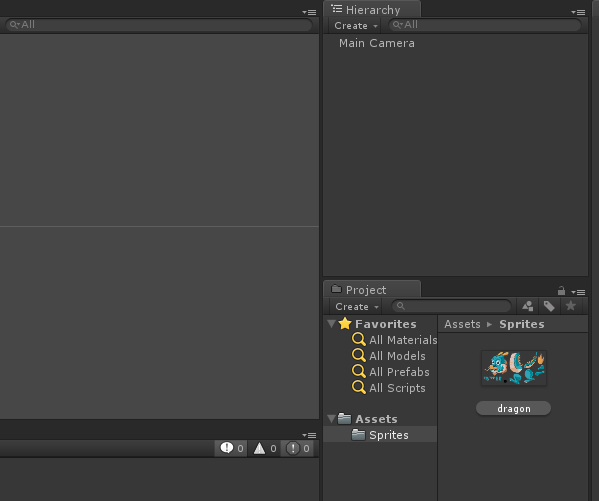
Before any character is ready for animation, you need to add a Scene to the project. Create a Scenes folder in your Assets directory, then create a new scene and save it as Test.scene within this folder. At the end of this step, you should have something like this:

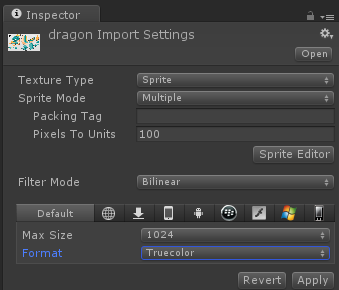
Now, still in the Project tab, select the dragon sprite, then look at the Inspector panel:
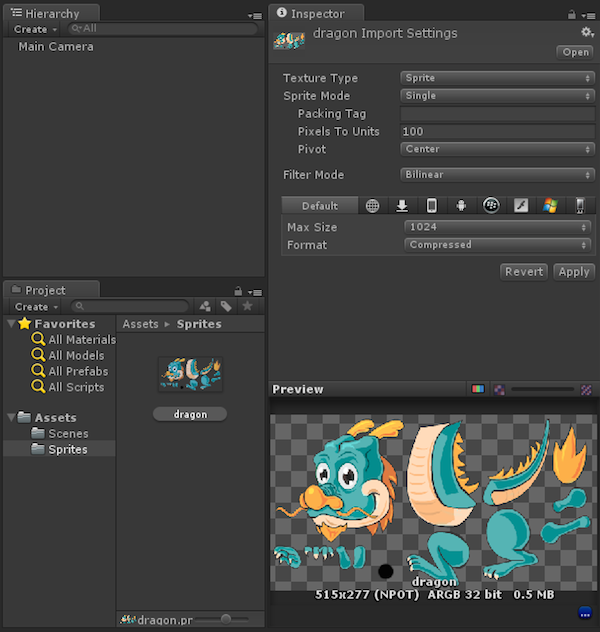
As you can see in the Sprite Mode property in the Inspector, the Sprite Mode is set to Single. This means that the engine will use the entire texture as a whole when creating a new sprite. Since we have the body parts separated in the dragon, we don't want that to happen. We therefore need to change the Sprite Mode from Single to Multiple.
When you change the option, a new button labelled Sprite Editor appears:
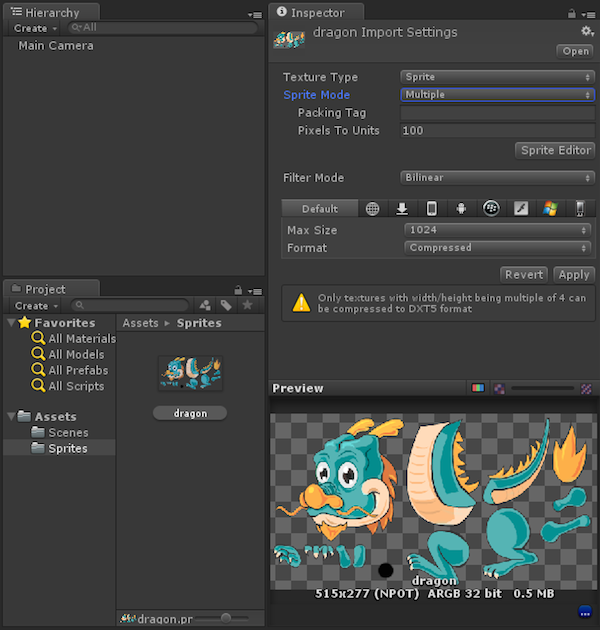
Currently, the Sprite Editor slicing tool does not work well on compressed images. In order to ensure the best result for the animated sprites, you need to change the Format value on the bottom of the Inspector tab from the default option, Compressed, to Truecolor. Then, click Apply.
Now, select the dragon sprite and click the Sprite Editor button. A new window will pop up:
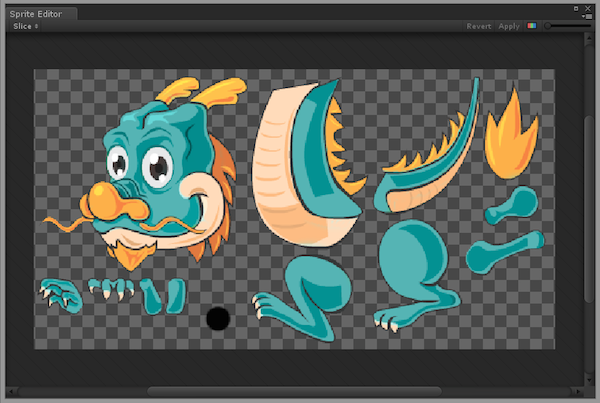
In the upper left corner of the window, you will find the Slice button. Click on it, and another menu will pop up:
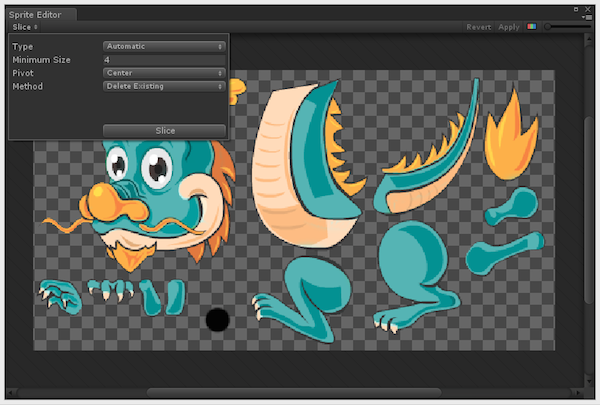
This menu allows you to change the parameters of how the sprite will be sliced by the engine. If you set the slices to Automatic, the engine will try to detect the different parts of the character you have in the image. You can define a minimum size for the slices, a pivot (the point around which the slice rotates) and one of three methods:
- Delete Existing will replace any existing slices.
- Smart will try to create new slices while retaining or adjusting the existing ones.
- Safe will add new slices without modifying the existing ones.
You can also set the Type parameter to Grid. This will give you other options:
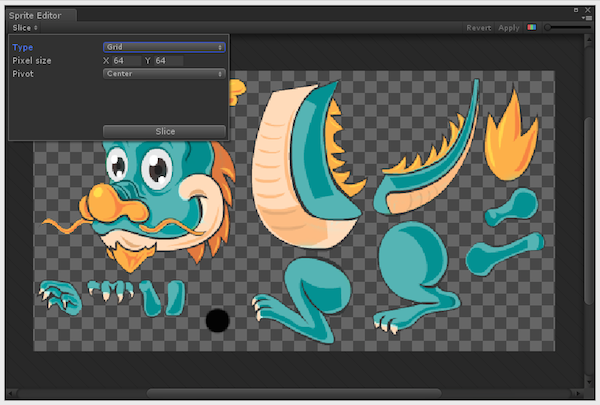
As in the automatic mode, you can select the pivot point of the sprite, but you also have an option to define the pixel size. This value determines the height and width of the tiles in pixels.
For this particular image, select the Automatic mode and press the Slice button. The result should be similar to this:
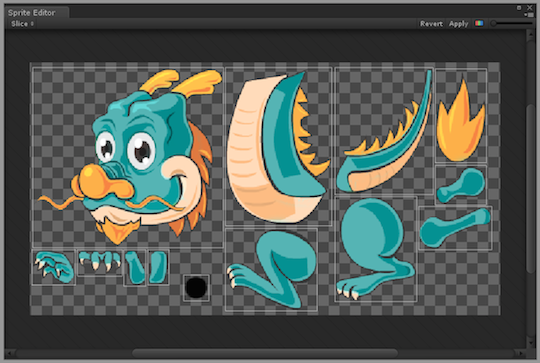
As you can see, the editor sliced the various parts of the sprite into different rectangles. These are the parts you are going to use to build your character. As mentioned above, this will not be a perfect bone animation but each part will be animated separately.
If you double-click in one of the generated rectangles, a pop up panel will open with the properties of that particular part of the sprite:

You can change the name of the generated sprite, its position, its size, and its pivot point. You can also change the position and size values by dragging the blue points on the rectangles' vertices. The blue circle on the center of the selected rectangle indicates the pivot point.
For this sprite, it is safe to let Unity to create the individual sprites automatically. However, in more complex sprites you may want to define the sprites manually. You can do this by clicking and dragging the left mouse button over the image to define a rectangle.
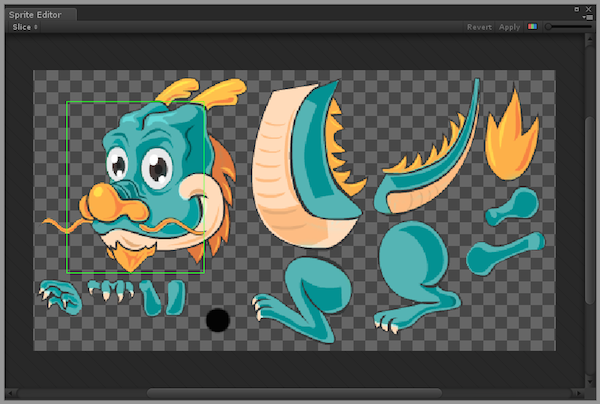
Once you release the mouse button, Unity will create a sprite from that rectangle.
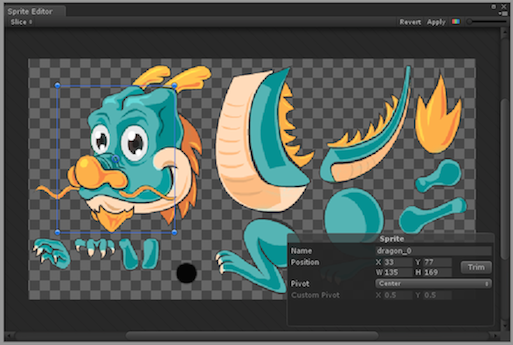
You can press the Trim button to adjust the rectangle to the sprite. Then, just repeat this process to all the sprites you want to generate.
Since the automatic mode works fine for this image, you don't have to define the sprites manually.
Adjusting the Pivot Points
The next thing to do is to adjust the pivot points on the various generated sprites. This step is very important for the animation.
Basically, you need to to drag the pivot point to the area where the sprite will join the parent body part. For example, you want to move the head's pivot near to the neck area. This will make sure that, when you animate the character, all movements, for example the rotations, will orient around that point, allowing the character to move in a realistic way. If you left the pivot points in their original places, you would end up with strange animations, since the character would not be able to move in a realistic way.
Think of the pivot points of the members as the joints of a doll. In order for the doll to move, the joints must be correctly placed, right? The same rules apply for the pivot points.
To move the pivot point, drag the blue circle at the center of each sprite to the correct place (which is the point where it should connect to the parent body part). In the following image you can see the head pivot in its correct place:

The tail part should look like this:
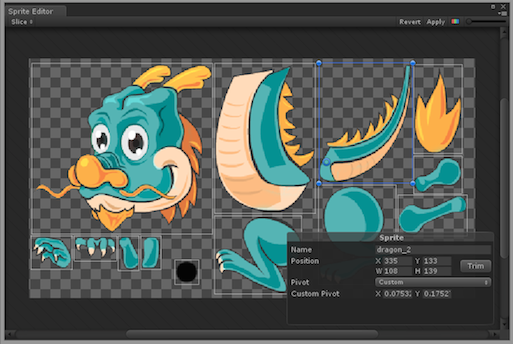
Did you get the idea? Great! Repeat the process for the remaining parts. (You can leave the pivot for the black spot in its center; we'll explain more about this in the next section.) Remember, you want a dragon animation, not a Frankenstein animation.
Once you're finished, click Apply:
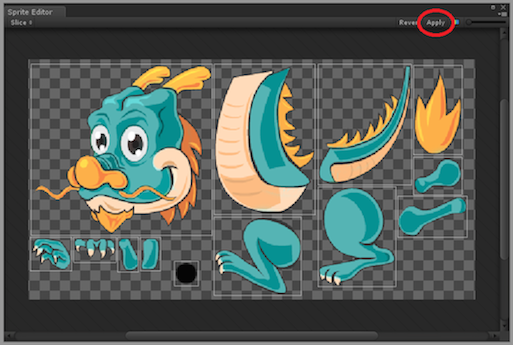
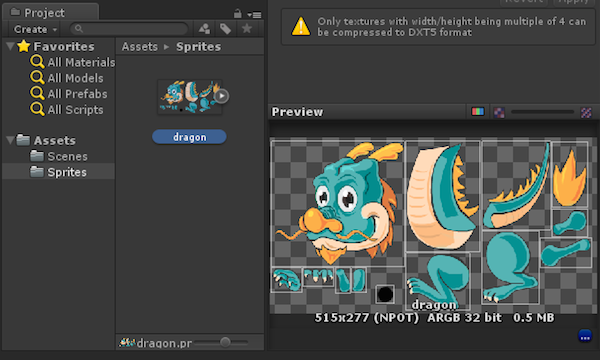
If you take a quick look at the folder where you have the sprites, you will be able to see that the dragon sprite now has an arrow next to it:
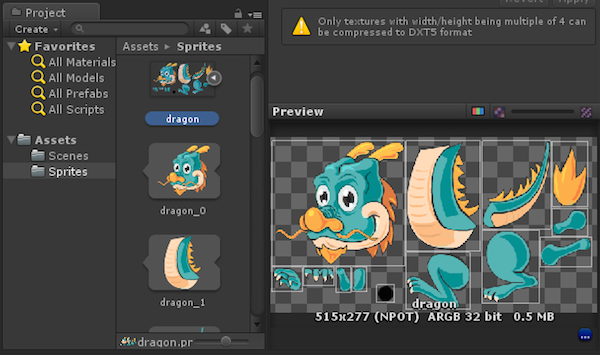
Press the arrow and you will be able to see all the parts that comprise our dragon character separately:
Assembling the Character
Now that you have your character sliced into different sprites, you can start placing the sprites into the scene. Since the dragon is composed of several body parts, you need to build the character.
The first thing to do is drag the black dot of the dragon sprite to the scene. This object will work as a center of mass for your character. Later on, you will focus your attention there; however, for now, just know that this is the base for your character.
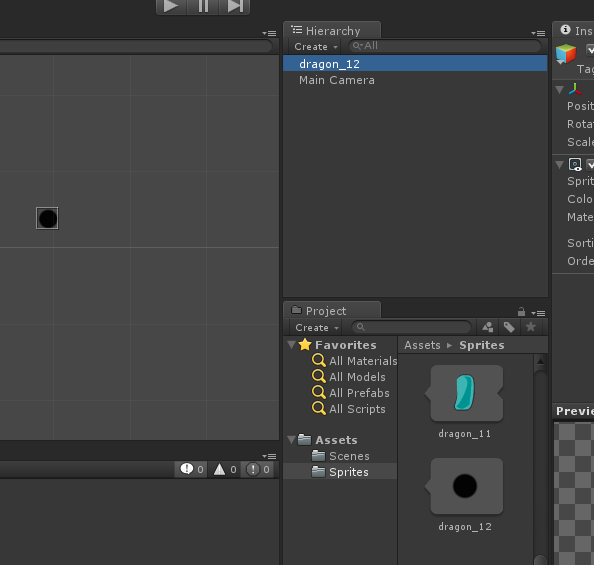
Now, take the body of the dragon and place it over the black dot, like so:
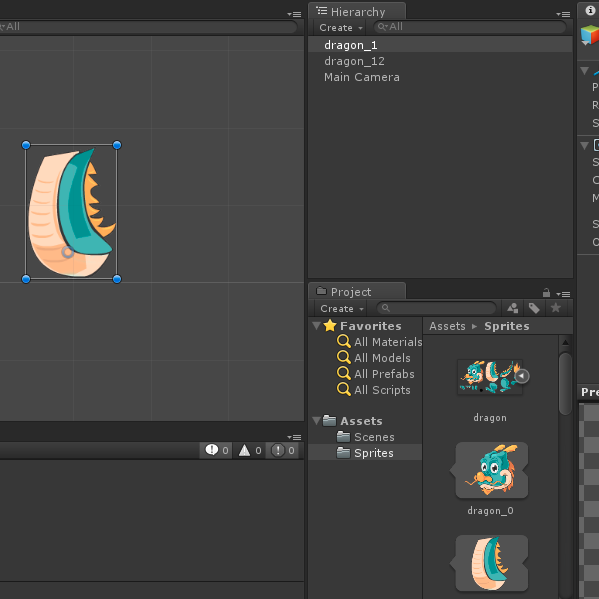
Repeat this process until you have assembled your dragon. By the end it should look something like this:
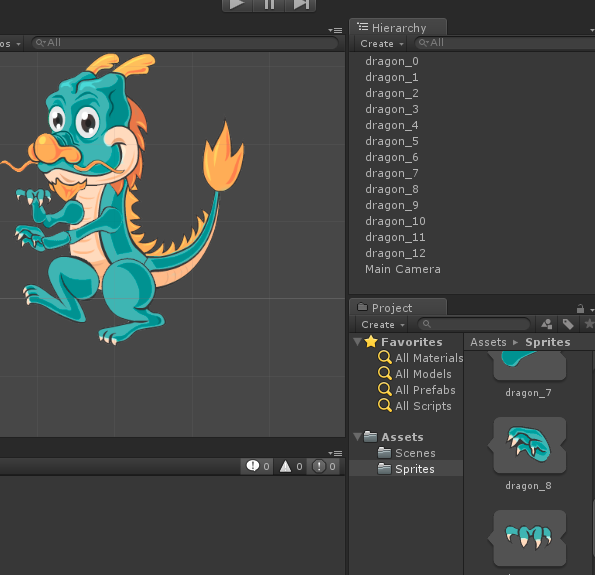
You finally have your dragon ready—however, as you may notice, it looks weird. Some parts that should be under the body are over it, or vice-versa. That happens because we added the dragon parts without any specific order.
Before we solve that issue, let's turn the dragon sprite into a single game object. As you may have noticed, right now the several parts of the dragon work as individual game objects—you need to group them into a single game object before you can start to animate them.
In order to correctly group all the sprites, use the sprite with the black dot as the main game object; all the other body parts should be grouped under the sprite mass. Just drag a sprite on to the black dot sprite within the Hierarchy to group it under the black dot.
On the next image you can see how the sprite hierarchy should look like after you have grouped the game objects.
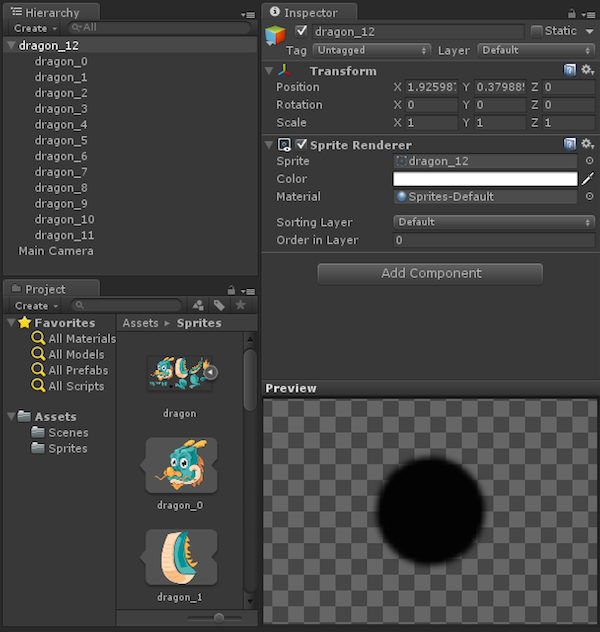
Before moving on, rename your base game object to Dragon. When you move the Dragon game object, you can now move all the parts of the character on the scene.
But what if you want to move just one single sprite? For instance, if you want to move just the hand, you know that the arm is connected to the hand, so, if you move it, all the hand should move too, correct? If you try to do this, you will see that is not the case. When you select the arm and move it, the remaining parts of the body stay still. So, in order to move the complete body part, you need to create a hierarchy inside your sprite.
To make this process more intuitive, rename the body parts (by right-clicking and selecting Rename) with their respective names, like so:
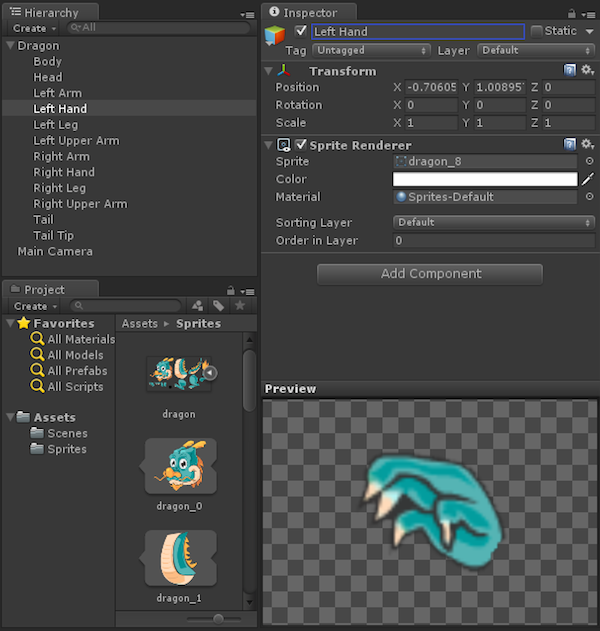
Regarding the hierarchy, think of the character as a tree, with roots, a trunk, and branches. The black dot acts like the root of the tree; when you move it, all the character body moves. After the root comes the trunk; in this case, your trunk will be the body of the character, so this will be the next sprite in the hierarchy. All the other body parts are branches of the tree. However, you can still have branches of branches like, for example, in the tail—the Tail Tip is a branch of the Tail, and so on..
Organize the sprites of your character following this hierarchy:
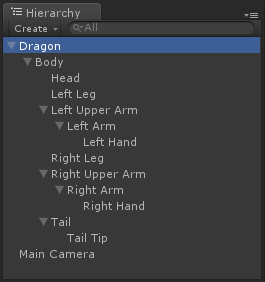
Now, if you move the upper arm, all the parts of the arm will follow. Great, isn't it?
Re-Ordering the Sprites
Before you can start animating the character, there is still one last detail we need to take care of. As we discussed, the sprite parts are not being drawn in the correct order. To solve this, you must change the value of the Order in Layer parameter for each individual sprite.
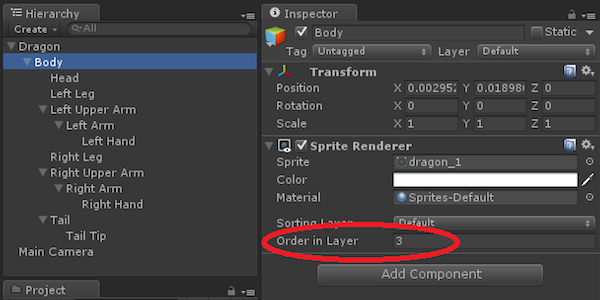
In order to be sure that the tutorial is successful, please use the following values for each Sprite:
- Dragon:
0 - Body:
3 - Head:
4 - Left Leg:
4 - Left Upper Arm:
5 - Left Arm:
4 - Left Hand:
5 - Right Leg:
1 - Right Upper Arm:
2 - Right Arm:
1 - Right Hand:
2 - Tail:
4 - Tail Tip:
5
By the end, your dragon should look something like this:
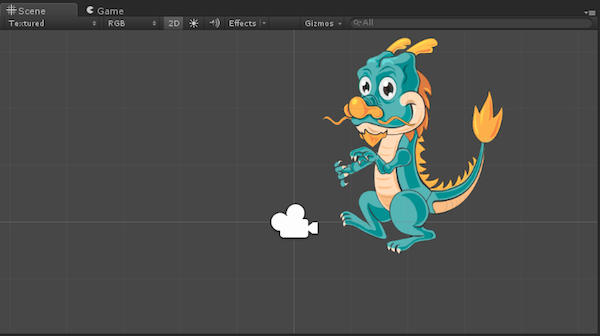
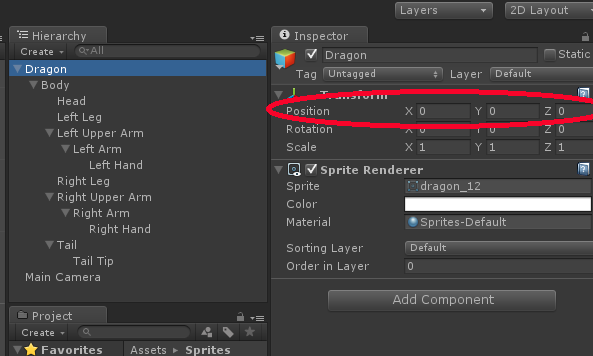
To finish this part, just center your character to the screen. Do this by changing the Transform values of the center position to (0, 0, 0).
Next Time
This concludes the first part of the series. You now have a 2D character with the correct sprite order and hierarchy.
If you have any questions or feedback on what we've covered so far, feel free to leave a comment below.
References
- Dragon sprite sheet: used with permission from Chenguang from DragonBonesTeam
- Japanese Ninja/Shinobi sprite sheet from 36peas.
