Quantcast
Channel: Envato Tuts+ Game Development
Viewing all 731 articles
Browse latest View live

Super Adventure Pals – Development Post Mortem

$
0
0

Super Adventure Pals is an action-adventure platformer game with RPG elements. In the three months since the game’s original release it has been played over 4 million times, had front page features on popular portals, won daily and monthly awards on both Newgrounds and Kongregate, received Kong badges and been licensed to eight different sponsors.


Introduction

I’m Jay Armstrong, an indie developer. I grew up in Hong Kong but am now based in the UK. Super Adventure Pals was a collaborative effort between Julian Wilton and myself.

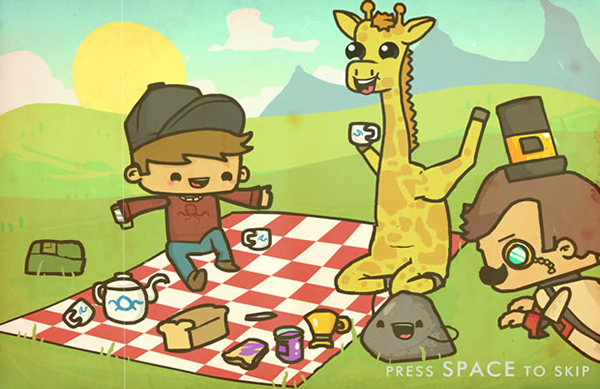
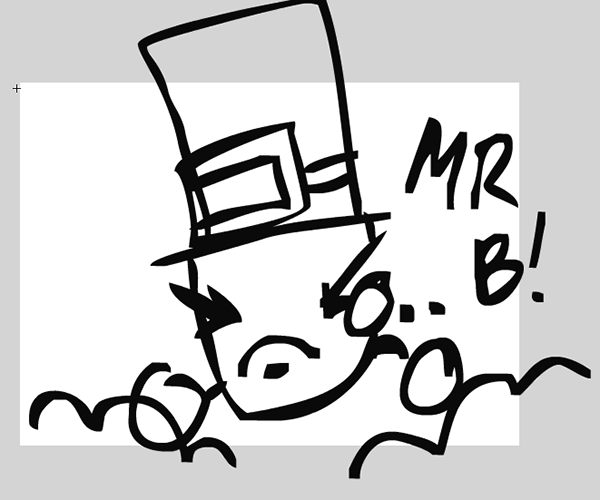
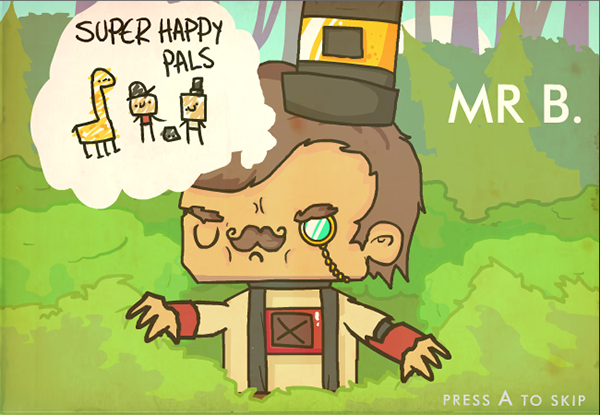
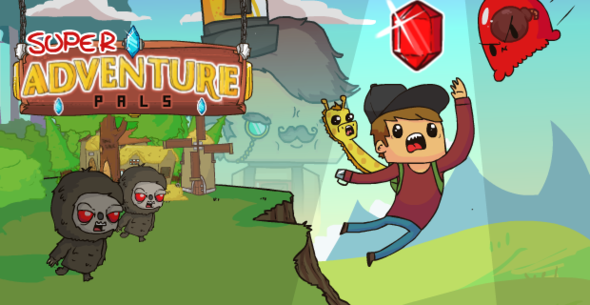
Super Adventure Pals is an action-adventure platformer game with RPG elements. You play as a young adventurer out to save his pet rock from the evil Mr B. But fear not, for you are not alone: by your side is your loyal pet and BFF, the Giraffe.

Together you cross a large free roaming landscape, helping out villagers, lawmen, talking snowmen, book worms, identity confused camels, notorious outlaws and nudist elderly gentlemen. Levels are filled with yetis, jellyfish toaster monsters, flying jelly bombs and giant cactuses (area dependant of course). You also face a number of platforming challenges such as wall jumping, exploding blokes and spikes, and you must make use of your yellow friend’s special abilities including his grappling hook neck and helicopter tongue.


Conception

I had relatively recently gone full time as an indie developer and decided that the best way to produce a lot of interesting content was to reach out and try and work with as many talented people as possible. I put out a post on a developer forum and a few days later had linked up with Julian. He was just completing his game Angry Bees and I knew straight away that we were on the same page.

Super Adventure Pals Post Mortem

When discussing ideas, the two of us often come up with the same thing at exactly the same time – this can be a little weird, but it makes for a very fertile brainstorming process. It’s also so much easier to get to where you want to go if you are both pulling in the same direction.

At first, despite (or perhaps because of) our shared vision, we didn’t really know what we were creating. We knew we wanted to make a platform game, we knew we wanted it to be bright and colourful and we knew we wanted it to be fun. But we had no idea what it would end up as, or how it would be structured. We spent about two months building the engine, and getting combat, jumping and the scale of it all to feel ‘right’.

One of the first things we decided very early on was that you should have a pet or companion in the game. In fact, we didn’t have a use for the giraffe until about the third month and I think that at one stage we had entirely forgotten about him! I had previously made a game called Kit & The Octopod, which, featured a boy and his pet squid, and it was very clear that people really felt a connection to the smiling cephalopod. We both agreed that having a pet companion not only takes away the ‘loneliness’ that a single player game can have, but also creates an emotional connection between the player and characters as well as opening up many opportunities for unique gameplay mechanics.

Super Adventure Pals Post Mortem

In the end, Super Adventure Pals came out of a whole melting pot of inspirations, influences and ideas. Julian and I had a desire to create something heart-warming, yet outlandish. The game features a plot so ridiculous that it becomes a wink to the audience, an in-joke between the player and developer. Games, particularly platformers, often come with a whole set of preconceptions and understandings that mean you are familiar with the format even before starting the first level. You know the aim and what to do and you feel comfortable with it. By giving the game such outlandish characters and plot it pushes our preconceived expectations in a way that I hope would make players laugh and add to the fun of it all.


Creation

To create Super Adventure Pals we prepared a standard size baking tray, laid in three parts platformer, an ounce of action-RPG, a sprinkling of rainbow-laser-shooting-giraffe, a healthy portion of ruby hunting and a whole heap of adventure. Then we just peppered to taste, placed it in a pre-heated oven and left it to simmer for four to six months.

Although that makes it sounds easy, cooking can be dangerous. Be sure never to pour water on an oil fire. For more information on kitchen safety, please review these guidelines.

Development

At this stage, we were really on a rampage – we were adding in everything that we could imagine. It got to a point where if there was an idea in our head we put it in the game, with little or no forethought. We had come to a joint decision that this game would be the pinnacle of what we could achieve at that point in time. This led to a number of important decisions and ambitious design choices.

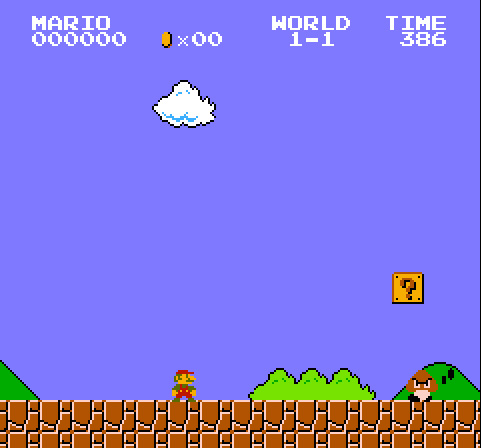
One of these was having the first boss fight at the very beginning of the game, which acted both as a tutorial, and an introduction to the story. Julian had seen a video which talked about the brilliant way that in Mega Man, by fighting and losing to the final boss at the beginning, you get a real sense that you have been on a journey and grown by the time you eventually beat him at the end of the game. It makes you truly believe that your victory has been a direct result of your efforts.


By sheer coincidence, this is the third time this video has been referred to on this site. – Editor

We also believe that the mark of good game design is to be able to explain as little as possible and have the player pick things up intuitively. We spent a long time simplifying controls, abilities and other interactions to make them as streamlined and as easy to pick up as possible. For example, when you first play, you are not told that you can level up, you don’t know there is a world map and you don’t know about unlocking abilities. In fact, these are never explicitly explained – the only text in the game is during conversations with the townspeople – instead everything is introduced in such a way that you can take to it almost immediately.

Level Design

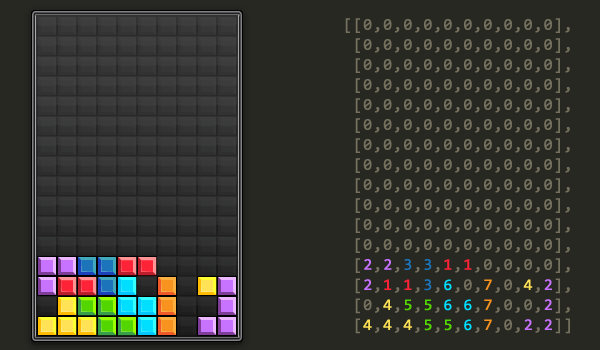
I had built a platformer level editor for a game I was working on (and still haven’t completed!) before I met Julian and we used this as a basis for the gameplay. This turned out to work really well for a number of reasons.

Super Adventure Pals Post Mortem

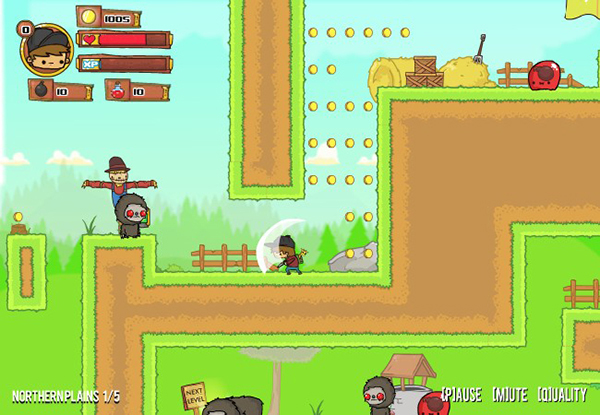
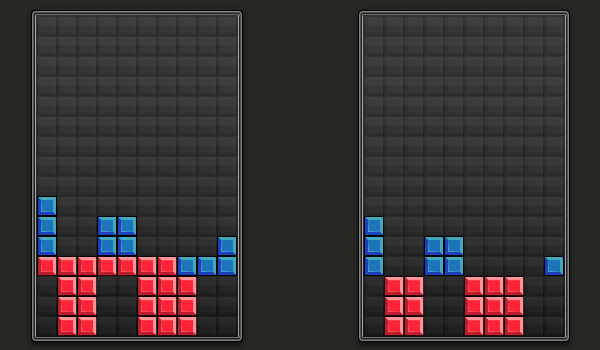
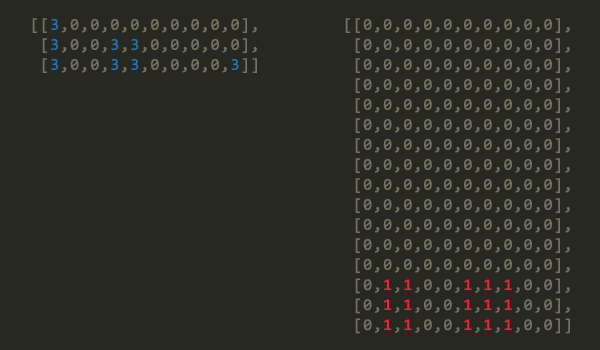
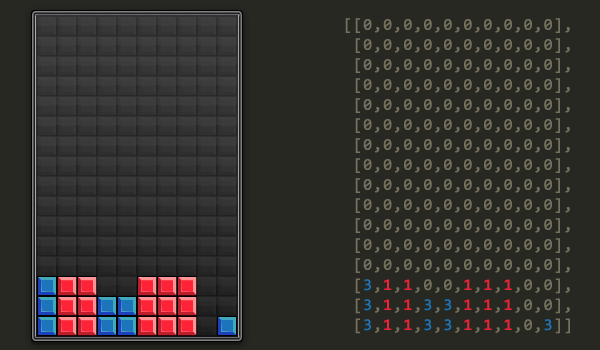
Firstly, it created a fantastic way to create a lot of levels. Making a tile based (rather than art based) level meant that we could export them as two-dimensional arrays which we could save into a text file. This drastically reduced the size of the game file size and allowed us to generate a huge number of levels with relative ease.

The other added bonus was that the platforming elements and mechanics could be created alongside the levels, which ended up giving the game a really well balanced learning curve – completely unintentionally!

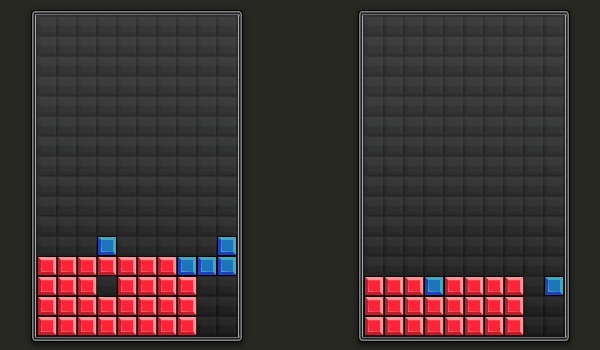
Designing that many levels definitely got tiresome and on a couple of occasions I would just draw shapes into the level editor and then manipulate whatever emerged into a playable level. This, surprisingly enough, often led to some interesting ideas.

Towns and Bosses

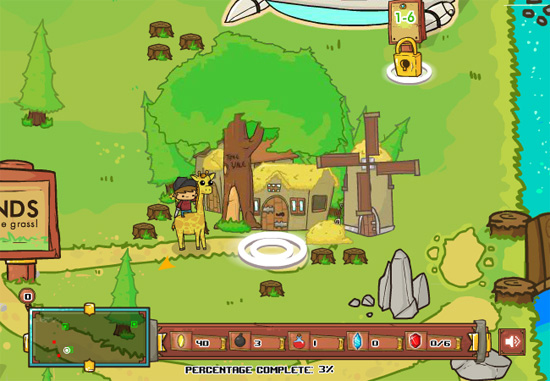
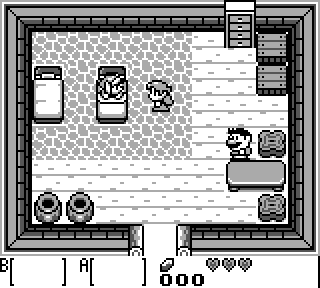
Towns are really, in my opinion the unsung heroes of the Super Adventure Pals experience. They were something that we had talked about, but not had any real idea how they would work in the context of gameplay. I think Julian drew the first town ‘Treevale’, and I just started programming it. Before long I realised that they would be an ideal way of ‘revealing’ levels to the player. This would allow us to keep the free roaming feeling, while maintaining an element of structure.

Super Adventure Pals Post Mortem

The townspeople were not something we discussed either. Julian basically drew a town full of crazy characters and let me handle the script. We didn’t talk about the missions either. It was quite a nice way of trying to surprise each other. He would draw this wonderful town over a period of a couple of days and I would develop the story and personalities to fill that place. I really feel that it would not have worked as well had we planned out each character. There was a freedom to it, and a sense of improvisation that really fed into the atmosphere of the game. The ‘fetch’ quests were also a side note, and designed to give people a reason to go out to the levels aside from getting the rubies.

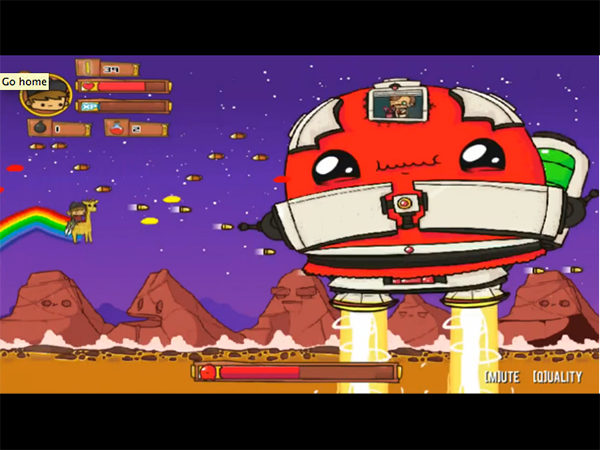
As for the bosses, they were originally going to be based around the theme to each level. We wanted to have a candy land area, and the Wild West was originally going to be more of a ‘pyramid desert’ theme but like so many other things, these ideas slowly drifted into something else. In the end we went with the fish robot, the giant jellyfish, a metallic spider and of course Mr B himself.

Super Adventure Pals Post Mortem

It was important for us that the bosses be as large as possible for maximum ‘epic’. We also wanted each to be a little different, which is why you get a horizontal shooter for the second boss, and the moving in the mineshaft. I think they gave a welcome break from the sword fighting and platforming of the usual levels and were a source of enjoyment for us during development. It fit in really well with our ‘anything goes’ ethos.

Bringing It Together

The thing that really concerned me was how we would tie all these different elements together. There was a long period in which we were just adding different things to the game with no idea how we could create a common thread with which to bring them all together.

That all changed when we began to design the world map. It was clear that to have any form of progression, parts of the areas would need to be inaccessible until you fulfilled some kind of criteria. It was a natural progression from here to create some form of collectible or currency, which you could get at the end of each level set. Rubies seemed to fit nicely in to this requirement.

Super Adventure Pals Post Mortem

Once we had this, we added the towns and made the bosses only available once you had completed all the levels in the area. Having this form of structure was vitally important to us; we needed to have goals that players could be striving for from second to second, minute to minute and hour to hour. The first layer would be whatever they were faced with in the level, the second would be the desire to collect rubies with which to open the gates and the third would be defeating Mr B and retrieving your pet rock.

I believe that this layer cake approach really kept players engaged for much longer than if all they were doing was trying to complete a numbered list of levels.


Regrets

With Super Adventure Pals we had a very open-ended cycle. We basically knew we wanted to create something wacky, something fun and with a few interesting mechanic ideas.  We had a whole bunch of ideas – like what if you could control both the kid and the giraffe simultaneously? – things that just didn’t quite fit in the end. This open-ended approach was both a blessing and a curse. It gave us full creative freedom, but meant that it took much, much, much longer than it should have done.


What Next?

We have decided that we will be making a sequel, and we will certainly be learning from our previous mistakes. This time of course we have a lot of advantages – we know what we are making right from the start, we know the structure, we know the feel and we know all the different elements that make up the game. This time around we are going to make a more polished, tighter and enjoyable game and do it in half the time it took to make the first… well, that’s the plan anyway!


Implementing Tetris: Clearing Lines

$
0
0
This entry is part 2 of 2 in the series Implementing Tetris

In my previous Tetris tutorial, I showed you how to handle collision detection in Tetris. Now let’s take a look at the other important aspect of the game: line clears.

Note: Although the code in this tutorial is written using AS3, you should be able to use the same techniques and concepts in almost any game development environment.


Detecting a Completed Line

Detecting that a line has been filled is actually very simple; just looking at the array of arrays will make it quite obvious what to do:

The filled line is the one that has no zeroes in it – so we can check a given row like this:

row = 4;   //check fourth row
isFilled = true;
for (var col = 0; col < landed[row].length; col++) {
    if (landed[row][col] == 0) {
        isFilled = false;
    }
}
//if isFilled is still true than row 4 is filled

With this, of course, we can loop through each row and figure out which of them are filled:

for (var row = 0; col < landed.length; row++) {
    isFilled = true;
    for (var col = 0; col < landed[row].length; col++) {
        if (landed[row][col] == 0) {
            isFilled = false;
        }
    }
    //if isFilled is still true then current row is filled
}

Okay, we could optimise this by figuring out which lines are likely to be filled, based on which rows the latest block occupies, but why bother? Looping through every single element in the 10×16 grid is not a processor-intensive task.

The question now is: how do we clear the lines?


The Naive Method

At first glance, this seems simple: we just splice the filled row(s) from the array, and add new blank lines at the top.

for (var row = 0; row < landed.length; row++) {
    isFilled = true;
    for (var col = 0; col < landed[row].length; col++) {
        if (landed[row][col] == 0) {
            isFilled = false;
        }
    }
    //remove the filled line sub-array from the array
    landed.splice(row, 1);
    //add a new empty line sub-array to the start of the array
    landed.unshift([0,0,0,0,0,0,0,0,0,0]);
}

If we try this on the above array (and then render everything), we get:

…which is what we’d expect, right? There are still 16 rows, but the filled one has been removed; the new blank line has pushed everything down to compensate.

Here’s a simpler example, with the before and after pics side-by-side:

Another expected result. And – although I won’t show it here – the same code also deals with situations where more than one line is filled at once (even if those lines are not adjacent).

However, there are cases where this doesn’t do what you might expect. Take a look at this:

It’s strange to see that blue block floating there, attached to nothing. It’s not wrong, exactly – most versions of Tetris do this, including the classic Game Boy edition – so you could leave it at that.

However, there are a couple of other popular ways to deal with this…


The Big Clump Method

What if we made that solitary blue block continue falling after the line was cleared?

The big difficulty with this is actually figuring out exactly what we’re trying to do. It’s harder than it sounds!

My first instinct here would be to make every individual block fall down until it had landed. That would lead to situations like this:

…but I suspect that this would be no fun, as all gaps would quickly get filled. (Do feel free to experiment with this, though – there might be something in it!)

I want those orange blocks to stay connected, but that blue block to fall. Maybe we could make blocks fall if they have no other blocks to the left or right of them? Ah, but look at this situation:

Here, I want the blue blocks to all fall into their respective “holes” after the line is cleared – but the middle set of blue blocks all have other blocks next to them: other blue blocks!

(“So only check whether the blocks are next to red blocks,” you might think, but remember that I’ve only coloured them in blue and red to make it easier to refer to different blocks; they could be any colours, and they could have been laid at any time.)

We can identify one thing that the blue blocks in the right-hand image – and the lone floating blue block from before – all in common: they are above the line that got cleared. So, what if instead of trying to make the individual blocks fall, we group all of these blue blocks together and make them fall as one?

We could even re-use the same code that makes an individual tetromino fall. Here’s a reminder, from the previous tutorial:

//set tetromino.potentialTopLeft to be one row below tetromino.topLeft, then:
for (var row = 0; row < tetromino.shape.length; row++) {
    for (var col = 0; col < tetromino.shape[row].length; col++) {
        if (tetromino.shape[row][col] != 0) {
            if (row + tetromino.potentialTopLeft.row >= landed.length) {
                //this block would be below the playing field
            }
            else if (landed[row + tetromino.potentialTopLeft.row] != 0 &&
                landed[col + tetromino.potentialTopLeft.col] != 0) {
                //the space is taken
            }
        }
     }
}

But rather than than using a tetromino object, we’ll create a new object whose shape contains just the blue blocks – let’s call this object clump.

Transferring the blocks is just a matter of looping through the landed array, finding every non-zero element, filling in the same element in the clump.shape array, and setting the element of the landed array to zero.

As usual, this is easier to understand with a picture:

On the left is the clump.shape array, and on the right is the landed array. Here, I’m not bothering to fill in any blank rows in clump.shape to keep things neater, but you could do so without any problems.

So, our clump object looks like this:

clump.shape = [[1,0,0,0,0,0,0,0,0,0],
                   [1,0,0,1,1,0,0,0,0,0],
                   [1,0,0,1,1,0,0,0,0,1]];
clump.topLeft = {row: 10, col: 0};

…and now we just repeatedly run the same code that we use to make a tetromino fall, until the clump lands:

//set clump.potentialTopLeft to be one row below clump.topLeft, then:
for (var row = 0; row < clump.shape.length; row++) {
    for (var col = 0; col < clump.shape[row].length; col++) {
        if (clump.shape[row][col] != 0) {
            if (row + clump.potentialTopLeft.row >= landed.length) {
                //this block would be below the playing field
            }
            else if (landed[row + clump.potentialTopLeft.row] != 0 &&
                landed[col + clump.potentialTopLeft.col] != 0) {
                //the space is taken
            }
        }
     }
}

Once the clump has landed, we copy the individual elements back to the landed array – again, just like when a tetromino lands. However, rather than running this every half second and re-rendering everything between each fall, I suggest running it over and over again until the clump lands, as quickly as possible, and then rendering everything, so that it looks like it drops instantly.

Follow this through if you like; here’s the result:

It’s possible that another line will be formed here, without the player having to drop another block – opening up possible player strategies not available with the Naive method – so you must immediately check for filled lines again. In this case, there are no filled lines, so the game can continue, and you can spawn another block.

All seems good for the Clump method, but unfortunately there is a problem, as shown in this before-and-after example:


After the filled line disappears, both blue blocks fall two squares and then stop.

Here, the blue block in the middle has landed – and since it’s clumped together with the blue block on the right, that one is considered to have “landed” as well. The next block would spawn, and again we have a blue block floating in mid-air.

The Big Clump method isn’t actually an effective method, due to this unintuitive problem, but it is halfway to a good method…


The Sticky Method

Look again at these two examples:

In both cases, there’s an obvious way to separate the blue blocks into separate clumps – two clumps (each of one block) in the first, and three clumps (of three, four, and one blocks) in the second.

If we clump the blocks like that, and then make each clump fall independently, then we should get the desired result! Additionally, “clump” will no longer appear to be a word.

Here’s what I mean:

We start with this situation. Obviously, the second line up is going to get cleared.

We split the blocks above the cleared line into three distinct clumps. (I’ve used different colours to identify which blocks clump together.)

The clumps fall independently – notice how the green clump falls two rows, while the blue and purple clumps land after falling just one. The bottom line is now filled, so this gets cleared as well, and the three clumps fall.

How do we figure out the shape of the clumps? Well, as you can see from the image, it’s actually rather simple: we group all the blocks up into contiguous shapes – that is, for each block, we group it up with all of its neighbours, and its neighbours’ neighbours, and so on, until every block is in a group.

Rather than explain exactly how to do this grouping, I’ll point you at the Wikipedia page for flood fill, which explains several ways to achieve this, along with the pros and cons of each.

Once you’ve got your clumps’ shapes, you can stick them in an array:

clumps = [];
clumps[0].shape = [[3],
                   [3]];
clumps[0].topLeft = {row: 11, col: 0};
clumps[1].shape = [[0,1,0],
                   [0,1,1],
                   [0,1,1],
                   [1,1,1]];
clumps[1].topLeft = {row: 9, col: 3};
clumps[2].shape = [[1,1,1],
                   [1,1,1],
                   [0,1,1]];
clumps[2].topLeft = {row: 10, col: 7};

Then, just iterate each clump in the array falling, remembering to check for new filled lines once they’ve landed.

This is called the Sticky method, and it’s used in a few games, such as Tetris Blast. I like it; it’s a decent twist on Tetris, allowing for new strategies. There’s one other popular method that’s quite a bit different…


Challenge: The Cascade Method

If you’ve followed the concepts so far, I think it’s worth trying to implement the Cascade method yourself as an exercise.

Basically, each block remembers which tetromino it was part of, even when a segment of that tetromino gets destroyed by a line clear. The tetrominoes – or weird, chopped up parts of tetrominoes – fall as clumps.

As always, pictures help:

A T-tetromino falls, completing a line. Note how each block remains connected to its original tetromino? (We’ll assume here that no lines have been cleared so far.)

The completed line is cleared, which splits the green Z-tetromino into two separate pieces, and chops pieces off other tetrominoes.

The T-tetromino (or what’s left of it) continues to fall, because it is not held up by any other blocks.

The T-tetromino lands, completing another line. This line is cleared, chopping pieces off yet more tetrominoes.

As you can see, the Cascade method plays quite a bit differently to the other two main methods. If you’re still unclear about how it works, see if you can find a copy of Quadra or Tetris 2 (or look up videos on YouTube), as they both use this method.

Good luck!


Conclusion

Thanks for reading this tutorial! I hope you learned something (and not just about Tetris), and that you’ll have a go at the challenge. If you make any games using these techniques, I’d love to see them! Please post them in the comments below, or tweet me at @MichaelJW.

Don’t forget, you can follow us on Twitter, Facebook, or Google+ to keep up to date with the latest posts.

Avoiding the Blob Antipattern: A Pragmatic Approach to Entity Composition

$
0
0

Organising your game code into component-based entities, rather than relying only on class inheritance, is a popular approach in game development. In this tutorial, we’ll look at why you might do this, and set up a simple game engine using this technique.


Introduction

In this tutorial I’m going to explore component-based game entities, look at why you might want to use them, and suggest a pragmatic approach to dip your toe in the water.

As it’s a story about code organisation and architecture, I’ll start by dropping in the usual “get out of jail” disclaimer: this is just one way of doing things, it’s not “the one way” or maybe even the best way, but it might work for you.  Personally, I like to find out about as many approaches as possible and then work out what suits me.


Final Result Preview


Throughout this two-part tutorial, we’ll create this Asteroids game. (The full source code is available on GitHub.) In this first part, we’ll focus on the core concepts and general game engine.


What Problem Are We Solving?

In a game like Asteroids, we might have a few basic types of on-screen “thing”: bullets, asteroids, player ship and enemy ship. We might want to represent these basic types as four separate classes, each containing all the code we need to draw, animate, move and control that object.

While this will work, it might be better to follow the Don’t Repeat Yourself (DRY) principle and try to reuse some of the code between each class — after all, the code for moving and drawing a bullet is going to be very similar to, if not exactly the same as, the code to move and draw an asteroid or a ship.

So we can refactor our rendering and movement functions into a base class that everything extends from. But Ship and EnemyShip also need to be able to shoot. At this point we could add the shoot function to the base class, creating a “Giant Blob” class that can do basically everything, and just make sure asteroids and bullets never call their shoot function.  This base class would soon get very large, swelling in size each time entities need to be able to do new things. This isn’t necessarily wrong, but I find smaller, more specialised classes to be easier to maintain.

Alternatively, we can go down the root of deep inheritance and have something like EnemyShip extends Ship extends ShootingEntity extends Entity. Again this approach isn’t wrong, and will also work quite well, but as you add more types of Entities, you will find yourself constantly having to readjust the inheritance hierarchy to handle all the possible scenarios, and you can box yourself into a corner where a new type of Entity needs to have the functionality of two different base classes, requiring multiple inheritance (which most programming languages don’t offer).

I have used the deep hierarchy approach many times myself, but I actually prefer the Giant Blob approach, as at least then all entities have a common interface and new entities can be added more easily (so what if all your trees have A* pathfinding?!)

There is, however, a third way…


Composition Over Inheritance

If we think of the Asteroids problem in terms of things that objects might need to do, we might get a list like this:

  • move()
  • shoot()
  • takeDamage()
  • die()
  • render()

Instead of working out a complicated inheritance hierarchy for which objects can do which things, let’s model the problem in terms of components that can perform these actions.

For instance, we could create a Health class, with the methods takeDamage(), heal() and die(). Then any object that needs to be able to take damage and die can “compose” an instance of the Health class — where “compose” basically means “keep a reference to its own instance of this class”.

We could create another class called View to look after the rendering functionality, one called Body to handle movement and one called Weapon to handle shooting.

Most Entity systems are based on the principle described above, but differ in how you access functionality contained in a component.

Mirroring the API

For example, one approach is to mirror the API of each component in the Entity, so an entity that can take damage would have a takeDamage() function that itself just calls the takeDamage() function of its Health component.

class Entity {
    private var _health:Health;
    //...other code...//
    public function takeDamage(dmg:int) {
        _health.takeDamage(dmg);
    }
}

You then have to create an interface called something like IHealth for your entity to implement, so that other objects can access the takeDamage() function. This is how a Java OOP guide might advise you to do it.

getComponent()

Another approach is to simply store each component in a key-value lookup, so that every Entity has a function called something like getComponent("componentName") which returns a reference to the particular component. You then need to cast the reference you get back to the type of component you want — something like:

var health:Health = Health(getComponent("Health"));

This is basically how Unity’s entity/behaviour system works. It’s very flexible, because you can keep adding new types of component without changing your base class, or creating new subclasses or interfaces. It might also be useful when you want to use configuration files to create entities without recompiling your code, but I’ll leave that to someone else to figure out.

Public Components

The approach I favour is to let all entities have a public property for each major type of component, and leave fields null if the entity doesn’t have that functionality. When you want to call a particular method, you just “reach in” to the entity to get the component with that functionality — for example, call enemy.health.takeDamage(5) to attack an enemy.

If you try to call health.takeDamage() on an entity that doesn’t have a Health component, it will compile, but you’ll get a runtime error letting you know you’ve done something silly. In practice this rarely happens, as it’s pretty obvious which types of entity will have which components (for example, of course a tree doesn’t have a weapon!).

Some strict OOP advocates might argue that my approach breaks some OOP principles, but I find it works really well, and there’s a really good precedent from the history of Adobe Flash.

In ActionScript 2, the MovieClip class had methods for drawing vector graphics: for example, you could call myMovieClip.lineTo() to draw a line. In ActionScript 3, these drawing methods were moved to the Graphics class, and each MovieClip gets a Graphics component, which you access by calling, for example, myMovieClip.graphics.lineTo() in the same way I described for enemy.health.takeDamage(). If it’s good enough for the ActionScript language designers, it’s good enough for me.


My System (Simplified)

Below I’m going to detail a very simplified version of the system I use across all my games. In terms of how simplified, it’s something like 300 lines of code for this, compared to 6,000 for my full engine. But we can actually do quite a lot with just these 300 lines!

I’ve left in just enough functionality to create a working game, while keeping the code as short as possible so it’s easier to follow. The code is going to be in ActionScript 3, but a similar structure is possible across most languages. There are a few public variables that could be properties (i.e. put behind get and set accessor functions), but as this is quite verbose in ActionScript, I’ve left them as public variables for ease of reading.

The IEntity Interface

Let’s start by defining an interface that all entities will implement:

package engine
{
	import org.osflash.signals.Signal;
	/**
	 * ...
	 * @author Iain Lobb - iainlobb@gmail.com
	 */
	public interface IEntity
	{
		// ACTIONS
		function destroy():void;
		function update():void;
		function render():void;
		// COMPONENTS
		function get body():Body;
		function set body(value:Body):void;
		function get physics():Physics;
		function set physics(value:Physics):void
		function get health():Health
		function set health(value:Health):void
		function get weapon():Weapon;
		function set weapon(value:Weapon):void;
		function get view():View;
		function set view(value:View):void;
		// SIGNALS
		function get entityCreated():Signal;
		function set entityCreated(value:Signal):void;
		function get destroyed():Signal;
		function set destroyed(value:Signal):void;
		// DEPENDANCIES
		function get targets():Vector.;
		function set targets(value:Vector.):void;
		function get group():Vector.;
		function set group(value:Vector.):void;
	}
}

All entities can perform three actions: you can update them, render them and destroy them.

They each have “slots” for five components:

  • A body, handling position and size.
  • physics, handling movement.
  • health, handling getting hurt.
  • A weapon, handling attacking.
  • And finally a view, allowing you to render the entity.

All of these components are optional and can be left null, but in practice most entities will have at least a couple of components.

A piece of static scenery that the player can’t interact with (maybe a tree, for example), would need just a body and a view. It wouldn’t need physics as it doesn’t move, it wouldn’t need health as you can’t attack it, and it certainly wouldn’t need a weapon. The player’s ship in Asteroids, on the other hand, would need all five components, as it can move, shoot and get hurt.

By configuring these five basic components, you can create most simple objects you might need. Sometimes they won’t be enough, however, and at that point we can either extend the basic components, or create new additional ones — both of which we’ll discuss later.

Next we have two Signals: entityCreated and destroyed.

Signals are an open source alternative to ActionScript’s native events, created by Robert Penner. They’re really nice to use as they allow you to pass data between the dispatcher and the listener without having to create lots of custom Event classes. For more information on how to use them, check out the documentation.

The entityCreated Signal allows an entity to tell the game that there is another new entity that needs to be added — a classic example being when a gun creates a bullet. The destroyed Signal lets the game (and any other listening objects) know that this entity has been destroyed.

Finally, the entity has two other optional dependencies: targets, which is a list of entities that it might want to attack, and group, which is a list of entities that it belongs to. For example, a player ship might have a list of targets, which would be all the enemies in the game, and might belong to a group which also contains any other players and friendly units.

The Entity Class

Now let’s look at the Entity class that implements this interface.

package engine
{
	import org.osflash.signals.Signal;
	/**
	 * ...
	 * @author Iain Lobb - iainlobb@gmail.com
	 */
	public class Entity implements IEntity
	{
		private var _body:Body;
		private var _physics:Physics;
		private var _health:Health;
		private var _weapon:Weapon;
		private var _view:View;
		private var _entityCreated:Signal;
		private var _destroyed:Signal;
		private var _targets:Vector.<Entity>;
		private var _group:Vector.<Entity>;
		/*
		 * Anything that exists within your game is an Entity!
		 */
		public function Entity()
		{
			entityCreated = new Signal(Entity);
			destroyed = new Signal(Entity);
		}
		public function destroy():void
		{
			destroyed.dispatch(this);
			if (group) group.splice(group.indexOf(this), 1);
		}
		public function update():void
		{
			if (physics) physics.update();
		}
		public function render():void
		{
			if (view) view.render();
		}
		public function get body():Body
		{
			return _body;
		}
		public function set body(value:Body):void
		{
			_body = value;
		}
		public function get physics():Physics
		{
			return _physics;
		}
		public function set physics(value:Physics):void
		{
			_physics = value;
		}
		public function get health():Health
		{
			return _health;
		}
		public function set health(value:Health):void
		{
			_health = value;
		}
		public function get weapon():Weapon
		{
			return _weapon;
		}
		public function set weapon(value:Weapon):void
		{
			_weapon = value;
		}
		public function get view():View
		{
			return _view;
		}
		public function set view(value:View):void
		{
			_view = value;
		}
		public function get entityCreated():Signal
		{
			return _entityCreated;
		}
		public function set entityCreated(value:Signal):void
		{
			_entityCreated = value;
		}
		public function get destroyed():Signal
		{
			return _destroyed;
		}
		public function set destroyed(value:Signal):void
		{
			_destroyed = value;
		}
		public function get targets():Vector.<Entity>
		{
			return _targets;
		}
		public function set targets(value:Vector.<Entity>):void
		{
			_targets = value;
		}
		public function get group():Vector.<Entity>
		{
			return _group;
		}
		public function set group(value:Vector.<Entity>):void
		{
			_group = value;
		}
	}
}

It looks long, but most of it is just those verbose getter and setter functions (boo!). The important part to look at is the first four functions: the constructor, where we create our Signals; destroy(), where we dispatch the destroyed Signal and remove the entity from its group list; update(), where we update any components that need to act every game loop — although in this simple example this is only the physics component — and finally render(), where we tell the view to do its thing.

You’ll notice that we don’t automatically instantiate the components here in the Entity class — this is because, as I explained earlier, each component is optional.

The Individual Components

Now let’s look at the components one by one. First, the body component:

package engine
{
	/**
	 * ...
	 * @author Iain Lobb - iainlobb@gmail.com
	 */
	public class Body
	{
		public var entity:Entity;
		public var x:Number = 0;
		public var y:Number = 0;
		public var angle:Number = 0;
		public var radius:Number = 10;
		/*
		* If you give an entity a body it can take physical form in the world,
		* although to see it you will need a view.
		*/
		public function Body(entity:Entity)
		{
			this.entity = entity;
		}
		public function testCollision(otherEntity:Entity):Boolean
		{
			var dx:Number;
			var dy:Number;
			dx = x - otherEntity.body.x;
			dy = y - otherEntity.body.y;
			return Math.sqrt((dx * dx) + (dy * dy)) <= radius + otherEntity.body.radius;
		}
	}
}

All our components need a reference to their owner entity, which we pass to the constructor. The body then has four simple fields: an x and y position, an angle of rotation, and a radius to store its size. (In this simple example, all entities are circular!)

This component also has a single method: testCollision(), which uses Pythagoras to calculate the distance between two entities, and compares this to their combined radiuses. (More info here.)

Next let’s look at the Physics component:

package engine
{
	/**
	 * ...
	 * @author Iain Lobb - iainlobb@gmail.com
	 */
	public class Physics
	{
		public var entity:Entity;
		public var drag:Number = 1;
		public var velocityX:Number = 0;
		public var velocityY:Number = 0;
		/*
		 * Provides a basic physics step without collision detection.
		 * Extend to add collision handling.
		 */
		public function Physics(entity:Entity)
		{
			this.entity = entity;
		}
		public function update():void
		{
			entity.body.x += velocityX;
			entity.body.y += velocityY;
			velocityX *= drag;
			velocityY *= drag;
		}
		public function thrust(power:Number):void
		{
			velocityX += Math.sin(-entity.body.angle) * power;
			velocityY += Math.cos(-entity.body.angle) * power;
		}
	}
}

Looking at the update() function, you can see that the velocityX and velocityY values are added onto the entity’s position, which moves it, and the velocity is multiplied by drag, which has the effect of gradually slowing the object down. The thrust() function allows a quick way to accelerate the entity in the direction it is facing.

Next let’s look at the Health component:

package engine
{
	import org.osflash.signals.Signal;
	/**
	 * ...
	 * @author Iain Lobb - iainlobb@gmail.com
	 */
	public class Health
	{
		public var entity:Entity;
		public var hits:int;
		public var died:Signal;
		public var hurt:Signal;
		public function Health(entity:Entity)
		{
			this.entity = entity;
			died = new Signal(Entity);
			hurt = new Signal(Entity);
		}
		public function hit(damage:int):void
		{
			hits -= damage;
			hurt.dispatch(entity);
			if (hits < 0)
			{
				died.dispatch(entity);
			}
		}
	}
}

The Health component has a function called hit(), allowing the entity to be hurt. When this happens, the hits value is reduced, and any listening objects are notified by dispatching the hurt Signal. If hits are less than zero, the entity is dead and we dispatch the died Signal.

Let’s see what’s inside the Weapon component:

package engine
{
	import org.osflash.signals.Signal;
	/**
	 * ...
	 * @author Iain Lobb - iainlobb@gmail.com
	 */
	public class Weapon
	{
		public var entity:Entity;
		public var ammo:int;
		/*
		 * Weapon is the base class for all weapons.
		 */
		public function Weapon(entity:Entity)
		{
			this.entity = entity;
		}
		public function fire():void
		{
			ammo--;
		}
	}
}

Not much here! That’s because this is really just a base class for the actual weapons — as you’ll see in the Gun example later. There’s a fire() method that subclasses should override, but here it just reduces the value of ammo.

The final component to examine is View:

package engine
{
	import flash.display.Sprite;
	/**
	 * ...
	 * @author Iain Lobb - iainlobb@gmail.com
	 */
	public class View
	{
		public var entity:Entity;
		public var scale:Number = 1;
		public var alpha:Number = 1;
		public var sprite:Sprite;
		/*
		 * View is display component which renders an Entity using the standard display list.
		 */
		public function View(entity:Entity)
		{
			this.entity = entity;
		}
		public function render():void
		{
			sprite.x = entity.body.x;
			sprite.y = entity.body.y;
			sprite.rotation = entity.body.angle * (180 / Math.PI);
			sprite.alpha = alpha;
			sprite.scaleX = scale;
			sprite.scaleY = scale;
		}
	}
}

This component is very specific to Flash. The main event here is the render() function, which updates a Flash sprite with the body’s position and rotation values, and the alpha and scale values it stores itself. If you wanted to use a different rendering system such as copyPixels blitting or Stage3D (or indeed a system relevant to a different choice of platform), you would adapt this class.

The Game Class

Now we know what an Entity and all its components look like. Before we start using this engine to make an example game, let’s look at the final piece of the engine — the Game class that controls the whole system:

package engine
{
	import flash.display.Sprite;
	import flash.display.Stage;
	import flash.events.Event;
	/**
	 * ...
	 * @author Iain Lobb - iainlobb@gmail.com
	 */
	 public class Game extends Sprite
	{
		public var entities:Vector.<Entity> = new Vector.<Entity>();
		public var isPaused:Boolean;
		static public var stage:Stage;
		/*
		 * Game is the base class for games.
		 */
		public function Game()
		{
			addEventListener(Event.ENTER_FRAME, onEnterFrame);
			addEventListener(Event.ADDED_TO_STAGE, onAddedToStage);
		}
		protected function onEnterFrame(event:Event):void
		{
			if (isPaused) return;
			update();
			render();
		}
		protected function update():void
		{
			for each (var entity:Entity in entities) entity.update();
		}
		protected function render():void
		{
			for each (var entity:Entity in entities) entity.render();
		}
		protected function onAddedToStage(event:Event):void
		{
			Game.stage = stage;
			startGame();
		}
		protected function startGame():void
		{
		}
		protected function stopGame():void
		{
			for each (var entity:Entity in entities)
			{
				if (entity.view) removeChild(entity.view.sprite);
			}
			entities.length = 0;
		}
		public function addEntity(entity:Entity):Entity
		{
			entities.push(entity);
			entity.destroyed.add(onEntityDestroyed);
			entity.entityCreated.add(addEntity);
			if (entity.view) addChild(entity.view.sprite);
			return entity;
		}
		protected function onEntityDestroyed(entity:Entity):void
		{
			entities.splice(entities.indexOf(entity), 1);
			if (entity.view) removeChild(entity.view.sprite);
			entity.destroyed.remove(onEntityDestroyed);
		}
	}
}

There’s a lot of implementation detail here, but let’s just pick out the highlights.

Every frame, the Game class loops through all the entities, and calls their update and render methods. In the addEntity function, we add the new entity to the entities list, listen to its Signals, and if it has a view, add its sprite to the stage.

When onEntityDestroyed is triggered, we remove the entity from the list and remove its sprite from the stage. In the stopGame function, which you only call if you want to end the game, we remove all entities’ sprites from the stage and clear the entities list by setting its length to zero.


Next Time…

Wow, we made it! That’s the whole game engine! From this starting point, we could make many simple 2D arcade games without much additional code. In the next tutorial, we’ll use this engine to make an Asteroids-style space shoot-’em-up. Keep up to date by following Gamedevtuts+ on Twitter, Facebook, or Google+.

Create a Simple Asteroids Game Using Component-Based Entities

$
0
0

In the previous tutorial, we created a bare-bones component-based Entity system. Now we’ll use this system to create a simple Asteroids game.


Final Result Preview


Here’s the simple Asteroids game we’ll be creating in this tutorial. It’s written using Flash and AS3, but the general concepts apply to most languages.

The full source code is available on GitHub.


Class Overview

There are six classes:

  • AsteroidsGame, which extends the base game class and adds the logic specific to our space shoot-’em-up.
  • Ship, which is the thing you control.
  • Asteroid, which is the thing that you shoot at.
  • Bullet, which is the thing that you fire.
  • Gun, which creates those bullets.
  • EnemyShip, which is a wandering alien who’s just there to add a bit of variety to the game.
  • Let’s go through these entity types one by one.


    The Ship Class

    We’ll start with the player’s ship:

package asteroids
{
	import com.iainlobb.gamepad.Gamepad;
	import com.iainlobb.gamepad.KeyCode;
	import engine.Body;
	import engine.Entity;
	import engine.Game;
	import engine.Health;
	import engine.Physics;
	import engine.View;
	import flash.display.GraphicsPathWinding;
	import flash.display.Sprite;
	/**
	 * ...
	 * @author Iain Lobb - iainlobb@gmail.com
	 */
	public class Ship extends Entity
	{
		protected var gamepad:Gamepad;
		public function Ship()
		{
			body = new Body(this);
			body.x = 400;
			body.y = 300;
			physics = new Physics(this);
			physics.drag = 0.9;
			view = new View(this);
			view.sprite = new Sprite();
			view.sprite.graphics.lineStyle(1.5, 0xFFFFFF);
			view.sprite.graphics.drawPath(Vector.<int>([1, 2, 2, 2, 2, 2, 2, 2, 2, 2, 2]),
			                              Vector.<Number>([ -7.3, 10.3, -5.5, 10.3, -7, 0.6, -0.5, -2.8, 6.2, 0.3, 4.5, 10.3, 6.3, 10.3, 11.1, -1.4, -0.2, -9.6, -11.9, -1.3, -7.3, 10.3]),
			                              GraphicsPathWinding.NON_ZERO);
			health = new Health(this);
			health.hits = 5;
			health.died.add(onDied);
			weapon = new Gun(this);
			gamepad = new Gamepad(Game.stage, false);
			gamepad.fire1.mapKey(KeyCode.SPACEBAR);
		}
		override public function update():void
		{
			super.update();
			body.angle += gamepad.x * 0.1;
			physics.thrust(-gamepad.y);
			if (gamepad.fire1.isPressed) weapon.fire();
		}
		protected function onDied(entity:Entity):void
		{
			destroy();
		}
	}
}

There’s quite a bit of implementation detail here, but the main thing to notice is that in the constructor we instantiate and configure Body, Physics, Health, View and Weapon components. (The Weapon component is in fact an instance of Gun rather than the weapon base class.)

I’m using the Flash graphics drawing APIs to create my ship (lines 29-32), but we could just as easily use a bitmap image. I’m also creating an instance of my Gamepad class — this is an open source library I wrote a couple of years ago to make keyboard input easier in Flash.

I have also overridden the update function from the base class to add some custom behaviour: after triggering all the default behaviour with super.update() we rotate and thrust the ship based on the keyboard input, and fire the weapon if the fire key is pressed.

By listening to the died Signal of the health component, we trigger the onDied function if the player runs out of hit points. When this happens we just tell the ship to destroy itself.


The Gun Class

Next let’s fire up that Gun class:

package asteroids
{
	import engine.Entity;
	import engine.Weapon;
	/**
	 * ...
	 * @author Iain Lobb - iainlobb@gmail.com
	 */
	public class Gun extends Weapon
	{
		public function Gun(entity:Entity)
		{
			super(entity);
		}
		override public function fire():void
		{
			var bullet:Bullet = new Bullet();
			bullet.targets = entity.targets;
			bullet.body.x = entity.body.x;
			bullet.body.y = entity.body.y;
			bullet.body.angle = entity.body.angle;
			bullet.physics.thrust(10);
			entity.entityCreated.dispatch(bullet);
			super.fire();
		}
	}
}

This is a nice short one! We just override the fire() function to create a new Bullet whenever the player fires. After matching the position and rotation of the bullet to the ship, and thrusting it off in the right direction, we dispatch entityCreated so that it can be added to the game.

A great thing about this Gun class is that it’s used by both the player and enemy ships.


The Bullet Class

A Gun creates an instance of this Bullet class:

package asteroids
{
	import engine.Body;
	import engine.Entity;
	import engine.Physics;
	import engine.View;
	import flash.display.Sprite;
	/**
	 * ...
	 * @author Iain Lobb - iainlobb@gmail.com
	 */
	public class Bullet extends Entity
	{
		public var age:int;
		public function Bullet()
		{
			body = new Body(this);
			body.radius = 5;
			physics = new Physics(this);
			view = new View(this);
			view.sprite = new Sprite();
			view.sprite.graphics.beginFill(0xFFFFFF);
			view.sprite.graphics.drawCircle(0, 0, body.radius);
		}
		override public function update():void
		{
			super.update();
			for each (var target:Entity in targets)
			{
				if (body.testCollision(target))
				{
					target.health.hit(1);
					destroy();
					return;
				}
			}
			age++;
			if (age > 20) view.alpha -= 0.2;
			if (age > 25) destroy();
		}
	}
}

The constructor instantiates and configures the body, physics and view. In the update function, you can now see the list called targets come in handy, as we loop through all the things we want to hit and see if any of them are intersecting the bullet.

This collision system wouldn’t scale to thousands of bullets, but is fine for most casual games.

If the bullet gets more than 20 frames old we start to fade it out, and if it’s older than 25 frames we destroy it. As with the Gun, the Bullet is used by both the player and enemy — the instances just have a different targets list.

Speaking of which…


The EnemyShip Class

Now let’s look at that enemy ship:

package asteroids
{
	import engine.Body;
	import engine.Entity;
	import engine.Health;
	import engine.Physics;
	import engine.View;
	import flash.display.GraphicsPathWinding;
	import flash.display.Sprite;
	/**
	 * ...
	 * @author Iain Lobb - iainlobb@gmail.com
	 */
	public class EnemyShip extends Entity
	{
		protected var turnDirection:Number = 1;
		public function EnemyShip()
		{
			body = new Body(this);
			body.x = 750;
			body.y = 550;
			physics = new Physics(this);
			physics.drag = 0.9;
			view = new View(this);
			view.sprite = new Sprite();
			view.sprite.graphics.lineStyle(1.5, 0xFFFFFF);
			view.sprite.graphics.drawPath(Vector.<int>([1, 2, 2, 2, 2]),
			                              Vector.<Number>([ 0, 10, 10, -10, 0, 0, -10, -10, 0, 10]),
			                              GraphicsPathWinding.NON_ZERO);
			health = new Health(this);
			health.hits = 5;
			health.died.add(onDied);
			weapon = new Gun(this);
		}
		override public function update():void
		{
			super.update();
			if (Math.random() < 0.1) turnDirection = -turnDirection;
			body.angle += turnDirection * 0.1;
			physics.thrust(Math.random());
			if (Math.random() < 0.05) weapon.fire();
		}
		protected function onDied(entity:Entity):void
		{
			destroy();
		}
	}
}

As you can see, it’s fairly similar to the player ship class. The only real difference is that in the update() function, rather than having player control via the keyboard, we have some “artificial stupidity” to make the ship wander and fire randomly.


The Asteroid Class

The other entity type the player can shoot at is the asteroid itself:

package asteroids
{
	import engine.Body;
	import engine.Entity;
	import engine.Health;
	import engine.Physics;
	import engine.View;
	import flash.display.Sprite;
	/**
	 * ...
	 * @author Iain Lobb - iainlobb@gmail.com
	 */
	public class Asteroid extends Entity
	{
		public function Asteroid()
		{
			body = new Body(this);
			body.radius = 20;
			body.x = Math.random() * 800;
			body.y = Math.random() * 600;
			physics = new Physics(this);
			physics.velocityX = (Math.random() * 10) - 5;
			physics.velocityY = (Math.random() * 10) - 5;
			view = new View(this);
			view.sprite = new Sprite();
			view.sprite.graphics.lineStyle(1.5, 0xFFFFFF);
			view.sprite.graphics.drawCircle(0, 0, body.radius);
			health = new Health(this);
			health.hits = 3;
			health.hurt.add(onHurt);
		}
		override public function update():void
		{
			super.update();
			for each (var target:Entity in targets)
			{
				if (body.testCollision(target))
				{
					target.health.hit(1);
					destroy();
					return;
				}
			}
		}
		protected function onHurt(entity:Entity):void
		{
			body.radius *= 0.75;
			view.scale *= 0.75;
			if (body.radius < 10)
			{
				destroy();
				return;
			}
			var asteroid:Asteroid = new Asteroid();
			asteroid.targets = targets;
			group.push(asteroid);
			asteroid.group = group;
			asteroid.body.x = body.x;
			asteroid.body.y = body.y;
			asteroid.body.radius = body.radius;
			asteroid.view.scale = view.scale;
			entityCreated.dispatch(asteroid);
		}
	}
}

Hopefully you’re getting used to how these entity classes look by now.

In the constructor we initialise our components and randomise the position and velocity.

In the update() function we check for collisions with our targets list — which in this example will just have a single item — the player’s ship. If we find a collision we do damage to the target and then destroy the asteroid. On the other hand, if the asteroid is itself damaged (i.e. it’s hit by a player bullet), we shrink it and create a second asteroid, creating the illusion that it has been blasted into two pieces. We know when to do this by listening to the Health component’s “hurt” Signal.


The AsteroidsGame Class

Finally, let’s look at the AsteroidsGame class that controls the whole show:

package asteroids
{
	import engine.Entity;
	import engine.Game;
	import flash.events.MouseEvent;
	import flash.filters.GlowFilter;
	import flash.text.TextField;
	/**
	 * ...
	 * @author Iain Lobb - iainlobb@gmail.com
	 */
	public class AsteroidsGame extends Game
	{
		public var players:Vector.<Entity> = new Vector.<Entity>();
		public var enemies:Vector.<Entity> = new Vector.<Entity>();
		public var messageField:TextField;
		public function AsteroidsGame()
		{
		}
		override protected function startGame():void
		{
			var asteroid:Asteroid;
			for (var i:int = 0; i < 10; i++)
			{
				asteroid = new Asteroid();
				asteroid.targets = players;
				asteroid.group = enemies;
				enemies.push(asteroid);
				addEntity(asteroid);
			}
			var ship:Ship = new Ship();
			ship.targets = enemies;
			ship.destroyed.add(onPlayerDestroyed);
			players.push(ship);
			addEntity(ship);
			var enemyShip:EnemyShip = new EnemyShip();
			enemyShip.targets = players;
			enemyShip.group = enemies;
			enemies.push(enemyShip);
			addEntity(enemyShip);
			filters = [new GlowFilter(0xFFFFFF, 0.8, 6, 6, 1)];
			update();
			render();
			isPaused = true;
			if (messageField)
			{
				addChild(messageField);
			}
			else
			{
				createMessage();
			}
			stage.addEventListener(MouseEvent.MOUSE_DOWN, start);
		}
		protected function createMessage():void
		{
			messageField = new TextField();
			messageField.selectable = false;
			messageField.textColor = 0xFFFFFF;
			messageField.width = 600;
			messageField.scaleX = 2;
			messageField.scaleY = 3;
			messageField.text = "CLICK TO START";
			messageField.x = 400 - messageField.textWidth;
			messageField.y = 240;
			addChild(messageField);
		}
		protected function start(event:MouseEvent):void
		{
			stage.removeEventListener(MouseEvent.MOUSE_DOWN, start);
			isPaused = false;
			removeChild(messageField);
			stage.focus = stage;
		}
		protected function onPlayerDestroyed(entity:Entity):void
		{
			gameOver();
		}
		protected function gameOver():void
		{
			addChild(messageField);
			isPaused = true;
			stage.addEventListener(MouseEvent.MOUSE_DOWN, restart);
		}
		protected function restart(event:MouseEvent):void
		{
			stopGame();
			startGame();
			stage.removeEventListener(MouseEvent.MOUSE_DOWN, restart);
			isPaused = false;
			removeChild(messageField);
			stage.focus = stage;
		}
		override protected function stopGame():void
		{
			super.stopGame();
			players.length = 0;
			enemies.length = 0;
		}
		override protected function update():void
		{
			super.update();
			for each (var entity:Entity in entities)
			{
				if (entity.body.x > 850) entity.body.x -= 900;
				if (entity.body.x < -50) entity.body.x += 900;
				if (entity.body.y > 650) entity.body.y -= 700;
				if (entity.body.y < -50) entity.body.y += 700;
			}
			if (enemies.length == 0) gameOver();
		}
	}
}

This class is pretty long (well, more than 100 lines!) because it does a lot of things.

In startGame() it creates and configures 10 asteroids, the ship and the enemy ship, and also creates the “CLICK TO START” message.

The start() function unpauses the game and removes the message, while the gameOver function pauses the game again and restores the message. The restart() function listens for a mouse click on the Game Over screen — when this happens it stops the game and starts it again.

The update() function loops through all the enemies and warps any that have drifted off screen, as well as checking for the win condition, which is that there are no enemies left in the enemies list.


Taking It Further

This is a pretty bare bones engine and a simple game, so now let’s think about ways we could expand it.

  • We could add a priority value for each entity, and sort the list before each update, so that we can make sure that some types of Entity always update after other types.
  • We could use object pooling so that we’re reusing dead objects (e.g. bullets) instead just creating hundreds of new ones.
  • We could add a camera system so we can scroll and zoom the scene. We could extend the Body and Physics components to add support for Box2D or another physics engine.
  • We could create an inventory component, so that entities can carry items.

As well as extending the individual components, we might at times need to extend the IEntity interface to create special types of Entity with specialised components.

For example, if we’re making a platform game, and we have a new component that handles all the very specific things that a platform game character needs — are they on the ground, are they touching a wall, how long have they been in the air, can they double-jump, etc. — other entities might also need to access this information. But it is not part of the core Entity API, which is kept intentionally very general. So we need to define a new interface, which provides access to all the standard entity components, but adds access to the PlatformController component.

For this, we would do something like:

package platformgame
{
	import engine.IEntity;
	/**
	 * ...
	 * @author Iain Lobb - iainlobb@gmail.com
	 */
	public interface IPlatformEntity extends IEntity
	{
		function set platformController(value:PlatformController):void;
		function get platformController():PlatformController;
	}
}

Any entity that needs “platforming” functionality then implements this interface, enabling other entities to interact with the PlatformController component.


Conclusions

By even daring to write about game architecture, I fear I’m stirring a hornets’ nest of opinion — but that’s (mostly) always a good thing, and I hope at the least I’ve made you think about how you organise your code.

Ultimately, I don’t believe you should get too hung up on how you structure things; whatever works for you to get your game done is the best strategy. I know there are far more advanced systems that the one I outline here, which solve a range of issues beyond the ones I’ve discussed, but they can tend to start looking very unfamiliar if you’re used to a traditional inheritance based architecture.

I like the approach I’ve suggested here because it allows code to be organised by purpose, into small focussed classes, whilst providing a statically typed, extensible interface and without relying on dynamic language features or String lookups. If you want to alter the behaviour of a particular component, you can extend that component and override the methods you want to change. Classes tend to stay very short, so I never find myself scrolling through thousands of lines to find the code I’m looking for.

Best of all, I’m able to have a single engine that is flexible enough to use across all the games I make, saving me a huge amount of time.

How to Learn Unity

$
0
0

Unity is a feature rich, fully integrated development engine for the creation of interactive 3D content. You want to make 3D games? Unity’s got you covered. In this article we’ll share books, tutorials and suggestions for getting to grips with Unity.


What?! You Haven’t Heard of Unity?

Where have you been hiding? For those unacquainted with this awesome bit of kit, prepare to go wow.

How to Learn Unity3D

Reading this and thinking “but I can’t code! I can’t design! I can’t model!”? No problem. Unity has an Asset Store built right into it, full of all sorts of goodies for you to buy cheaply and use in your projects. The situation has never been better for indie developers.

Unity is also surrounded by an awesome community with many contributing tutorials and open source libraries to integrate all sorts of cool technology from the Microsoft Kinect to mobile Augmented Reality solutions, leaving you able to focus entirely on your game or application.

What’s more, with one Unity project you can export to all the various web browsers, PC & Mac desktops, Adobe Flash, iOS, Android, Xbox 360, Wii, and PlayStation 3 all from the click of a button.  Never has it been so easy to get your content on many platforms and devices without having to pay a royalty share of your profits.  A lot of top games on the iOS store are made with Unity!

Think that’s amazing? What if I told you there was a FREE “Indie” version for you to download right now and start playing with?  That’s no joke. It’s truly awesome, so let’s dive right in…


I Want to Download It Right Now!

Sure you do — so head over to the Unity Download page and hit that download button! You’ll get a free 30 day trial of Unity Pro and (at the time of writing) a free 30 day trial of the Android and iOS exporter add-ons.

Whilst it’s downloading (~500MB) grab a cup of tea and have a browse through the Unity Gallery and check out some of the stunning games that have been made with Unity, just to whet your appetite a little more.

How to Learn Unity3D
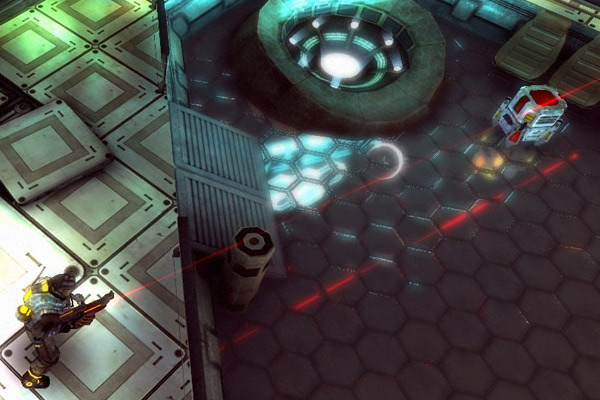
AngryBots, the current Example Project.

Once it’s downloaded, run through the installer. It will ask you for an email address and to choose whether you want to purchase Unity Pro, try out a 30 day Unity Pro trial, or just use the Unity Indie version. I’d opt for the Unity Pro trial just to see the real capabilities of the engine. Don’t fret about handing over your email address; they don’t spam you with anything and you can use this account for the Asset Store later if needed.

When going through the installation options be sure to install Unity, MonoDevelop (coding environment) and the Example Project. The Example Project changes from time to time but usually shows off the latest features of the engine and will be optimized for all the exportable platforms.  Currently, the Example Project is AngryBots and it’s well worth having a look through.


Learning Unity – Start at the Source

There are so many places where you could start your journey within Unity, and Unity themselves have recently started offering free “Live Online Training Courses”. Where better to start learning than from the source?  You can sign up and take part in them here.

The two courses available right now will introduce you to the basics of the Unity interface and the key concepts and workflows used whilst walking you through developing two mini games to take home and show your mom. She will love them!

Unity also has a tutorial channel with videos presented by Will Goldstone which walk you through the basics of the interface and the different unity components used to develop your games and applications.

Will Goldstone also released a very popular book, Unity 3.x Game Development Essentials 2011, which is a really great read and comes with source code for each of the chapters. It also introduces you quite gently to scripting within Unity, using either C# or JavaScript.

There are also various sites around the web that offer an introduction to Unity, including our very own Activetuts+ with my Getting Started With Unity series. This also introduces you to scripting with JavaScript.


Learning Unity – Where Next?

When you’re comfortable with the basics and wish to build on your knowledge you should check out Unity 3D Student – a site by Will Goldstone (again!) which is full of bitesized modules followed by challenges for you try.

For those who like a physical book to hold there is a great read by Ryan Henson Creighton, Unity 3.x Game Development by Example, which will teach you more challenging concepts and walk you through popular obstacles presented in game development. For the screen junkies there’s also an eBook available.

Beyond this, Unity Cookie produces a wide range of beginner tutorials as well as two complete series walking you through building your own game.  Digital Tutors host some more advanced courses in topics such as Character Scripting, Weapon Systems, Level Design and AI & Waypoints, to mention just a few. Design3 have several courses based on various concepts including mobile development, and last but not least GamePrefabs by the Tornado Twins has a ton of cool prefabs and tutorials for your projects.


Quick Tips

How to Learn Unity3D

Learn to love Bob. He created iTween which you will not be able to live without. Also check out his blog for loads of tips and tricks and cool time saving prefabs and and little insights into his workflow.

If you’re a developer and find yourself getting stuck then get used to reading the Unity Scripting Reference before going to bed, it’s your best friend and will always help you out.

Alternatively, get involved with the community and search on Unity Answers and the Unity Forums – someone is bound to have had the same problem and will have hopefully posted a solution.

Then, find and follow the best on Twitter.  To name just a few…


I’ve Gone From Zero to Hero, What Now?

You should now have the confidence and understanding to take on whatever comes your way so go out there and get inspired. Try to make a cool mini game just for fun to aid your learning and fill your portfolio so you can get hired. Most of all, enjoy yourself!

Understanding Steering Behaviors: Seek

$
0
0

Steering behaviors aim to help autonomous characters move in a realistic manner, by using simple forces that are combined to produce life-like, improvisational navigation around the characters’ environment. In this tutorial I will cover the basic theory behind the seek steering behavior, as well as its implementation.

The ideas behind these behaviors were proposed by Craig W. Reynolds; they are not based on complex strategies involving path planning or global calculations, but instead use local information, such as neighbors’ forces. This makes them simple to understand and implement, but still able to produce very complex movement patterns.

Note: Although this tutorial is written using AS3 and Flash, you should be able to use the same techniques and concepts in almost any game development environment. You must have a basic understanding of math vectors.


Position, Velocity and Movement

The implementation of all forces involved in steering behaviors can be achieved using math vectors. Since those forces will influence the character’s velocity and position, it’s a good approach to use vectors to represent them as well.

Even though a vector has a direction, it will be ignored when related to position (let’s assume the position vector is pointing to the character’s current location).

Character positioned at (x, y) with velocity (a, b).

The figure above represents a character positioned at (x, y) with a velocity (a, b). The movement is calculated using  Euler integration:

position = position + velocity

The direction of the velocity vector will control where the character is heading to while its length (or magnitude) will control how much it will move every frame. The greater the length, the faster the character moves. The velocity vector can be truncated to ensure it will not be greater than a certain value, usually max velocity. Below is a test showing that approach.


Move the mouse to move the target.

The red square is moving towards a target (the mouse cursor). This movement pattern illustrates the seek behavior without any steering forces being applied so far. The green line represents the velocity vector, calculated as follows:

velocity = normalize(position - target) * max_velocity

It’s important to notice that without the steering force, the character describes straight routes and it instantly changes its direction when the target moves, thus making an abrupt transition between the current route and the new one.


Calculating Forces

If there was only the velocity force involved, the character would follow a straight line defined by the direction of that vector. One of the ideas of steering behaviors is to influence the character’s movement by adding forces (called steering forces). Depending on those forces, the character will move in one or another direction.

For the seek behavior, the addition of steering forces to the character every frame makes it smoothly adjust its velocity, avoiding sudden route changes. If the target moves, the character will gradually change its velocity vector, trying to reach the target at its new location.

The seek behavior involves two forces: desired velocity and steering:

Steering forces.

The desired velocity is a force that guides the character towards its target using the shortest path possible (straight line between them – previously, this was the only force acting on the character). The steering force is the result of the desired velocity subtracted by the current velocity and it pushes the character towards the target as well. 

Those forces are calculated as follows:

desired_velocity = normalize(target - position) * max_velocity
steering = desired_velocity - velocity

Adding Forces

After the steering force has been calculated, it must be added to the character (it will be added to the velocity force). The addition of the steering  force to the velocity every frame will make the character smoothly abandon its old straight route and head towards the target, describing a seek path (orange curve in the figure below):

Seek path.

The addition of those forces and the final velocity/position calculation are:

steering = truncate (steering, max_force)
steering = steering / mass
velocity = truncate (velocity + steering , max_speed)
position = position + velocity

The steering force is truncated to ensure it will not exceed the amount of allowed forces the character can handle. Also the steering force is divided by the character mass, which produces different movement speeds for different weighted characters. Below is a test showing the seek behavior with all forces applied:


Move the mouse to move the target.

Every time the target moves, each character’s desired velocity vector changes accordingly. The velocity vector, however, takes some time to change and start pointing at the target again. The result is a smooth movement transition.


Conclusion

Steering behaviors are great for creating realistic movement patterns. The main idea is to use local information to calculate and apply forces to create the behaviors. Even though the calculation is simple to implement, it is still able to produce very complex results.

This tutorial described the basics of steering behaviors, explaining the seek behavior. Over the next few posts, we will learn about more behaviors. Keep up to date by following us on Twitter, Facebook, or Google+.

Picking a Color Palette for Your Game’s Artwork

$
0
0

In this tutorial, we’ll look at what color palettes are, tools for choosing colors that go together, and the secret to picking a perfect color scheme for our games!


An Introduction to Color Palettes

The term color palette is used widely across many different industries of design. Its exact definition and interpretation varies slightly between industries, but for the purposes of game design we can simply refer to it as a predefined set of colors based on specific rules.

Traditional color palettes generally consist of five colors within a specific scheme, but this is more of a guideline than a rule. In game design, color palettes can consist of any number of colors as long as they all follow your predefined set of rules.

Before we delve deeper, consider whether you want to create your own color palette or find a ready-made scheme online. Either way, there are many tools that can help you out!


Picking Palettes With Tools

Color palettes can be created in virtually every program with a color picker, but why use MS Paint when there are so many great websites that can get the job done better?

Kuler

Adobe Kuler is one of my favorite tools for making a color palette, simply because it acts as an all-in-one tool.

As well as being able to create your own color palette and pick colors from an image you find inspirational, you can also share your palettes and find ones created by others! This means there’s a never-ending supply of ready-made palettes for you to choose from.

I recommend using this tool if you are looking for an in-depth experience or if you are looking to find user palettes created by others.

Color Scheme Designer 3

Another great tool for making color palettes is Color Scheme Designer 3. It has all the standard features you would expect from a color palette tool, and really shines in in its interface design!

I found it effortlessly easy to jump in and make a color palette. I would recommend using this tool if you are looking for a simple experience.

Color Blender

The last tool I am going to suggest is Color Blender. Out of the three tools I would have to deem this tool the most interesting.

Instead of supplying you with a color wheel and a whack of values to modify it simply gives you three sliders (RGB/HSB) to play around with. Like Kulur, it has a section where you are able to browse palettes created by others.

I would recommend using this tool if you are looking for a tool that actually assists you in creating color palettes.


Common Types of Color Schemes

There are many different types of color schemes you can choose to use when making a game, so I will just cover the schemes you are most likely to pick. They’re all based on the relationships of different colors to each other within the color wheel:

Analogous color palettes consist of colors that are adjacent to each other on the color wheel.

An example of an analogous color palette would be a color palette that goes from red to green:

or a color palette that goes from blue to purple:

As you can see the colors within each of these palettes are adjacent to each other on the color wheel.

Complementary color palettes are made up of colors that are opposite to each other on the color wheel.

As you can see in this example the center color acts as a base and the colors on the left are complementary to the right:

Monochromatic color palettes are different shades or tints of a single color.

For example take this monochromatic green color palette:

And this monochromatic blue color palette:

The colors in each color palette remain the same while the brightness is decreased.

Custom color palettes are by far my top choice for game artwork. They can consist of any color, but are restricted to specific shades or tints: that is, they occupy the same ring on the color wheel.

At first glance the color palette below seems to consist of completely random colors:

Indeed, the colors have no particular link to each other, but note that the brightness and saturation of each are the same – they’re all from the middle ring of the color wheel.


Color Schemes Based on Themes

It’s obvious that not all color schemes are going to look visually appealing with every single game’s theme. A color scheme should be used to strengthen the mood you are trying to convey.

Picture a horror movie: the scariest scenes all take place in a dark environment or at night. That’s because dark colors convey a feeling of unease. So if you were to make a horror game, you probably wouldn’t pick hot pink as the dominant color of your game; you would most likely choose a monochromatic or custom color palette consisting of dark colors.

LIMBO is a game that makes incredible use of an all-grey palette. Take a look at how this gives the game an eerie feeling:

Before jumping right in to making your color palette, take a look at some form of media based around the theme of your game. You will often be able to detect some color schemes that work nicely and some that don’t, giving you the luxury to pick and choose the colors that appeal to your specific needs.


The Secret to Creating Perfect Color Palettes

What if I told you there was a way to create perfectly matching colors every single time you made a color palette, would you believe me? Well hopefully you did because I don’t want this next bit to seem like witchcraft to you.

All colors on a computer can be defined by three numbers: hue, saturation and brightness. This is important, as it lets us see patterns and relationships between sets of colors. Let’s wrap our heads around what each value means.

Hue defines the tone of the actual color. For example, the color red has a hue value of 0 regardless of what you set the saturation and brightness values to. If you change that hue value to 120 you will have changed the color to green and if you change it to 240 the color will become blue.

Now what happens if we take one of those colors and give it a saturation value of 50? It looks as if you are picking a different color, but you are actually only affecting the intensity of the color – that is, how vivid the color is. Reducing the saturation makes the color look washed out.

Brightness, then, accounts for how light or dark the color is. If we reduced the brightness of a color, we would see this as a darker shade of that same color.

To create a great color palette you need only follow this rule:

IF hues do not equal each other
THEN set saturations to match each other
AND set brightnesses to match each other
ELSE IF saturations do not equal each other
THEN set hues to match each other
AND set brightnesses to match each other
ELSE IF brightnesses do not equal each other
THEN set hues to equal each other
AND set saturations to equal each other

But Games Have Many Shades!

If you strictly follow the rule above you will create an amazing color palette, but if you try to use the palette you will most likely end up with a flat looking game.

That’s because you only have a single shade for each color – but don’t fret, we can easily add more rows to our palette! All you have to do change either the saturation or brightness by a specific interval.

In this massive color palette the colors increase in hue value by 40 each column, and decrease in brightness value by 10 each row:

Tip: If you are coloring an object, just use colors from the same row or column as the main color you are using.

Conclusion

Thank you for taking the time to read this article on color palettes. If you’d like to learn more about the relationships between colors try comparing the HSB (Hue-Saturation-Brightness) values throughout the various color schemes, or look up some other color schemes (triadic, tetrads, warm/cool). Please feel free to leave a comment or question!

Shuffle Bags: Making Random() Feel More Random

$
0
0

A pseudo random number generator (PRNG) like the Random Class in C# is not a true random number generator: its goal is to approximate randomness with speed. This means it will often return an uneven distribution of values, which may not be what you want. In this tutorial, I’ll show you how to solve this problem with a shuffle bag.

Note: Although this tutorial uses C#, you should be able to use the same techniques and concepts in almost any game development environment.


Introduction

When I first started creating games, I used the standard Random() methods to create variety in gameplay, creating large if/else conditions until I received my desired results. If the results weren’t balanced the way I wanted them, I would create additional conditions until I felt the gameplay was fun. It wasn’t until recently I realized there are better approaches in creating a truly entertaining game play experience.

There is nothing wrong with the use of the built-in Random class: the problem of not getting the desired results stems from the implementation of the methods. In this article we’ll use the “Shuffle Bag” method to make Random() feel more random (and more fun), using Boggle boards as a practical example.


The Problem

Have you ever noticed that an expression like:

int value = Random.Next(lowerBounds, upperBounds);

…gives you an uneven distribution of numbers?

A random number generator that picks values between 0 and 1 doesn’t care if it returns all 1s, so if you’ve created an if/else block using the above expression to pick a branch, you probably aren’t getting the results you expect.

var rand = new Random();
for (int i = 0; i < 10; i++)
    Console.WriteLine(rand.Next(0, 2));

There’s nothing technically wrong with Random.Next(), but it doesn’t guarantee a nice even distribution of numbers. This means that in many gameplay situations, Random() isn’t fun.


What Is a Shuffle Bag?

A Shuffle Bag is a technique for controlling randomness to create the distribution we desire. The idea is:

  • Pick a range of values with the desired distribution.
  • Put all these values into a bag.
  • Shuffle the bag’s contents.
  • Pull the values out one by one until you reach the end.
  • Once you reach the end, you start over, pulling the values out one by one again.

Implementing a Shuffle Bag

Implementing a Shuffle Bag in C# is simple, and the technique can easily be converted to any language.

As the purpose of this article is to focus on the implementation of Shuffle Bags and not language features, we will not look at the use of generics. However, I strongly recommend the use of generics because they allow us to make type safe data structures without committing to actual data types. Generics allow you to use the same code to create Shuffle Bags that hold many different types of data.

Here’s the basic code:

public class ShuffleBag
{
    private Random random = new Random();
    private List data;
    private char currentItem;
    private int currentPosition = -1;
    private int Capacity { get { return data.Capacity; } }
    public int Size { get { return data.Count; } }
    public ShuffleBag(int initCapacity)
    {
        data = new List(initCapacity);
    }

The beginning of the class sets up the instance variables, and the constructor initializes the data instance variable to the programmer’s initial capacity (i.e. how big the bag is to begin with).

    public void Add(char item, int amount)
    {
        for (int i = 0; i < amount; i++)
            data.Add(item);
        currentPosition = Size - 1;
    }

The Add method simply adds the char to data as many times as the programmer specifies.

Note that the currentPosition is set to the end of the list, as we will traverse from the end later on. Why from the end of the list? You could make the Shuffle Bag traverse from the beginning, but starting at the end and working backwards makes for cleaner code.

    public char Next()
    {
        if (currentPosition < 1)
        {
            currentPosition = Size - 1;
            currentItem = data[0];
            return currentItem;
        }
        var pos = random.Next(currentPosition);
        currentItem = data[pos];
        data[pos] = data[currentPosition];
        data[currentPosition] = currentItem;
        currentPosition--;
        return currentItem;
    }

The Next method is the meat of this technique.

If currentPosition is less than one, we reset it to point to the end of the list and return the first item from the bag. (This covers the situation where we’ve traversed through all the items and now wish to start again.)

Otherwise, we use random.Next() to pick a random item from the bag, from somewhere between the first item and the item at our current position. We swap this randomly selected item with the item at our current position, and then decrease currentPosition by 1.

Finally, we return the randomly selected item. The result is that we keep picking items we haven’t picked before, while shuffling the bag as we go. This means that its contents are in a different order when we want to traverse it again.

Now it’s time to try out our newly created class.


Using the Shuffle Bag Class

Several years ago I created a Boggle clone for the iPhone.

Boggle, by therichbrooks on Flickr

Image credit: Rich Brooks

One problem I faced was creating dense boards that only used 16 letters, but allowed the user to form hundreds of words with those 16 letters. I learned about letter frequencies, and how I could use it to create a positive user experience.

By using the frequency that letters appear in English text we can construct a weighted dictionary.

private static Dictionary letterFrequencies = new Dictionary
{
    {'E', 12.702},
    {'T', 9.056},
    {'A', 8.167},
    {'O', 7.507},
    {'I', 6.966},
    {'N', 6.769},
    {'S', 6.327},
    {'H', 6.094},
    {'R', 5.987},
    {'D', 4.253},
    {'L', 4.025},
    {'C', 2.782},
    {'U', 2.758},
    {'M', 2.406},
    {'W', 2.306},
    {'F', 2.228},
    {'G', 2.015},
    {'Y', 1.974},
    {'P', 1.929},
    {'B', 1.492},
    {'V', 0.978},
    {'K', 0.772},
    {'J', 0.153},
    {'X', 0.150},
    {'Q', 0.095},
    {'Z', 0.074}
};
//total: 99.965

Note: Q is handled a bit differently than the other letters. It retains the value from the letter frequency table, but it appears as Qu in many word games.

Now we can create an instance of our Shuffle Bag class, fill our Shuffle Bag with data and create dense Boggle Boards.

        static void Main(string[] args)
        {
            var shuffleBag = new ShuffleBag(88000);
            int amount = 0;
            foreach (var letter in letterFrequencies)
            {
                amount = (int)letter.Value * 1000;
                shuffleBag.Add(letter.Key, amount);
            }
            for (int i = 0; i < 16; i++)
                Console.Write(shuffleBag.Next());
            Console.WriteLine();
        }

Note: The most important thing to take away from this piece of code is the amount. A multiplier of 1000 returns better results than a multiplier of 10.

Run the results through an online solver. How many words do you find?


Conclusion

In this article, we acknowledged the problem in using random values with if/else conditions, we introduced a solution using Shuffle Bags, and demonstrated a usage by creating dense Boggle Boards. With the use of Shuffle Bags we take control of Random() methods and create an even distribution of values that aid in a positive gaming experience.


Tips for a One Man Gamedev Team: Should You Make Your Own Development Tools?

$
0
0

From level editors to physics engines to entire video game creation interfaces, there are a multitude of tools that exist to help both experienced and budding game developers get things done easily and efficiently. But as a one man team, should you be looking into these time savers for your first project, or should you go solo?


Using Tools Is Awesome

I’ve said it before and I’ll say it again: building a videogame as a one man hobbyist is a whole different beast from regular video game development. Without the presence of time constraints or monetary obligations, you can take many more liberties and chances in their development. Unfortunately, being only one person also means everything seems to take a lot more work.

This is where tools come in. Why take the time to create a 2D level editor when others have already spent countless hours of their life making great ones like DAME or Ogmo? Why build a rigid body physics engine when the likes of Box2D is freely available?


Using something elegant like this (Ogmo Editor) certainly makes things easy…

For many people, there won’t be a good answer to these questions. If you’re building a video game as a means to an end — as in, you are interested only in the final product and not the development experience — then using these tools is a no-brainer. Most are well-documented and highly flexible, so with a little bit of work they can be adapted to most any type of project.

If you wanted to you could even use a point and click gamedev tool like Construct 2 or Stencyl to skip some or all of the programming portion of development entirely.

There really isn’t much to say here; using premade tools is a convenience. It’s efficient, it’s effective, it’s fun and it’s much easier than the alternative of making things yourself from scratch.


But You Shouldn’t Do It

If you’re reading this article it means you’re interested in learning about game development. Why else would you be on a site filled with tutorials on the subject? For this reason, I encourage you to forego using tools and to try doing things yourself.

This will, without a doubt, require a much larger amount of work than using tools someone else has built, but the payoff will be absolutely enormous — especially if this is your first development experience. You will learn so much about how various systems in games are set up, and gain valuable debugging and code architecture skills while setting up your own development environment.

Plus, the tools you will create for yourself will be perfectly tailored to the development of your particular game, which will save you a lot of time in the long run. You will also find it much easier to add features you hadn’t anticipated, because, well, you created the tools, and so you understand them better.


…still, making your own tools can be much more rewarding!

I’m not saying there is no place for third-party tools in video game development — in fact, I think quite the opposite is true. Game development of every form is based on the work of others and this remains true even on the small scale of one-man development.

However, doing things yourself the first time around will really help you understand how the third-party tools you will undoubtedly end up using are made, and you will be able to use (and even more importantly, modify) them more effectively because of it.

When it comes down to it, it might seem like a long and difficult process, and you might really not want to do it, but I strongly encourage first time developers to use as few third party tools as possible. Your game probably won’t be the greatest, the tools you create will definitely not be up to the standards you see in others’ work, but the knowledge you will gain during the process will prove to be absolutely invaluable.

If you enjoyed this, check out my other tip for a one man gamedev team: What to Do Before Even Touching a Computer. And for more info on tools, take a look at The Many Types of Tools for Game Developers.

Understanding Steering Behaviors: Flee and Arrival

$
0
0
This entry is part 2 of 2 in the series Understanding Steering Behaviors

Steering behaviors aim to help autonomous characters move in a realistic manner, by using simple forces that combine to produce life-like, improvisational navigation. In this tutorial, I’ll cover the flee behavior, which makes the character move away from a pursuer, and the arrival behavior, which makes the character slow down and stop as it approaches a target.

Note: Although this tutorial is written using AS3 and Flash, you should be able to use the same techniques and concepts in almost any game development environment. You must have a basic understanding of math vectors.


Running Away

The seek behavior described previously is based on two forces that push the character towards the target: the desired velocity and the steering.

desired_velocity = normalize(target - position) * max_velocity
steering = desired_velocity - velocity

The desired_velocity, in this case, is the shortest path between the character and the target. It is calculated by subtracting the target’s position from the character’s position. The result is a force vector that goes from the character towards the target.

Seek steering behavior

Seek behavior

The flee behavior uses those same two forces, but they are adjusted to make the character run away from the target:

Forces involved in the flee behavior

Flee behavior

That new desired_velocity vector is calculated by subtracting the character’s position from the target’s position, which produces a vector that goes from the target towards the character

The resulting forces are calculated almost the same way as in the seek behavior:

desired_velocity = normalize(position - target) * max_velocity
steering = desired_velocity - velocity

The desired_velocity in that case represents the easiest escaping route the character can use to run away from the target. The steering force makes the character abandon its current route, pushing it towards the direction of the desired velocity vector.

Comparing the desired velocity vector of the flee behavior with the desired velocity vector of the seek behavior, the following relation can be established:

flee_desired_velocity = -seek_desired_velocity

In other words, one vector is the negative of the other.


Adding Escape Forces

After the steering force is calculated it must be added to the character’s velocity vector. Since that force is pushing the character away from the target, every frame the character will stop moving towards the target and start moving away from it, producing a flee path (the orange curve in the figure below):

Flee path

The addition of those forces and the final velocity/position calculation are handled in the same way as before. Below is a demo showing several characters performing the flee behavior:


Move the mouse to move the target.

Every character is placed at the center of the moving area with a random velocity. They will try to flee from the target (the mouse cursor).  The addition of all forces makes each character smoothly abandon its current route and flee the target.

Currently the target affects every character, ignoring the distance from them; it could have been limited to an “effect area”, where the character would flee only if it is close enough to the target.


Arrival

The seek behavior, as we’ve seen, makes a character move towards a target. When it reaches the destination the steering force keeps acting on it based on the same rules, making the character “bounce” back and forth around the target.


The seek behavior. Move the mouse to move the target.

The arrival behavior prevents the character from moving through the target. It makes the character slow down as it approaches the destination, eventually stopping at the target.

The behavior is composed of two phases. The first phase is when the character is far away from the target and it works exactly the same way as the seek behavior does (move at full speed towards the target).

The second phase is when the character is close to the target, inside the “slowing area” (a circle centered at the target’s position):

Arrival behavior

When the character enters the circle, it slows down until it stops at the target.


Slowing Down

When the character enters the slowing area its velocity is ramped down linearly to zero. This is achieved by adding a new steering force (the arrival force) to the character’s velocity vector. The result of this addition will eventually become zero, meaning that nothing will be added to the character’s position every frame (so there will be no movement):

// If (velocity + steering) equals zero, then there is no movement
velocity = truncate(velocity + steering, max_speed)
position = position + velocity
function truncate(vector:Vector3D, max:Number) :void {
	var i :Number;
	i = max / vector.length;
	i = i < 1.0 ? i : 1.0;
	vector.scaleBy(i);
}

In order to ensure the character will gradually slow down before it stops, the velocity should not become zero immediately. The gradual slow down process is calculated based on the radius of the slowing area and the distance between the character and the target:

// Calculate the desired velocity
desired_velocity = normalize(position - target)
distance = length(desired_velocity)
// Check the distance to detect whether the character
// is inside the slowing area
if (distance < slowingRadius) {
    // Inside the slowing area
    desired_velocity = normalize(desired_velocity) * max_velocity * (distance / slowingRadius)
} else {
    // Outside the slowing area.
    desired_velocity = normalize(desired_velocity) * max_velocity
}
// Set the steering based on this
steering = desired_velocity - velocity

If the distance is greater than slowingRadius, it means the character is far away from the target and its velocity should remain max_velocity.

If the distance is less than slowingRadius, it means the character has entered the slowing area and its velocity should be ramped down.

The term distance / slowingRadius will vary from 1 (when distance equals slowingRadius) to 0 (when distance is almost zero). This linear variation will make the velocity smoothly slow down:

Arrival slowing factor.

As previously described, the character movement is performed as follows:

steering = desired_velocity - velocity
velocity = truncate (velocity + steering , max_speed)
position = position + velocity

If the desired velocity is ramped down to zero, then the steering force becomes -velocity. As a consequence, when that steering force is added to the velocity, it will result in zero, making the character stop moving.

Below is a demo showing the arrival behavior:


Move the mouse to move the target.

What the arrival behavior does, really, is calculate a force that will be equal to -velocity, preventing the character from moving as long as that force is in place. The character’s original velocity vector does not change and it continues to work, but it is nulled by the steering addition.

If the arrival steering force is lifted, the character will start moving again, using its original velocity vector.


Conclusion

The flee behavior makes the character move away from the desired target while the arrival behavior makes it slow down and stop at the target’s position. Both can be used to create smooth escape or follow movement patterns, for instance. They can also be combined to create even more complex movements.

This tutorial described more about steering behaviors, explaining the flee and the arrival behaviors. Over the next few posts, we will learn about more behaviors. Keep up to date by following us on Twitter, Facebook, or Google+.

WANTED: Game Developers to Explain Core Gamedev Terms and Concepts

$
0
0

Are you a game developer with an interest in helping others learn your craft? We’re looking for devs to write short posts explaining important game development terms and concepts like “game loop”, “blitting”, and “freemium”. This is a paid job. If you’re interested, read on.


What We’re Looking For

We’d like to put together a collection of posts explaining common terms in game development and design.

Each post would be about 600-1000 words long (or a few minutes, if you prefer to record screencasts), and would cover a single topic. Where appropriate, these posts should include a visual aid, like a diagram or screenshot.

You must be able to explain ideas concisely, without a whole lot of waffle, in decent English – however, you do not need to have prior writing experience. If you can explain a topic in person or on a forum, that’s great!

We will pay $50-$100 for each post, depending on the complexity of the topic. You’re free to write a one-off post if you don’t have the time to commit to a regular writing schedule.


How to Apply

If you’re interested, please email gamedev[at]tutsplus.com with a single-paragraph explanation of one of the following topics:

  • Blitting
  • The game loop
  • Freemium games
  • TDD
  • Bump map

Imagine you’re explaining this to a beginner game developer who isn’t familiar with the term or concept, but who has to catch a bus in 30 seconds.

If you have any suggestions for other important terms and concepts you’d like to explain, let us know!

I look forward to hearing from you.

Quick Tip: Intro to Object-Oriented Programming for Game Development

$
0
0
This entry is part 1 of 1 in the series Beginner's Guide to OOP

Welcome to a new series of Quick Tips on Object-Oriented Programming! We’ll be going over the principles of OOP and how they can be used to create organized code. In this first part, we’ll talk about what OOP is and why it’s helpful, with a few examples of how it could be used in game development.


What Is Object-Oriented Programming?

Object-oriented programming (OOP), in its most basic sense, is a programming style used to organize code. Video games can run anywhere from a few thousand lines of code (Cut the Rope has 15,000) to millions of lines of code long (Crysis has over a million). You can see why it’s so important to write code that can be easily modified and maintained.

Programming styles, such as OOP, help to organize code in such a way that it becomes easier to maintain and modify. OOP helps organize code by organizing it into what are known as objects.

Objects hold information about state and behavior:

States are the characteristics of the object, or the words you would use to describe it, and usually take the form of is or has descriptors. A computer is either on or off, a chair has four legs, and you have a name.

Behaviors are the things the object can do, or the actions the object can perform, and are usually verbs that end in ing. You are sitting, using a computer, and reading this article.


Why Is It Helpful?

As stated earlier, OOP is helpful because it helps create maintainable code – code that is understandable, adaptable, and extendable.

It also helps create reusable code by following the DRY (Don’t Repeat Yourself) method: write the code once and then reuse it, rather than copying and pasting.

The OOP way of thinking also lends itself well to directly translating real-world objects and interactions into code.


How to Apply It

I’ll list three different examples of how to apply OOP to video games. In later articles, we’ll look at how to code these examples, but for now we’ll just stick to learning to identify objects and their states and behaviors.

Asteroids

First, let’s imagine that we wanted to make the classic game Asteroids. To identify what the objects are in Asteroids, try describing it.

Wikipedia describes Asteroids as follows:

The objective of Asteroids is to score as many points as possible by destroying asteroids and flying saucers. The player controls a triangular-shaped ship that can rotate left and right, fire shots straight forward, and thrust forward. As the ship moves, momentum is not conserved – the ship eventually comes to a stop again when not thrusting.

Think about what in this description could stand alone, or the things that are described that could have state and behavior. These become our objects.

The objects for Asteroids are: a ship, an asteroid, a flying saucer, and a bullet (can’t forget those!). The cool thing about objects is that we normally describe things in terms of objects in everyday talk, so they usually reveal themselves through a description.

The classic game of Asteroids

Now that we have identified our objects, let’s define the state and behavior for one of them: the player’s ship. Think about what attributes describe the ship; these are its states. Then think about what the ship can do; these are its behaviors.

A ship has states of:

  • rotation
  • momentum
  • thrust

and behaviors of:

  • turning
  • moving
  • firing

I’ll let you determine what the remaining objects’ states and behaviors are.

Tetris

Next, let’s consider another classic game, Tetris. Again, we start off by describing Tetris to find its objects.

A random sequence of Tetrominos fall down the playing field. The objective of the game is to manipulate these Tetrominos, by moving each one sideways and rotating it by 90 degree units, with the aim of creating a horizontal line of ten blocks without gaps.

Tetris
Tetris

In Tetris, really the only object is a Tetromino. It has states of:

  • rotation (in 90 degree units)
  • shape
  • color

and behaviors of:

  • falling
  • moving (sideways)
  • rotating

Pac-Man

The last game we’ll use as an example is Pac-Man.

The player controls Pac-Man through a maze, eating pac-dots or pellets. Four enemies [ghosts] roam the maze, trying to catch Pac-Man. Near the corners of the maze are four larger, flashing dots known as power pellets that provide Pac-Man with the temporary ability to eat the enemies. The enemies turn deep blue, reverse direction and usually move more slowly.

The original Pac-Man arcade game

For Pac-Man, there are three objects: Pac-Man, a ghost, and a pac-dot. A power pellet isn’t really its own object because it’s a special pac-dot (we’ll talk about what to do about this in a later article). We’ll describe the ghost object because it’s more interesting.

The ghost has states of:

  • color
  • name (+1 if you can name all the ghosts off the top of your head)
  • state (eatable or not)
  • direction
  • speed

and behaviors of:

  • moving
  • changing state

Conclusion

Object-oriented programming is one way to organize code in a video game. OOP focuses on objects that are defined by their state and their behavior.

In the next Quick Tip, we’ll talk about the principle of cohesion and begin to code the basic structure of an object. Follow us on Twitter, Facebook, or Google+ to keep up to date with the latest posts.

Noise: Creating a Synthesizer for Retro Sound Effects – Introduction

$
0
0

This is the first in a series of tutorials in which we will create a synthesizer based audio engine that can generate sounds for retro-styled games. The audio engine will generate all of the sounds at runtime without the need for any external dependencies such as MP3 files or WAV files. The end result will be a working library that can be dropped effortlessly into your games.

Before we can start to create the audio engine there are a few things that we will need to understand; these include the waveforms that the audio engine will be using to generate the audible sounds, and how sound waves are stored and represented in digital form.

The programming language used in this tutorial is ActionScript 3.0 but the techniques and concepts used can easily be translated into any other programming language that provides a low-level sound API.

You should make sure you have Flash Player 11.4 or higher installed for your browser if you want to use the interactive examples in this tutorial.


The Waveforms

The audio engine that we will be creating will use four basic waveforms (also known as periodic waveforms, because their basic shapes repeat periodically) all of which are extremely common in both analog and digital synthesizers. Each waveform has its own unique audible characteristic.

The following sections provide a visual rendering of each waveform, an audible example of each waveform, and the code required to generate each waveform as an array of sample data.

Pulse

The pulse wave produces a sharp and harmonic sound.

To generate an array of values (in the range -1.0 to 1.0) that represent a pulse wave we can use the following code, where n is the number of values required to populate the array, a is the array, and p is the normalised position within the waveform:

var i:int = 0;
var n:int = 100;
var p:Number;
while( i < n ) {
    p = i / n;
    a[i] = p < 0.5 ? 1.0 : -1.0;
    i ++;
}

Sawtooth

The sawtooth wave produces a sharp and harsh sound.

To generate an array of values (in the range -1.0 to 1.0) that represent a sawtooth wave we can use the following code, where n is the number of values required to populate the array, a is the array, and p is the normalised position within the waveform:

var i:int = 0;
var n:int = 100;
var p:Number;
while( i < n ) {
    p = i / n;
    a[i] = p < 0.5 ? p * 2.0 : p * 2.0 - 2.0;
    i ++;
}

Sine

The sine wave produces a smooth and pure sound.

To generate an array of values (in the range -1.0 to 1.0) that represent a sine wave we can use the following code, where n is the number of values required to populate the array, a is the array, and p is the normalised position within the waveform:

var i:int = 0;
var n:int = 100;
var p:Number;
while( i < n ) {
    p = i / n;
    a[i] = Math.sin( p * 2.0 * Math.PI );
    i ++;
}

Triangle

The triangle wave produces a smooth and harmonic sound.

To generate an array of values (in the range -1.0 to 1.0) that represent a triangle wave we can use the following code, where n is the number of values required to populate the array, a is the array, and p is the normalised position within the waveform:

var i:int = 0;
var n:int = 100;
var p:Number;
while( i < n ) {
    p = i / n;
    a[i] = p < 0.25 ? p * 4.0 : p < 0.75 ? 2.0 - p * 4.0 : p * 4.0 - 4.0;
    i ++;
}

Here’s an expanded version of line 6:

if (p < 0.25) {
    a[i] = p * 4.0;
}
else if (p < 0.75) {
    a[i] = 2.0 - (p * 4.0);
}
else {
    a[i] = (p * 4.0) - 4.0;
}

Waveform Amplitude and Frequency

Two important properties of a sound wave are the amplitude and frequency of the waveform: these dictate the volume and pitch of the sound, respectively. The amplitude is simply the absolute peak value of the waveform, and the frequency is the number of times the waveform is repeated per second which is normally measured in hertz (Hz).

The following image is a 200 millisecond snapshot of a sawtooth waveform with an amplitude of 0.5 and a frequency of 20 hertz:

To give you an idea of how the frequency of a waveform directly relates to the pitch of the audible sound, a waveform with a frequency of 440 hertz would produce the same pitch as the standard A4 note (middle A) on a modern concert piano. With that frequency in mind, we are able to calculate the frequency of any note by using the following code:

f = Math.pow( 2, n / 12 ) * 440.0;

The n variable in that code is the number of notes from A4 (middle A) to the note we are interested in. For example, to find the frequency of A5, one octave above A4, we would set the value of n to 12 because A5 is 12 notes above A4. To find the frequency of E2 we would set the value of n to -5 because E2 is 5 notes below A4. We can also do the reverse and find a note (relative to A4) for a given frequency:

n = Math.round( 12.0 * Math.log( f / 440.0 ) * Math.LOG2E );

The reason why these calculations work is because note frequencies are logarithmic – multiplying a frequency by two moves a note up a single octave, while dividing a frequency by two moves a note down a single octave.


Digital Sound Waves

In the digital world, sound waves need to be stored as binary data, and the common way of doing that is to take periodic snapshots (or samples) of a sound wave. The number of wave samples that are taken for each second of a sound’s duration is known as the sample rate, so a sound with a sample rate of 44100 will contain 44100 wave samples (per channel) for every second of the sound’s duration.

The following image demonstrates how a sound wave might be sampled:

The white blobs in that image represent the amplitude points of the wave that are sampled and stored in a digital format. You can think of this as the resolution of a bitmap image: the more pixels a bitmap image contains the more visual information it can hold, and more information results in bigger files (ignore file compression for now). The same is true for digital sounds: the more wave samples a sound file contains the more accurate the reconstructed sound wave will be.

As well as having a sample rate, digital sounds also have a bit rate which is measured in bits per second. The bit rate dictates how many binary bits are used to store each wave sample. This is similar to the number of bits used to store ARGB information for each pixel in a bitmap image. For example, a sound with a sample rate of 44100 and a bit rate of 705600 would be storing each of its wave samples as a 16-bit value, and we can calculate that easily enough using the following code:

bitsPerSample = bitRate / sampleRate;

Here is a working example using the values mentioned above:

trace( 705600 / 44100 ); // "16"

Understanding what sound samples are is the most important thing here; the audio engine that we will be creating will have to generate and manipulate raw sound samples.


Modulators

One more thing that we should be aware of before we start to program the audio engine are modulators, which are extremely common in both analog and digital synthesizers. A modulator is essentially just a standard waveform, but instead of being used to produce a sound they are commonly used to modulate one or more properties of an audible waveform (e.g. its amplitude or frequency).

Take vibrato, for example. Vibrato is a regular pulsating change of pitch. To produce that effect using a modulator you could set the modulator’s waveform to a sine wave, and set the modulator’s frequency to somewhere around 8 hertz. If you then hooked that modulator up to the frequency of an audible waveform the result would be a vibrato effect – the modulator would smoothly raise and lower the frequency (pitch) of the audible waveform eight times per second.

The audio engine that we will be creating will allow you to attach modulators to your sounds to allow you produce a vast number of different effects.


Coming Up…

In the next tutorial we will create the core code for the audio engine and get everything up and running. Follow us on Twitter, Facebook, or Google+ to keep up to date with the latest posts.

How Heavy Rain’s Narrative Is Strengthened by Its Gameplay

$
0
0

Heavy Rain received immense critical praise for being an experience that elevated video game storytelling to a new level. In this article, we’ll look at why that is and what we can learn from it.

Warning: Massive story spoilers for Heavy Rain follow.


“Narrative”?

Before we go into talking about Heavy Rain, we need to specify exactly what I mean by narrative, and specifically how it differs from plot.

There are many differing definitions and opinions online about what the two words mean (trust me, I looked) and there doesn’t seem to be a consensus about the exact difference. So, for this article, I’m taking what I found to be the most commonly used definition of these two words. In the end, it’s not important; what matters is that we have a good definition for the sake of this article.

Plot is simple: it refers to the sequence of events that occur throughout a story – the bullet points of the story, if you will. Narrative, on the other hand, refers to how the plot is told. This encompasses character development, atmosphere, emotional or moral subtext, and all the other fun stuff that make up a gripping story.


O Heavy Rain, Thy Narrative Is Sublime

Heavy Rain is often lauded as one of the heavy hitters of storytelling in the video game world. In fact, the game is often referred to not as a game, but as an interactive movie. This comparison stems from the hands-off nature of the game’s Quick Time Event-heavy gameplay, but it’s also due to claims that the game’s narrative being up to par with what is found in film.

I strongly disagree with that claim.

Heavy Rain may be akin to an interactive movie, but this movie can hardly be considered high quality. When judged under the same guidelines as a movie – that is, not taking its interactivity into account – Heavy Rain rates particularly badly for a number of reasons.

Firstly, though they are technically impressive, the performances of the virtual actors are not up to par with what you would expect in a good film. The potential is there for future greatness, but the technology in Heavy Rain creates virtual renditions of actors which unfortunately do not even remotely compare to the rich and subtle performances that real actors give in quality cinema.


It wasn’t perfect in Heavy Rain, but Quantic Dream is making huge progress with virtual acting.

To the game’s credit, this quality gap is surprisingly small for most of the leading roles, but many secondary characters unfortunately deliver lackluster performances. For whatever reason, children in particular suffer this fate, with many of the virtual kids landing firmly in the uncanny valley.

Also, at least in the English version of the game that I played, Heavy Rain is riddled with weird accents, even in some of the main roles. The game’s French origins can clearly be heard with some obviously non-French characters having French accents, and a few of the fake American accents are cringeworthy.


See what I mean about the accents?

Secondly, Heavy Rain provides weak motivation for the protagonist’s actions. The entire story is centered around a father trying to save his son, but the child in question is only briefly seen in the game. The non-presence of this kid, as well as the aforementioned uncanny valley creepiness when he is present, means the narrative does very little to make the viewer/player sympathize with the plight of the main characters. Instead, it relies on simply telling them that they should care and hoping that’s good enough. This is not good storytelling.

Finally, the very plot of the game itself is far from great, with some obvious plot holes and a lackluster twist ending. The fact that Ethan Mars (the father of the aforementioned son) constantly wakes up from his blackouts with an origami figure in his hand (the sign left on victims of the Origami Killer, the game’s primary villain) serves as an effective red herring, but is never explained.


Why do I always wake up with paper in my hands?

Plot holes are not unusual in stories, but this one is absolutely enormous and the coherence of the game’s plot is really hurt by it. Also, the detective turning out to be the killer is not a creative or unique idea by any stretch of the imagination.


No, Seriously, It Is a Sublime Narrative

Anybody who has played through Heavy Rain will have read the last section and acknowledged that everything written there was true, but also that everything written there absolutely doesn’t matter at all. If you’ve played Heavy Rain, you know it has an incredibly engrossing narrative, and one that you’d judge to be on par or even better than many movies. This is because you don’t watch Heavy Rain, you play it – and this changes everything.

First of all, being in control of a character – in essence being that character – adds significant weight to any decision that character makes while not under your control.

Heavy Rain is a game all about multiple perspectives; there are four main characters you control throughout the game, and the way the different perspectives intersect is the backbone of the storyline. Apart from simply being a cool way to tell a story, this perspective switching, coupled with the fact that you determine the actions of these four characters, really helps the plot feel more interesting than it actually is.

The best example of this is in the ending: more specifically in the aforementioned plot twist. The detective actually turning out to be the killer, as I said before, is not exactly a new idea in storytelling, and normally wouldn’t elicit much shock or interest. However, in Heavy Rain, the impact of this revelation is enormous, because for a big portion of the game, you were the detective.

Being a detective, your role when playing this character is typically to investigate the various murders the Origami Killer has committed. Out of all the characters, the detective does the most obvious work towards trying to solve the mystery behind the crimes, and all this is done under your control. What you don’t see or control, however, is the time when the detective is actually doing anything related to being the Origami Killer.


Playing the game, you’d never suspect this guy is the killer.

This massive disconnect between the way you see the detective behave and the way he behaves off-camera is made much more shocking because of the fact that you were controlling his actions when he was on camera. Rather than this revelation feeling like a simple misdirection based on showing only a part of a character’s life as it would in a film, it comes off feeling like a betrayal on the part of the detective, which is a much more powerful emotion. The fact that you can then kill the detective, a character which mere moments ago represented yourself, while under control of another character, makes all of this even more potent.

Second, knowing that things could have gone differently, or that the player can affect how they will unfold in the future adds suspense and drama to the narrative that otherwise wouldn’t have been there.

Choice

Heavy Rain is a video game, not a movie, and for this reason is an experience all about choice. Characters can live or they can die; mysteries can be solved or they can be left as eternal question marks; and love can be found or it can be lost, all based on how the player chooses to play the game. This, more than any other aspect of the game, excuses the limitations of the plot and elevates Heavy Rain into a new class of experience.

Unlike what one would expect, however, this doesn’t only matter in the context of how Heavy Rain managed to elevate branching storylines in games – it also matters on a moment-to-moment level. Knowing that the series of events you are experiencing is a direct result of the actions you took adds suspense in a way few movies ever could. Decisions seem like they have more weight, every bad thing that happens to the characters feels like a failure on your part, and every one of their victories feels like your victory.


It’s impressive that Heavy Rain can make deciding what to think about when you can’t sleep feel like an important decision.

Unfortunately, in the case of Heavy Rain, the system isn’t as open-ended as it originally seems, with many branching paths culminating into only a few different possible outcomes. But go through it only once, as it was intended to be played, and you’d never know. David Cage, the director of the game said this about the subject:

I would like people to play it once … because that’s life. Life you can only play once … I would like people to have this experience that way. [...] the right way to enjoy Heavy Rain is to really make one thing because it’s going to be your own story. It’s going to be unique to you. It’s really the story you decide to write … I think playing it several times is also a way to kill the magic of it.

All of this ties in perfectly with the third and one of the most interesting ways the gameplay in Heavy Rain strengthens the narrative. The inability for the player to fail or retry, even though getting desired story outcomes can be difficult adds tension to the narrative even in the most mundane of moments.

This idea isn’t new to video games; this basic principle is what drives the entire genre of permadeath roguelike. However in Heavy Rain, through attempting to tell a dramatic and suspenseful story, the effect is taken to new heights.

There’s a particular part right at the beginning of the game where you lose track of your son in a shopping mall and are tasked with frantically searching for him. For a video game, this is an incredibly lame sounding task, but is made much more tense by the fact that short of restarting your system before the game saves (don’t do that, that’s no fun) you only have one try to find this kid or he will be lost forever. This makes this moment really tense, and helps elevate the atmosphere of the narrative in a way that tense music and sad looking actors never could.


This is the only interesting way to watch this scene. Trust me though, it really is very tense when you actually play it.

In this particular instance, the kid will get hit by a car on the street and die no matter what you do, but as a player you don’t know that and it doesn’t affect the quality of the narrative. Of course, this example also serves to illustrate the last point about branching storylines sharing the same outcome, but it wouldn’t even have close to the same effect if the player were given the option to try again had they failed. The fact that some outcomes can be very difficult to achieve also adds greatly to this effect.


But I’m Making a Platformer…

So we know why Heavy Rain works, but what can we learn from it, and how can we apply this to our own games in other genres? Not every game can accommodate branching storylines (let alone the manpower for such a massive undertaking) and permadeath simply doesn’t work for many game genres.

These examples were specific to Heavy Rain, or any other game in the interactive movie genre (not a lot of those), but there is still one huge lesson we can learn from it that can be adapted to almost any genre: gameplay needs to work with and complement the narrative in order to elevate it to new heights.

This can be done in two primary ways: creating gameplay with narrative significance, or creating a narrative with gameplay significance. These are distinct options, and one of them is probably very feasible for most of us while the other is probably not.

Gameplay with narrative significance refers to any form of gameplay which has significance to the way the narrative plays out: Heavy Rain, Mass Effect, or any other game with a branching storyline. For lots of genres, and for almost any small-scale developer, this isn’t really an option. Doing this type of thing in a meaningful way often requires an amount of work that grows exponentially with the game’s length.

What can be achieved by most, however, is narrative with gameplay significance: narrative that has significance to the way the gameplay plays out. Basically, this means a narrative that affects or explains the way the game plays.

The most obvious example of this type of thing is seen in many games which have a themed respawn system, such as the New-U Stations and Vita Chambers in Borderlands and BioShock respectively. It may be a small touch, but having something as inherently incongruous with tension in combat as unlimited lives be explained through the narrative really helps the world seem more alive and real, versus simply having respawns or checkpoints act as a shadow clouding an otherwise sensible story.


The simplest things can make all the difference.

Another game that does this in an interesting way is Bastion. Aside from being entirely narrated, Bastion has one other cool little case of narrative with gameplay significance. Near the end of the game, you are tasked with saving a certain character who is wounded in battle. If you chose to save him, you are forced to carry him through the rest of the level unable to use your weapons, changing the game’s focus from shooting to dodging for a little while. This is a great example of gameplay and narrative working together to create an experience that makes sense narratively but is also fun to play.

In the end, video games are interactive experiences, and this allows for the exploration of a whole new realm of storytelling: merging the interactive with the predetermined nature of traditional storytelling. There’s a lot that can be done in this space, and only a few games, Heavy Rain included, have really scratched the surface of what is possible. Get cracking, we’ve got a lot of work to do.

Constraints Are an Essential Aspect of Game Development

$
0
0

When you’re asked to tackle a game development project you want to have as much freedom as possible, a generous budget, long development times and a big team. That would be a dream scenario, right? …Actually, no, not really. In this article I’ll share my thoughts on why working under limitations often proves to be the best way to develop games.


Constraints Stimulate Creative Thinking

Developing a game essentially means tackling a lot of problems and challenges. As game developers we overcome the issues, addressing them with familiar solutions based on our previous experiences, on what has worked well for us in the past. Although this is a great way to get things done, having that much freedom ends up discouraging new and creative ways of solving those problems.

I think frugality drives innovation, just like other constraints do. One of the only ways to get out of a tight box is to invent your way out. – Jeff Bezos

Now, let’s examine the most constrained environment that a game developer can experience: a game jam.


Getting Out of Your Comfort Zone

constraints game development

A picture I took during the 2010 global game jam in Bogotá, Colombia

A game jam is all about getting out of your comfort zone and being creative. There’s a plethora of jams that you might want to participate in, such as the Global Game Jam and Ludum Dare among many others.

Generally, all game jams follow guidelines and constraints such as:

  • Theme: This is always the main limitation, and is often revealed at the start of the event. All games made during the jam must be based on this theme.
  • Time: You have only (say) 48 hours to create a game; this forces the team to come up with a plan and stick to it throughout the event.
  • Team: Some game jams encourage people to create teams on the fly, so you will have to juggle each person’s strengths and weaknesses.
  • Tools: This refers to the different types of software that might be available for participants; some game jams may focus on 2D games, some on 3D games. You will have to adapt.

These constraints force teams to rapidly prototype game designs and become familiar with limitations and scenarios found in bigger, more complex projects.


Additional Constraints

As if four constraints weren’t enough, in some game jams you can add even more to the challenge. I’m going to take as an example three of the 2011 Global Game Jam diversifiers – voluntary constraints that you can use to further experiment with new ideas and concepts.

  • Automated Development: All game assets (art, sound, levels, and so on) are procedurally generated.
  • constraints game development

    Image from (an archive of) .kkrieger’s site

    This constraint is based around the computer art subculture demoscene which specializes in procedurally generated graphics and music. One of the best examples of a game done under this parameters is .kkrieger, a 3D game that weighs just 96k.

  • Back to School, OLD School: The game must have a screen resolution of 160×144, be restricted to a color palette of four shades of the same color, and take up just 1MB or less.
  • constraints game development
    Screenshot from Legend of Zelda: Link’s Awakening

    Nowadays, if I asked game developers to make an engaging game with a resolution of 160×144, some of them would think it’s impossible. Well, guess what: a whole generation of game developers managed. This constraint is based on the technical limitations of the Nintendo Game Boy.

  • One Hit Wonder: The game can only be played once (per computer or per IP address, as appropriate).
  • constraints game development
    Screenshot of Execution from TIGdb

    Execution is a very small and experimental game with a very strong lesson. The game implements a interesting, out of the box idea clearly showing what constraints are all about.

    When you take a look at the previous diversifiers and the games inspired by them, you can grasp how much constraints can help in creative endeavors.

    Tip: Even if you’re not participating in a game jam, I encourage you to make a weekend project based on one of the Global Game Jam diversifiers as a creative exercise


    What Happens Without Constraints

    constraints game development

    So far, we’ve seen the marvels of constraints, but you might be curious about the other side of the coin: what if there are no constraints when developing a game?

    Well… I’ve got bad news.

    Daikatana

    constraints game development
    Image from CDAccess.com

    Daikatana was a game created by John Romero, one of the co-founders of id Software (creators of the Wolfenstein, Doom and Quake series). In 1997 Romero enjoyed fame and fortune and decided it was time to make his dream game come true. He designed the game with great amounts of content in mind, more than 20 levels and plenty of weapons and monsters, with no limitations in budget, team or time. Initially he planned only seven months of development – but following multiple reschedules, changes in game engine technologies and code rewrites, the game ended up being released after three years.

    Duke Nukem Forever

    constraints game development

    After the success of Duke Nukem 3D in the 90s, its creator George Broussard was ready to make a sequel called Duke Nukem Forever, it was promised to be an industry game changer but it only became the best example of vaporware.

    Initially announced in April 1997, the game was expected to release a year later, but constant changes in game engine technology made Broussard change his mind multiple times while trying to develop the best looking game he could. Duke Nukem Forever ended up being released 15 years later, in 2011.

    The Lesson

    There are common points between the mistakes made during the development of this two games. First, both Romero and Broussard were perfectionists in a constantly changing industry, and trying to catch up with the latest in technology proved to be a fatal mistake. Second, there were no constraints whatsoever. Having this kind of freedom becomes a hindrance for game development.

    The stories behind the development of this games is fascinating, if you want to read more about them I recommend the following articles: Knee Deep in a Dream – The Story of Daikatana and Learn to Let Go: How Success Killed Duke Nukem.

    A Glimpse at the Past, Present and Future

    The foundation of the videogame industry is made of games developed in times of great limitations. The NES, an incredibly limited console by today’s standards, single handedly saved the video game industry in 1985.

    constraints game development
    Screenshot from Super Mario Bros.

    It’s a great exercise to play 8-bit games, you can get a sense of what can be accomplished using the least amount of resources. In the above screenshot of Super Mario Bros. you can see that the clouds and the bushes use the same sprite due to the NES technical limitations.

    A couple of years ago, making a game independently was considered very difficult – almost impossible. Licensing a game engine was very expensive, and even if you did, it was hard to distribute the game once it was done.

    Today we’re experiencing the democratization of game development technologies. With affordable (or even free) game engines like Unity, Game Maker and UDK, we have access to the same tools the AAA game industry uses, albeit with a different scope.

    Having access to AAA tools doesn’t mean you should try to make the next Call of Duty, and this is exactly where independent games shine. If you’re wondering why there is a Halo 4, a Grand Theft Auto 5 and a Call of Duty 9, is because the AAA industry is afraid of taking risks; they will keep sticking to the same formulas until they cease to make money. But being an independent game developer means that you can experiment with new ideas without being afraid.

    The last sequel is the one that fails to do money – Cliff Bleszinski

    The future looks very bright for independent game developers. More powerful tools are becoming available at affordable prices and digital distribution channels such as Steam Greenlight are opening new and interesting paths.


    Final Thoughts

    Constraints can act as a catalyst for innovation, experimentation and creativity. Don’t get caught in the habit of solving problems using known methods, get out of your comfort zone and start using constraints to your advantage. Your game could be the next Minecraft…

    Thanks for reading!


Quick Tip: The OOP Principle of Cohesion

$
0
0
This entry is part 2 of 2 in the series Beginner's Guide to OOP

In the first post of this series, we discussed why object-oriented programming (OOP) was helpful for game development, and learned how to identify objects, their states, and their behaviors. In this article, we’ll look at the specific OOP principle of cohesion and how it applies to games.

Note: Although this tutorial is written using Java, you should be able to use the same techniques and concepts in almost any game development environment.


What Is Cohesion?

Cohesion is the principle of being or doing one thing well. In other words, cohesion means grouping together code that contributes to a single task.

A great non-programming example of this principle was covered in one of the first Gamedevtuts+ articles which talked about the Covert Action Rule:

Don’t try to do too many games in one package … Individually, those each could have been good games. Together, they fought with each other.

The same rule applies to object-oriented programming. Each object should only have one responsibility. Every behavior of that object should only do one task. Any more than that and you’ll have a much harder time making changes to the code.


Why Is It Helpful?

Code that is organized by functionality and does only one task is said to have high cohesion. Highly cohesive code is reusable, simple, and easy to understand. It also creates objects that are small and focused.

Code that is organized arbitrarily and has multiple tasks is said to have low cohesion. Such code is difficult to understand, maintain, and reuse, and is often complex. It also creates objects that are large and unfocused.

Having high cohesion is generally good, while having low cohesion is generally bad. When writing code, always strive to write highly cohesive code.


How to Apply It

So how do we apply this to object-oriented programming? Well for starters, organizing code into objects helps increase cohesion of the game in general. However, each individual object should also have high cohesion. Let’s refer back to our three examples to see how this works.

Asteroids

Recall from the last article that we defined the ship object as having behaviors of turning, moving, and firing.

If we were to write a single piece of code that did all three behaviors at once, it would get pretty messy. Instead, we should separate each behavior into what are known as functions. Functions allow us to separate functionality and group similar code together, thus helping to create highly cohesive code.

In programming, an object is defined by creating a class. In Java, a class is coded as follows:

/**
* The Ship Class
*/
public class Ship {
  /**
   * Function – performs the behavior (task) of turning the Ship
   */
  public void rotate() {
    // Code that turns the ship
  }
  /**
   * Function – performs the behavior (task) of moving the Ship
   */
  public void move() {
    // Code that moves the ship
  }
  /**
   * Function – performs the behavior (task) of firing the Ship's gun
   */
  public void fire() {
    // Code that makes the ship fire a bullet
  }
}

As you can see, each behavior gets its own function, and the code is pretty well organized just in this skeleton structure.

Don’t worry too much about the exact syntax just yet; we’ll discuss it in more detail as we get further along in the series.

Tetris

For Tetris, recall that the behaviors of a tetromino were falling, moving (sideways), and rotating. The basic class structure is as follows:

/**
* The Tetromino Class
*/
public class Tetromino {
  /**
   * Function – update a Tetromino's position
   */
  public void fall() {
    // Code that updates the Tetromino's position
  }
  /**
   * Function - move a Tetromino
   */
  public void move() {
    // Code that moves the Tetromino sideways
  }
  /**
   * Function – rotate a Tetromino
   */
  public void rotate() {
    // Code that rotates the Tetromino by 90 degrees
  }
}

Again, the behaviors are separated into their own functions. For the fall method, though, notice that the task is to update the tetromino’s position. This is because the tetromino is always falling, so we can’t just make the task “cause the tetromino to fall”.

Instead, a falling tetromino just moves down the screen a certain number of rows at a time – so we have to update the position of the tetromino to reflect this falling speed.

Pac-Man

For the ghost object with behaviors of moving and changing state, we have to do a bit more work to get it to be highly cohesive.

/**
* The Ghost Class
*/
public class Ghost {
  /**
   * Function – moves the Ghost
   */
  public void move() {
    // Code that moves the ghost in the current direction
  }
  /**
   * Function - change Ghost direction
   */
  public void changeDirection() {
    // Code that changes the Ghost's direction
  }
  /**
   * Function – change Ghost speed
   */
  public void changeSpeed() {
    // Code that changes the Ghost's speed
  }
  /**
   * Function – change Ghost color
   */
  public void changeColor() {
    // Code that changes the Ghost's color
  }
  /**
   * Function – change Ghost state
   */
  public void changeState() {
    // Code that changes the Ghost's state
    // This function also will call the three functions of changeDirection, changeSpeed, and changeColor
  }
}

The Ghost state has three extra functions added to it: changeDirection, changeColor, and changeSpeed. These weren’t in our original behavior list because they aren’t behaviors. Instead, these functions are what are known as helper functions and are there to help us maintain high cohesion.

The behavior of changing state (what happens when Pac-Man eats a power pellet) requires three different tasks to be performed: turn deep blue, reverse direction, and move more slowly. To maintain cohesion, we don’t want one function to do all three of these tasks, so we divide them up into three subtasks that the function will call upon to complete its one main task.

The use of the word and when describing what a behavior/function does usually means we should create more than one function.


Conclusion

Cohesion is the principle of grouping like code together and ensure each function performs only a single task. Cohesion helps to create code that is maintainable and reusable.

In the next Quick Tip, we’ll discuss the principle of coupling and how it relates to cohesion. Follow us on Twitter, Facebook, or Google+ to keep up to date with the latest posts.

Grey – Post Mortem

$
0
0

Grey is a total conversion Half Life 2 horror mod three years in the making. The team has made a lot of changes to the base Source engine, adding countless new mechanics alongside new monsters, maps, weapons, and more.


Introduction

With Grey’s recent milestone of 100,000 downloads, both positive and negative news articles and reviews, and a history of three years of work on the mod we feel it is only appropriate to give fellow modders, indie developers, and interested fans of Grey a post mortem of the mod.

In this post mortem of Grey we will mostly cover what went wrong. Big and somewhat common mistakes we made that we feel will help other developers out there the most while making their own games. We will will also include some specific tips for this genre and game type.

If you wish to download Grey you can get it from: http://grey-mod.com/downloads. It required Half Life 2 and Half Life 2 Episode 2.


Balance

The Problems

When working on a mod for such a long time you quickly become desensitized to its difficulty. One of our developers could easily speedrun Grey in 30 minutes without even having to use a health kit. Other developers and friends usually finished within an hour or less on their re-tests with minimal health kit usage and plenty of ammo left at the end. None of us at the time felt there was a huge difficulty problem.

Early screenshot of Grey's Stats System showing a 30 minute Dev speedrun
Early screenshot of Grey’s Stats System showing a 30 minute Dev speedrun

Our testers for Grey were mainly friends of developers or friends of friends. All of them had one major problem in common for testing, though: they were experienced FPS players. This was probably our biggest mistake with testing. While these testers we brought in throughout random times along the development of Grey did initially have difficulty, most of them quickly learned ways to avoid monsters, how to kill without getting hurt, and where to find what they needed. Some even called it easy.

Because so many testers and developers found Grey easy during the development of the mod, there were many times we thought it would be a good idea to make it harder. This ended up being one of our largest downfalls. Enemies became bullet sponges (although this was later ‘fixed’ and rebalanced in 1.1) and health kits became scarce if you didn’t look for them. The result: many complained it was too hard on release.

Side note: Even with most complaining Grey was far too hard on release there were still quite a few experienced FPS players calling it too easy.

What We Did Right

One of the few major things all of us on the team agree we did right about balancing was to get our testers to record their playthroughs. Almost every single tester we used had the ability to record their playthrough with FRAPS or a similar program. After they finished Grey, we had them compress the videos the best they could and upload them to our private FTP. It was a huge help in the development of Grey to see exactly how players played and reacted their very first playthrough.

Screenshot of a tester with a moderate amount of health at this point in the game

What Have We Learned From This?

The biggest thing we have learned from our balancing mistake is that we need to get testers of every type. Having testers from both the bottom of the barrel in FPS skills and having those that know how to exploit every ‘feature’ of an engine to avoid dying will help greatly in balancing.

Testers should also not just be picked from the developers’ friends. Usually friends and even friends of friends will know how to play what you are creating. Get random testers from various players on the internet that may not even know how to exactly install a mod without a step-by-step guide. Get inexperienced players to see where it goes wrong with them. (But do be careful about leaks.)


Gameplay and Tip System

The Problems

Gameplay in Grey was meant to represent that found in many of the older Silent Hill games as well as many other popular horror games throughout the years. Grey was not meant to ever really be easy – and while we certainly achieved that it wasn’t in the way we wanted to.

One thing we noticed in many Let’s Plays we’ve watched of Grey after release is that players frequently don’t explore everywhere due to having low health which put them in a catch-22 of “I have low health so I don’t want to explore and die, but I won’t find health kits in side rooms because I can’t explore because I will die.”


Pewdiepie’s Let’s Play of the Grey series occasionally showing this dilemma

Health kits in Grey were rarely placed in direct sight or along the way of the ‘correct’ path. They were often in side rooms that served no purpose other than providing health, or in crates that caused players to rarely find them, making Grey much harder than it should have been. This of course made for poor gameplay and caused frequent deaths which just aren’t fun in a horror game.

Our tip system which did suggest for players to explore everywhere and break every crate didn’t contribute much to Grey either due to players reading the storyline between maps (which was added after the tips already existed) and ignoring the tip both pre-loading and post-loading. This lead to players not knowing that they really, really should be doing what these tips suggest as they never read it or paid attention to the importance of them.


Grey’s old loading screens mistakenly also gave much more importance to the story itself over the tips that should have been learned through gameplay anyway

What We Did Right

Grey filled the role of a simple puzzle-based horror shooter exactly how we wanted it to. Grey was never intended to have some advanced combat system or stat system that took hours of gameplay to learn like Dark Souls. Grey was simply a horror shooter intended to fill the void of lacking up-to-date horror games as well as to tell the story of previous mods released by Ashkandi. We feel we have accomplished this well and we feel it is reflected in both our current 8.4 rating on Mod DB and the reviews we have read of Grey.

An early bug with Grey's ragdolls that caused their polygons to stretch on death
An early bug with Grey’s ragdolls that caused their polygons to stretch on death

What Have We Learned From This?

We learned a version important lesson here, which every modder should know: when you add a feature to a game you should always introduce the concept by (usually) forcing the player to do it. Show them the result of it, then reinforce it later.

Players need to be alerted to these features ahead of time and know that they exist, as well as being encouraged to use them later on. Introducing a feature that is only used once, in that one specific spot you introduced it, is poor gameplay. On top of that, introducing a feature only to ignore it for the rest of the game until one specific spot later on is also really poor gameplay.

Crates in Grey often blended in with the environment and gave no indication to if they had items contained in them or not. Sometimes you could break 15 crates and get nothing, but then have 3 items in a row.
Crates in Grey often blended in with the environment and gave no indication of whether they contained items or not. Sometimes you could break 15 crates and get nothing, but then find three items in a row.

Release Date, Timing, and Hype

The Problems

One of our biggest regrets with the release of the mod is releasing it so (relatively) close to the release of another popular horror mod. Grey was made with the idea that we would be filling a lack of horror mods at the current time.

Unfortunately our release date ending up timing not-so-well with another release of a horror mod on a similar engine. This caused many comparisons between the two mods, even in areas where their genres were not intended to overlap.


Wireframe, lighting, and textured screenshots of Grey’s development

What We Did Right

We believe that the biggest thing that helped Grey get as many downloads and popularity (short-lived or not) that it did was the reviews we did as well as the preview copies of the game we sent out to RPS and other sites, and the Let’s Players on YouTube. By doing this we got many fans of the mod that didn’t even know how to install a mod prior to this. We even had people asking us what Steam was because they wanted to play Grey but had never played a mod before.

Big thanks to the guys over at Beefjack, Mod DB, and RPS, as well as our Let’s Players on YouTube, for helping Grey get as popular as it has.

What Have We Learned From This?

With the release of Grey we have learned that sometimes it may be a better idea to delay a game if you feel that its current genre is over-saturated.

Do note that this is not always the best thing to do though. While it may help to avoid releasing at a similar time as another game with a similar genre, if they do establish their player base well before you you may not be able to catch up and compete. While it would not have been as big of a problem if there had been a few years between the release of other mods such as Nightmare House 2 and Cry of Fear, releasing Grey so quickly after these put us in the position of being heavily compared to – even in areas where we never intended to be similar and areas that weren’t similar to begin with – due to players liking one gameplay idea more or less than another.

Screenshots of some of Grey's completed levels and areas

Screenshots of some of Grey’s completed levels and areas

Conclusion

Thanks for reading our Grey Post Mortem! We hope this will help other modders in their future work as we know we have learned quite a lot from our own release. Feel free to leave a comment and maybe tell us what you’d like to see us discuss later.

Next: If you enjoyed this post, check out our other post mortems!

Noise: Creating a Synthesizer for Retro Sound Effects – Core Engine

$
0
0
This entry is part 2 of 2 in the series Noise: Creating a Synthesizer for Retro Sound Effects

This is the second in a series of tutorials in which we will create a synthesizer based audio engine that can generate sounds for retro-styled games. The audio engine will generate all of the sounds at runtime without the need for any external dependencies such as MP3 files or WAV files. The end result will be a working library that can be dropped effortlessly into your games.

If you have not already read the first tutorial in this series, you should do that before continuing.

The programming language used in this tutorial is ActionScript 3.0 but the techniques and concepts used can easily be translated into any other programming language that provides a low-level sound API.

You should make sure you have Flash Player 11.4 or higher installed for your browser if you want to use the interactive examples in this tutorial.


Audio Engine Demo

By the end of this tutorial all of the core code required for the audio engine will have been completed. The following is a simple demonstration of the audio engine in action.

Only one sound is being played in that demonstration, but the frequency of the sound is being randomised along with its release time. The sound also has a modulator attached to it to produce the vibrato effect (modulate the sound’s amplitude) and the frequency of the modulator is also being randomised.


AudioWaveform Class

The first class that we will create will simply hold constant values for the waveforms that the audio engine will use to generate the audible sounds.

Start by creating a new class package called noise, and then add the following class to that package:

package noise {
	public final class AudioWaveform {
		static public const PULSE:int    = 0;
		static public const SAWTOOTH:int = 1;
		static public const SINE:int     = 2;
		static public const TRIANGLE:int = 3;
	}
}

We will also add a static public method to the class that can be used to validate a waveform value, the method will return true or false to indicate whether or not the waveform value is valid.

static public function validate( waveform:int ):Boolean {
	if( waveform == PULSE    ) return true;
	if( waveform == SAWTOOTH ) return true;
	if( waveform == SINE     ) return true;
	if( waveform == TRIANGLE ) return true;
	return false;
}

Finally, we should prevent the class from being instantiated because there is no reason for anyone to create instances of this class. We can do this within the class constructor:

public function AudioWaveform() {
	throw new Error( "AudioWaveform class cannot be instantiated" );
}

This class is now complete.

Preventing enum-style classes, all-static classes, and singleton classes from being directly instantiated is a good thing to do because these types of class should not be instantiated; there is no reason to instantiate them. Programming languages such as Java do this automatically for most of these class types but currently in ActionScript 3.0 we need to enforce this behaviour manually within the class constructor.


Audio Class

Next on the list is the Audio class. This class in similar in nature to the native ActionScript 3.0 Sound class: every audio engine sound will be represented by an Audio class instance.

Add the following barebones class to the noise package:

package noise {
	public class Audio {
		public function Audio() {}
	}
}

The first things that need to be added to the class are properties that will tell the audio engine how to generate the sound wave whenever the sound is played. These properties include the type of waveform used by the sound, the frequency and amplitude of the waveform, the duration of the sound, and its release time (how quickly it fades out). All of these properties will be private and accessed via getters/setters:

private var m_waveform:int     = AudioWaveform.PULSE;
private var m_frequency:Number = 100.0;
private var m_amplitude:Number = 0.5;
private var m_duration:Number  = 0.2;
private var m_release:Number   = 0.2;

As you can see, we have set a sensible default value for each property. The amplitude is a value in the range 0.0 to 1.0, the frequency is in hertz, and the duration and release times are in seconds.

We also need to add two more private properties for the modulators that can be attached to the sound; again these properties will be accessed via getters/setters:

private var m_frequencyModulator:AudioModulator = null;
private var m_amplitudeModulator:AudioModulator = null;

Finally, the Audio class will contain a few internal properties that will only be accessed by the AudioEngine class (we will create that class shortly). These properties do not need to be hidden behind getters/setters:

internal var position:Number         = 0.0;
internal var playing:Boolean         = false;
internal var releasing:Boolean       = false;
internal var samples:Vector.<Number> = null;

The position is in seconds and it allows the AudioEngine class to keep track of the sound’s position while the sound is playing, this is needed to calculate the waveform sound samples for the sound. The playing and releasing properties tell the AudioEngine what state the sound is in, and the samples property is a reference to the cached waveform samples that the sound is using. The use of these properties will become clear when we create the AudioEngine class.

To finish the Audio class we need to add the getters/setters:

Audio.waveform

public final function get waveform():int {
	return m_waveform;
}
public final function set waveform( value:int ):void {
	if( AudioWaveform.isValid( value ) == false ) {
		return;
	}
	switch( value ) {
		case AudioWaveform.PULSE:    samples = AudioEngine.PULSE;    break;
		case AudioWaveform.SAWTOOTH: samples = AudioEngine.SAWTOOTH; break;
		case AudioWaveform.SINE:     samples = AudioEngine.SINE;     break;
		case AudioWaveform.TRIANGLE: samples = AudioEngine.TRIANGLE; break;
	}
	m_waveform = value;
}

Audio.frequency

[Inline]
public final function get frequency():Number {
	return m_frequency;
}
public final function set frequency( value:Number ):void {
	// clamp the frequency to the range 1.0 - 14080.0
	m_frequency = value < 1.0 ? 1.0 : value > 14080.0 ? 14080.0 : value;
}

Audio.amplitude

[Inline]
public final function get amplitude():Number {
	return m_amplitude;
}
public final function set amplitude( value:Number ):void {
	// clamp the amplitude to the range 0.0 - 1.0
	m_amplitude = value < 0.0 ? 0.0 : value > 1.0 ? 1.0 : value;
}

Audio.duration

[Inline]
public final function get duration():Number {
	return m_duration;
}
public final function set duration( value:Number ):void {
	// clamp the duration to the range 0.0 - 60.0
	m_duration = value < 0.0 ? 0.0 : value > 60.0 ? 60.0 : value;
}

Audio.release

[Inline]
public final function get release():Number {
	return m_release;
}
public function set release( value:Number ):void {
	// clamp the release time to the range 0.0 - 10.0
	m_release = value < 0.0 ? 0.0 : value > 10.0 ? 10.0 : value;
}

Audio.frequencyModulator

[Inline]
public final function get frequencyModulator():AudioModulator {
	return m_frequencyModulator;
}
public final function set frequencyModulator( value:AudioModulator ):void {
	m_frequencyModulator = value;
}

Audio.amplitudeModulator

[Inline]
public final function get amplitudeModulator():AudioModulator {
	return m_amplitudeModulator;
}
public final function set amplitudeModulator( value:AudioModulator ):void {
	m_amplitudeModulator = value;
}

You no doubt noticed the [Inline] metadata tag bound to a few of the getter functions. That metadata tag is a shiny new feature of Adobe’s latest ActionScript 3.0 Compiler and it does what says on the tin: it inlines (expands) the contents of a function. This is extremely useful for optimisation when used sensibly, and generating dynamic audio at runtime is certainly something that requires optimisation.


AudioModulator Class

The purpose of the AudioModulator is to allow the amplitude and frequency of Audio instances to be modulated to create useful and crazy sound effects. Modulators are actually similar to Audio instances, they have a waveform, an amplitude, and frequency, but they don’t actually produce any audible sound they only modify audible sounds.

First thing first, create the following barebones class in the noise package:

package noise {
	public class AudioModulator {
		public function AudioModulator() {}
	}
}

Now let’s add the private private properties:

private var m_waveform:int            = AudioWaveform.SINE;
private var m_frequency:Number        = 4.0;
private var m_amplitude:Number        = 1.0;
private var m_shift:Number            = 0.0;
private var m_samples:Vector.<Number> = null;

If you are thinking this looks very similar to the Audio class then you are correct: everything except for the shift property is the same.

To understand what the shift property does, think of one of the basic waveforms that the audio engine is using (pulse, sawtooth, sine, or triangle) and then imagine a vertical line running straight through the waveform at any position you like. The horizontal position of that vertical line would be the shift value; its a value in the range 0.0 to 1.0 that tells the modulator where to begin reading it’s waveform from and in turn can have a profound affect on the modifications the modulator makes to a sound’s amplitude or frequency.

As an example, if the modulator was using a sine waveform to modulate the frequency of a sound, and the shift was set at 0.0, the sound’s frequency would first rise and then fall due to the curvature of the sine wave. However, if the shift was set at 0.5 the sound’s frequency would first fall and then rise.

Anyway, back to the code. The AudioModulator contains one internal method that is only used by the AudioEngine; the method is as follows:

[Inline]
internal final function process( time:Number ):Number {
	var p:int    = 0;
	var s:Number = 0.0;
	if( m_shift != 0.0 ) {
		time += ( 1.0 / m_frequency ) * m_shift;
	}
	p = ( 44100 * m_frequency * time ) % 44100;
	s = m_samples[p];
	return s * m_amplitude;
}

That function is inlined because it is used a lot, and when I say “a lot” I mean 44100 times a second for each sound that is playing that has a modulator attached to it (this is where inlining becomes incredibly valuable). The function simply grabs a sound sample from the waveform the modulator is using, adjusts that sample’s amplitude, and then returns the result.

To finish the AudioModulator class we need to add the getters/setters:

AudioModulator.waveform

public function get waveform():int {
	return m_waveform;
}
public function set waveform( value:int ):void {
	if( AudioWaveform.isValid( value ) == false ) {
		return;
	}
	switch( value ) {
		case AudioWaveform.PULSE:    m_samples = AudioEngine.PULSE;    break;
		case AudioWaveform.SAWTOOTH: m_samples = AudioEngine.SAWTOOTH; break;
		case AudioWaveform.SINE:     m_samples = AudioEngine.SINE;     break;
		case AudioWaveform.TRIANGLE: m_samples = AudioEngine.TRIANGLE; break;
	}
	m_waveform = value;
}

AudioModulator.frequency

public function get frequency():Number {
	return m_frequency;
}
public function set frequency( value:Number ):void {
	// clamp the frequency to the range 0.01 - 100.0
	m_frequency = value < 0.01 ? 0.01 : value > 100.0 ? 100.0 : value;
}

AudioModulator.amplitude

public function get amplitude():Number {
	return m_amplitude;
}
public function set amplitude( value:Number ):void {
	// clamp the amplitude to the range 0.0 - 8000.0
	m_amplitude = value < 0.0 ? 0.0 : value > 8000.0 ? 8000.0 : value;
}

AudioModulator.shift

public function get shift():Number {
	return m_shift;
}
public function set shift( value:Number ):void {
	// clamp the shift to the range 0.0 - 1.0
	m_shift = value < 0.0 ? 0.0 : value > 1.0 ? 1.0 : value;
}

And that wraps up the AudioModulator class.


AudioEngine Class

Now for the big one: the AudioEngine class. This is an all-static class and manages pretty much everything related to Audio instances and sound generation.

Let’s start with a barebones class in the noise package as usual:

package noise {
	import flash.events.SampleDataEvent;
	import flash.media.Sound;
	import flash.media.SoundChannel;
	import flash.utils.ByteArray;
	//
	public final class AudioEngine {
		public function AudioEngine() {
			throw new Error( "AudioEngine class cannot be instantiated" );
		}
	}
}

As mentioned before, all-static classes should not be instantiated, hence the exception that is thrown in the class constructor if someone does try to instantiate the class. The class is also final because there’s no reason to extend an all-static class.

The first things that will be added to this class are internal constants. These constants will be used to cache the samples for each of the four waveforms that the audio engine is using. Each cache contains 44,100 samples which equates to one hertz waveforms. This allows the audio engine to produce really clean low frequency sound waves.

The constants are as follows:

static internal const PULSE:Vector.<Number>    = new Vector.<Number>( 44100 );
static internal const SAWTOOTH:Vector.<Number> = new Vector.<Number>( 44100 );
static internal const SINE:Vector.<Number>     = new Vector.<Number>( 44100 );
static internal const TRIANGLE:Vector.<Number> = new Vector.<Number>( 44100 );

There are also two private constants used by the class:

static private const BUFFER_SIZE:int    = 2048;
static private const SAMPLE_TIME:Number = 1.0 / 44100.0;

The BUFFER_SIZE is the number of sound samples that will be passed to the ActionScript 3.0 sound API whenever a request for sound samples is made. This is the smallest number of samples allowed and it results in the lowest possible sound latency. The number of samples could be increased to reduce CPU usage but that would increase the sound latency. The SAMPLE_TIME is the duration of a single sound sample, in seconds.

And now for the private variables:

static private var m_position:Number            = 0.0;
static private var m_amplitude:Number           = 0.5;
static private var m_soundStream:Sound          = null;
static private var m_soundChannel:SoundChannel  = null;
static private var m_audioList:Vector.<Audio>   = new Vector.<Audio>();
static private var m_sampleList:Vector.<Number> = new Vector.<Number>( BUFFER_SIZE );
  • The m_position is used to keep track of the sound stream time, in seconds.
  • The m_amplitude is a global secondary amplitude for all of the Audio instances that are playing.
  • The m_soundStream and m_soundChannel shouldn’t need any explanation.
  • The m_audioList contains references to any Audio instances that are playing.
  • The m_sampleList is a temporary buffer used to store sound samples when they are requested by the ActionScript 3.0 sound API.

Now, we need to initialize the class. There are numerous ways of doing this but I prefer something nice and simple, a static class constructor:

static private function $AudioEngine():void {
	var i:int    = 0;
	var n:int    = 44100;
	var p:Number = 0.0;
	//
	while( i < n ) {
		p = i / n;
		SINE[i] = Math.sin( Math.PI * 2.0 * p );
		PULSE[i] = p < 0.5 ? 1.0 : -1.0;
		SAWTOOTH[i] = p < 0.5 ? p * 2.0 : p * 2.0 - 2.0;
		TRIANGLE[i] = p < 0.25 ? p * 4.0 : p < 0.75 ? 2.0 - p * 4.0 : p * 4.0 - 4.0;
		i++;
	}
	//
	m_soundStream = new Sound();
	m_soundStream.addEventListener( SampleDataEvent.SAMPLE_DATA, onSampleData );
	m_soundChannel = m_soundStream.play();
}
$AudioEngine();

If you have read the previous tutorial in this series then you will probably see what’s happening in that code: the samples for each of the four waveforms are being generated and cached, and this only happens once. The sound stream is also being instantiated and started and will run continuously until the app is terminated.

The AudioEngine class has three public methods that are used to play and stop Audio instances:

AudioEngine.play()

static public function play( audio:Audio ):void {
	if( audio.playing == false ) {
		m_audioList.push( audio );
	}
	// this allows us to know exactly when the sound was started
	audio.position  = m_position - ( m_soundChannel.position * 0.001 );
	audio.playing   = true;
	audio.releasing = false;
}

AudioEngine.stop()

static public function stop( audio:Audio, allowRelease:Boolean = true ):void {
	if( audio.playing == false ) {
		// the sound isn't playing
		return;
	}
	if( allowRelease ) {
		// skip to the end of the sound and flag it as releasing
		audio.position  = audio.duration;
		audio.releasing = true;
		return;
	}
	audio.playing   = false;
	audio.releasing = false;
}

AudioEngine.stopAll()

static public function stopAll( allowRelease:Boolean = true ):void {
	var i:int   = 0;
	var n:int   = m_audioList.length;
	var o:Audio = null;
	//
	if( allowRelease ) {
		while( i < n ) {
			o           = m_audioList[i];
			o.position  = o.duration;
			o.releasing = true;
			i++;
		}
		return;
	}
	while( i < n ) {
		o           = m_audioList[i];
		o.playing   = false;
		o.releasing = false;
		i++;
	}
}

And here come the main audio processing methods, both of which are private:

AudioEngine.onSampleData()

static private function onSampleData( event:SampleDataEvent ):void {
	var i:int       = 0;
	var n:int       = BUFFER_SIZE;
	var s:Number    = 0.0;
	var b:ByteArray = event.data;
	//
	if( m_soundChannel == null ) {
		while( i < n ) {
			b.writeFloat( 0.0 );
			b.writeFloat( 0.0 );
			i++;
		}
		return;
	}
	//
	generateSamples();
	//
	while( i < n ) {
		s = m_sampleList[i] * m_amplitude;
		b.writeFloat( s );
		b.writeFloat( s );
		m_sampleList[i] = 0.0;
		i++;
	}
	//
	m_position = m_soundChannel.position * 0.001;
}

So, in the first if statement we are checking if the m_soundChannel is still null, and we need to do that because the SAMPLE_DATA event is dispatched as soon as the m_soundStream.play() method is invoked, and before the method gets a chance to return a SoundChannel instance.

The while loop rolls through the sound samples that have been requested by m_soundStream and writes them to the provided ByteArray instance. The sound samples are generated by the following method:

AudioEngine.generateSamples()

static private function generateSamples():void {
	var i:int    = 0;
	var n:int    = m_audioList.length;
	var j:int    = 0;
	var k:int    = BUFFER_SIZE;
	var p:int    = 0;
	var f:Number = 0.0;
	var a:Number = 0.0;
	var s:Number = 0.0;
	var o:Audio  = null;
	// roll through the audio instances
	while( i < n ) {
		o = m_audioList[i];
		//
		if( o.playing == false ) {
			// the audio instance has stopped completely
			m_audioList.splice( i, 1 );
			n--;
			continue;
		}
		//
		j = 0;
		// generate and buffer the sound samples
		while( j < k ) {
			if( o.position < 0.0 ) {
				// the audio instance hasn't started playing yet
				o.position += SAMPLE_TIME;
				j++;
				continue;
			}
			if( o.position >= o.duration ) {
				if( o.position >= o.duration + o.release ) {
					// the audio instance has stopped
					o.playing = false;
					j++;
					continue;
				}
				// the audio instance is releasing
				o.releasing = true;
			}
			// grab the audio instance's frequency and amplitude
			f = o.frequency;
			a = o.amplitude;
			//
			if( o.frequencyModulator != null ) {
				// modulate the frequency
				f += o.frequencyModulator.process( o.position );
			}
			//
			if( o.amplitudeModulator != null ) {
				// modulate the amplitude
				a += o.amplitudeModulator.process( o.position );
			}
			// calculate the position within the waveform cache
			p = ( 44100 * f * o.position ) % 44100;
			// grab the waveform sample
			s = o.samples[p];
			//
			if( o.releasing ) {
				// calculate the fade-out amplitude for the sample
				s *= 1.0 - ( ( o.position - o.duration ) / o.release );
			}
			// add the sample to the buffer
			m_sampleList[j] += s * a;
			// update the audio instance's position
			o.position += SAMPLE_TIME;
			j++;
		}
		i++;
	}
}

Finally, to finish things off, we need to add the getter/setter for the private m_amplitude variable:

static public function get amplitude():Number {
	return m_amplitude;
}
static public function set amplitude( value:Number ):void {
	// clamp the amplitude to the range 0.0 - 1.0
	m_amplitude = value < 0.0 ? 0.0 : value > 1.0 ? 1.0 : value;
}

And now I need a break!


Coming Up…

In the third and final tutorial in the series we will be adding audio processors the to audio engine. These will allow us to push all of the generated sound samples though processing units such as hard limiters and delays. We will also be taking a look at all of the code to see if anything can be optimised.

All of the source code for this tutorial series will be made available with the next tutorial.

Follow us on Twitter, Facebook, or Google+ to keep up to date with the latest posts.

Best of Tuts+ in October 2012

$
0
0

Each month, we bring together a selection of the best tutorials and articles from across the whole Tuts+ network. Whether you’d like to read the top posts from your favourite site, or would like to start learning something completely new, this is the best place to start!


Psdtuts+ — Photoshop Tutorials


Nettuts+ — Web Development Tutorials

  • Meet Bower: A Package Manager For The Web

    Meet Bower: A Package Manager For The Web

    As the web platform has matured, the tools for managing our projects, too, have matured. In this tutorial, I’ll introduce you to one of these tools that makes managing the dependencies of your project considerably easier: Bower.

    Visit Article

  • Make JavaScript Testing Fun With Testem

    Make JavaScript Testing Fun With Testem

    JavaScript testing is a sensitive subject. Some developers are huge advocates of it (including myself), while others don’t see the need or benefit. One huge barrier is the simple fact that it can sometimes take a considerable amount of setup to get up and running. The longer it takes, the more likely it is that the developer simply won’t bother. That’s why Testem is so fantastic; it makes testing as effortless as possible, and, more importantly, fun!

    Visit Article

  • Test Driven PHP Session

    Let’s be honest: the PHP community hasn’t been as quick to the test-driven development scene as other communities, such as those around the Ruby and Python languages. We hope to help change that on Nettuts+! In this session, you’ll learn both why and how to test-drive your applications using the fantastic PHPUnit. Ready?

    Visit Article


Vectortuts+ — Illustrator Tutorials

  • Stop Making Bad Logos

    Stop Making Bad Logos

    There’s article after article on websites that talk bout how to make a great logo. But If you’re a logo machine, and you’ve been doing it for a long time, chances are that you’ve developed some pretty awful habits. How do I know this? Because I suffered from some of the same habits I’m about to talk about. A true master of logo creation will refine their work on every project, forcing themselves to get better with each design. It all boils down to a few key things to avoid when you’re creating a logo. While you can take a stab at selling generic logos on places like GraphicRiver, you’ll do your best work when you deeply understand your clients and their company.

    Visit Article

  • How to Create a Self Portrait in a Geometric Style

    How to Create a Self Portrait in a Geometric Style

    In this tutorial we are going to talk about how to create an illustrated self portrait in a geometric based style. We are going to work from a photograph of ourselves as the base of the illustration, then drawing the sketch and to the final piece, so lets get started.

    Visit Article

  • Creating Paisley Graphic Styles with Scatter Brushes and Recolor Artwork

    Creating Paisley Graphic Styles with Scatter Brushes and Recolor Artwork

    In today’s tutorial I’m going to show you how to create a series of Paisley inspired Graphic Styles using Scatter Brushes and the Appearance panel. Once done, I’ll show you how to create additional styles simply by using Recolor Artwork. This is a great tutorial for beginners as there is no Pen Tool (P) involved. So let’s begin!

    Visit Article


Webdesigntuts+ — Web Design Tutorials


Phototuts+ — Photography Tutorials

  • How to Make Fantastically Fun Jack ‘O Lantern Photos

    How to Make Fantastically Fun Jack ‘O Lantern Photos

    “Trick or treat!” Halloween is knocking on the door. It is a very popular holiday in many countries. It brings the spirit of mystic, fear, magic and fairy. Halloween can be a great inspiration for shooting some beautiful lights -” all those jack-o-lanterns and candles.

    Visit Article

  • How to Create a Sense of Depth to Your Photos

    How to Create a Sense of Depth to Your Photos

    Today we will take a look at how to add some sense of depth to your photographs and thus make them become alive and more interesting to the viewer. By making use of some simple but very effective factors that can be applied at the time of exposure, you can make a your picture pop. Today, we’ll talk about perspective, depth of field, and framing.

    Visit Article

  • Dealing With Foliage: Green and Yellow Saturation

    Dealing With Foliage: Green and Yellow Saturation

    I’ve noticed around the internet that a great many people struggle with foliage. A large number of people don’t even seem to notice that there’s an issue, which is unfortunately falsely backed up by the legions of commenters trying to be nice rather than truthful. The problem persists for all levels of photographers, from year one amateurs to multi-year pros.

    Visit Article


Cgtuts+ — Computer Graphics Tutorials

  • Creating The iPhone 4S In 3D Studio Max, Part 4 Texturing & Rendering with V-Ray

    Creating The iPhone 4S In 3D Studio Max, Part 4 Texturing & Rendering with V-Ray

    In the fourth part of the iPhone series we’ll begin creating textures and the many shaders needed for our model. While most will be procedural materials, a few of the elements do require image based textures, so we’ll first tackle the uvmapping on these elements. We’ll then move on and construct a studio lighting rig using V-Ray lights and introduce image based lighting to the scene. Along the way we’ll rely heavily on the power of V-Ray’s RT engine to fine tune our materials, lighting and render settings to balance the scene and achieve the look we’re after for our final render.

    Visit Article

  • Creating an Ice Cream Bar Animation with Maya, RealFlow And AE – Part 1

    Creating an Ice Cream Bar Animation with Maya, RealFlow And AE – Part 1

    Hey folks, in this three part tutorial spanning both Cgtuts+ and Aetuts+, we are going to create liquid chocolate pouring over a branded ice cream bar. To achieve this we will use Maya for mashing and rendering. RealFlow for the chocolate simulation. And finally in After Effects we’ll create the chocolate chunks and glow streaks swoosh, as well as the final compositing.

    Visit Article

  • Create a High Impact Faux Energy Drink Ad with 3D Studio Max, Cinema 4D & AE – Tuts+ Premium

    Create a High Impact Faux Energy Drink Ad with 3D Studio Max, Cinema 4D & AE – Tuts+ Premium

    In this tutorial we are going to create from start to finish an interesting short four shot ad cut for a fake energy drink ’Envato Energy”. This will give you some guidance on how to create something similar for a real life project.

    Visit Article


Aetuts+ — After Effects Tutorials


Audiotuts+ — Audio & Production Tutorials

  • How to Enhance a Live, Out-of-the-Mixer Concert Recording

    How to Enhance a Live, Out-of-the-Mixer Concert Recording

    I was playing at a concert recently where I had the fortune on getting my hands on a 2-track recording out of the FOH mixer. I playing at a festival and all the stages recorded the acts, giving them a CD at the end of their set. Usually, a recording such as this is done straight out of the L/R OUT of the mixer. All the channels of the mixer are fed to the stereo out that’s fed into a stereo recorder. The recording is then burned onto a CD for the bands to listen to.

    Visit Article

  • Essential Subtractive Synthesis: Envelopes

    Essential Subtractive Synthesis: Envelopes

    This is a series of basic synthesis workshops. We assume you’re not entirely new to synthesizers, but you’re not an expert either. Today we look at envelopes.

    Visit Article

  • Essential Listening – Getting Critical

    Essential Listening – Getting Critical

    Welcome back for another round of Essential Listening. Last time we took a look at some of the big albums of all time and how the mixes were so different, but at the same time all great. And while we will certainly revisit looking at some classic songs and albums from an engineering standpoint down the road, today is all about improving your critical listening skills.

    Visit Article


Wptuts+ — WordPress Tutorials

  • WANTED: WordPress Professionals With a Passion for Education. Enquire Within.

    WANTED: WordPress Professionals With a Passion for Education. Enquire Within.

    Are you an experienced WordPress professional with a desire to educate others on standards and best practices? If so, we’d like to speak with you about writing for Wptuts+ 1-4 times per month. We’d like you to submit at least one article a month, and you’re free to choose your topics, as long as they appeal to our audience. This is a paid job. If you’re interesting in helping educate others in The WordPress Way, read on.

    Visit Article

  • Building a Simple Announcements Plugin for WordPress

    Building a Simple Announcements Plugin for WordPress

    Let’s say that you’re a launching new product, giving away freebies or organizing an event. How do you deliver the message to your readers? Popular choice is to display a modal dialog in a lightbox, thus forcing the user to take notice. But there’s another, less obtrusive, yet still effective way, to get a user’s attention. In this tutorial we’ll be creating a plugin that displays custom site-wide announcements across the top of the page, with the ability to schedule messages to appear between two given dates.

    Visit Article

  • The Beginner’s Guide to WordPress Actions and Filters

    The Beginner’s Guide to WordPress Actions and Filters

    When it comes to professional WordPress development, it’s imperative that developers understand both actions and filters – that is, it’s important to understand WordPress hooks.

    Visit Article


Mobiletuts+ — Mobile Development Tutorials


Gamedevtuts+ — Game Development

  • Create a Glowing, Flowing Lava River Using Bézier Curves and Shaders

    Create a Glowing, Flowing Lava River Using Bézier Curves and Shaders

    Most of the time, using conventional graphic techniques is the right way to go. Sometimes, though, experimentation and creativity at the fundamental levels of an effect can be beneficial to the style of the game, making it stand out more. In this tutorial I’m going to show you how to create an animated 2D lava river using Bézier curves, custom textured geometry and vertex shaders.

    Visit Article

  • How to Learn Unity

    How to Learn Unity

    Unity is a feature rich, fully integrated development engine for the creation of interactive 3D content. You want to make 3D games? Unity’s got you covered. In this article we’ll share books, tutorials and suggestions for getting to grips with Unity.

    Visit Article

  • How Heavy Rain’s Narrative Is Strengthened by Its Gameplay

    How Heavy Rain’s Narrative Is Strengthened by Its Gameplay

    Heavy Rain received immense critical praise for being an experience that elevated video game storytelling to a new level. In this article, we’ll look at why that is and what we can learn from it.

    Visit Article


Mactuts+ — Mac & OS X

  • 5 Ways to Make Your Mac’s Desktop Better with GeekTool

    Ways to Make Your Mac’s Desktop Better with GeekTool

    GeekTool is an amazing free app that is a bit like Dashboard for the super nerdy. It allows you to place functional widgets, called “Geeklets,” right on top of your desktop, so you can always see them. Implementation can be a little tricky though so this tutorial will walk you through five different ways to use Geeklets to enhance your desktop experience.

    Visit Article

  • How to Set Up and Use VoIP on Your Mac

    How to Set Up and Use VoIP on Your Mac

    With the advent of faster broadband, the viability of using your data connection for voice communications has become increasingly reliable. VoIP has lower startup and ongoing costs than traditional, fixed-line telephones and has a wealth of flexible features that are often additional cost options from your dinosaur-era fixed-line phone network. If you are a freelancer, a business owner, or even just home user who requires a separate telephone from your home number, then VoIP is for you.

    Visit Article

  • Quick Tip: Trick Out Your Mac with Terminal

    Quick Tip: Trick Out Your Mac with Terminal

    The Mac OS X operating system is already really sleek, but we’re going to look at how to use terminal to activate some cool hidden settings that will make your Mac even better. The terminal tricks I’ll be showing you range from adding spaces to your dock to freeing your Dashboard widgets from the Dashboard. So let’s get started!

    Visit Article


FreelanceSwitch — Freelance Jobs & Information

  • How to Raise Your Freelance Pay Rates in the Next 60 Days

    Freelancers interested in earning big should always be looking for opportunities to raise rates. Luckily, if you’re reading this in the fall, you’re at one of the easiest times of year to get a raise.
    I’ll explain why in a minute.
    But first, let’s talk a little economic reality about why you need to get aggressive about asking for a raise.

    Visit Article

  • How to Set Up Your LinkedIn Profile: A Freelancer’s Guide

    LinkedIn makes sense for professionals, but what about for freelancers?
    In my experience, LinkedIn is an important tool in my marketing toolbox. Being on LinkedIn allows me to showcase my skills and experience. Additionally, LinkedIn is a networking platform, which makes it perfect for finding prospects, hooking up with new clients or reconnecting with past clients.

    Visit Article

  • How to Write an Effective Freelancer About Page

    The most visited page on most websites is the about page. That holds particularly true for freelancers — on my site, almost half of my visitors wind up there. That’s because a client looking to hire some help wants to know exactly who he’ll be working with.
    When he’s found you online, he’s not going to have a sense of who you are and why you’re worth your rates until he’s found out more. Your about page is the easiest way to do so.

    Visit Article

Announcing Crafttuts+: Teaching Everything Craft and Handmade!

$
0
0

We’re excited to let you know about the latest addition to the Tuts+ family — Crafttuts+!

Crafttuts+ is focused on teaching everything crafty — fundamental craft skills, decorations, ceramics, crochet, jewellery-making, embroidery, candles, paper-craft, knitting, woodwork, printmaking, as well as how to market, sell, and promote your craft work.

Whether you’ve never even wondered about your crafty side, or consider yourself an expert, we’ve got you covered! Keep reading to learn a little bit more about what we’ll be offering on the site…


It’s Craft, but Not as You Know It

It’s probably simplest to explain what you won’t find on Crafttuts+. We won’t be publishing half-baked tutorials with poor photography, incoherent steps, and mediocre outcomes. Nor will you find the type of craft projects that your nan might be interested in…

Crafttuts+ is all about teaching you how to embark on exciting craft projects that you’ll be desperate to try out. We’ll be publishing amazingly high-quality, clear, and visually impressive tutorials that are simple to follow. As well as fun one-off projects, we’ll have several sessions that take you through the basics of different types of craft — so you’ll have a solid place to start learning techniques to build upon later.

We’ll be publishing a combination of step-by-step written tutorials and screencasts/video lessons. In most weeks we’ll be publishing 4-5 high quality tutorials, so make sure to subscribe/follow Crafttuts+ below so you don’t miss a thing!


Find Crafttuts+ on Pinterest

Craftuts+ on PinterestWe’ll be making the most of Pinterest, and carefully curating our own set of boards to keep track of our favourite crafty projects and inspiration.

As well as sharing our latest tutorials on there, we’ll be highlighting the work of our authors, favourite crafters, and much more!

Just click below to follow Crafttuts+ on Pinterest, and keep up-to-date with the site:

Follow Me on Pinterest


Follow & Subscribe

Don’t forget to follow Crafttuts+ on Twitter, Pinterest, Facebook, and everywhere else! Here’s how to keep up to date with what’s going on:

Thanks for being part of the site, and we hope you’ll enjoy all the crafty projects we have lined up over the coming weeks!


Win $300 in Our Pinterest Competition

To celebrate the launch, we’re running a competition to win $300 to spend on craft supplies and goodies! Whether you’re in need of new crafty supplies, books, materials, or anything else, this is your chance to win a fantastic prize.

How to Enter

Viewing all 731 articles
Browse latest View live