Quantcast
Channel: Envato Tuts+ Game Development
Viewing all 728 articles
Browse latest View live

All About Karma: Decision Making and Morality in Games

$
0
0

As video games progress as an entertainment medium, they are becoming increasingly complicated. While there is still room for simple mechanic-driven games, there has been a noticeable trend in the industry towards expanding the narrative and emotional scope of video games. Many studios now use phrases like evolving narrative, dynamic choices, moral consequence and realistic character interactions as key pillars of their marketing campaigns.

But these aren't just empty marketing catchphrases; many games actually follow through with these promises, offering experiences that delight on both an emotional and narrative level. However, video games are still experiences driven by interactivity, and even the most compelling narratives must function within the confines of strictly defined gameplay systems.

In this article, we'll look at some of the various systems developers have used to allow player agency to affect their narratives, from various morality systems to more simple solutions. While most of these systems go beyond the scope of small team game development, understanding the pros and cons of their designs, and the trade-offs they make between simplicity and scope, can be useful to development at any scale.

Good vs Evil: The Infamous Series

At first glance, the Infamous games look like your typical fantasy open world fare: you are given control of a super-powered character and have an entire city to play around in. Unlike many open world games, however, the Infamous series aims to differentiate itself by presenting the player with a moral choice. Every game in the series shares the same central narrative theme: if you had superpowers, would you use them for good or for evil?

This karmic decision between good and evil lies at the center of the Infamous experience, with an ever-present good-vs-evil (hero-vs-infamous) slider representing a player's karmic alignment. Throughout each playthrough, the player is constantly presented with decisions which are explicitly stated by the game as being considered either good or evil, with each resulting in a slight shift toward either hero status or infamous status, respectively. 

However, this system only gives the illusion of choice; since the best and most interesting abilities can only be unlocked by becoming extremely good or extremely evil, it is in the player's best interest to pick an alignment at the beginning and stick with it until the end.
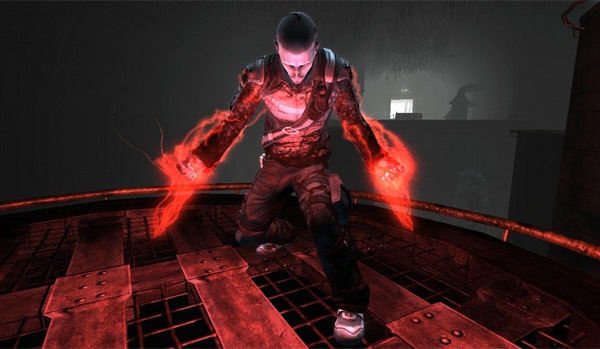
Looking wicked cool is always a benefit of being evil, as long as you don't mind the color red.

This type of purely binary system comes with one very clear advantage: each Infamous game is ostensibly two entirely separate experiences. With a modified story and set of powers, both the narrative and the gameplay are altered depending on the player's choice of morality. This encourages and almost demands multiple playthroughs, increasing the value of the game enormously. Even more importantly, this type of system allows developers to more easily create entirely distinct good and evil experiences.

Because players are committed to one path, there is less variation in possible player decisions, meaning drastically different content can be created for the two distinct play styles. Doing this would not be possible in a system with more varied player choices, due to the sheer volume of content creation required to cater to every possible scenario.

Unfortunately, this type of system also comes with a significant disadvantage: the player has virtually no impact on the story beyond their initial decision to be good or evil. Rather than presenting an evolving narrative with high player agency, this type of system is more akin to choosing which one of two separate video games to play. Though they are interesting when played side by side due their distinctiveness, each individual playthrough feels like a linear experience, devoid of any semblance of dynamic narrative or role playing. Depending on the type of game you wish to make, this may or may not be a deal breaker.

Good and Evil: The Mass Effect Series

The morality system used in the Mass Effect series is conceptually very similar to the one found in the Infamous games. Players are presented with opportunities to take both good and evil actions, and, depending on what choices they make, their character becomes slightly more good or evil. 

The key difference is that these alignments, known as paragon andrenegade, are measured separately on two independent scales, with the player gaining paragon points for good actions and renegade points for evil ones. This means that, unlike in the Infamous games, being good and evil are not mutually exclusive, with points towards renegade not removing points towards paragon and vice-versa.

Though a seemingly small change, this modification completely alters the core functioning of the experience. Though it is not possible to max out both the paragon and renegade bars, bonuses are tiered and mostly story-based, meaning that being purely good or evil is not necessarily better than having a more rounded moral disposition. Success in gameplay is therefore no longer tied to rigidly following a specific alignment, which truly opens up the decision making process.

With this more flexible system, players are given the freedom to make decisions based on their narrative implications, and this offers many benefits to the experience. Chief among these is the ability for the player to properly role-play and have an effect on the game's story in a way that feels organic. Because paragon and renegade points are measured independently, it becomes possible for a player to make some story-based decisions that are counter to their favored alignment, without the fear of ruining their chances for specific endings or bonuses based on morality.
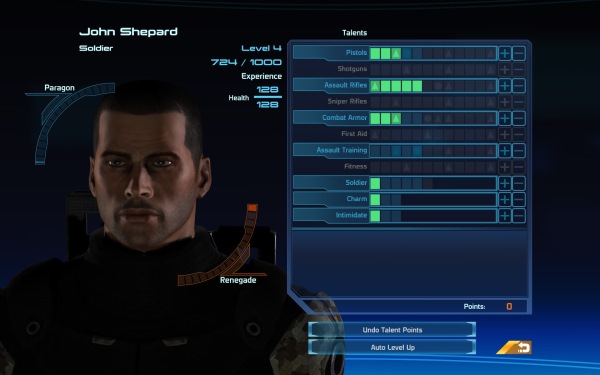
Check out how paragon and renegade occupy their own separate bars, I wasn't lying.

Though players are still likely to primarily follow one karmic path, the game's narrative is still made more engrossing, as players can evaluate the moral and narrative implications of each choice independently of the others. This is in stark contrast to the illusion of choice they have in Infamous's system, in which the player simply goes along with their initial decision even if they disagree with the outcome it presents.

However, this system is not perfect, and comes with one major shortcoming: pulling it off requires the creation of an enormous amount of content. Since players can not be expected to follow one of two specific series of decisions, the game must be able to create convincing scenarios for a wide range of possible story states.

It gets even harder: these various scenarios must link together into one cohesive narrative, to avoid the game feeling disjointed or its characters unrealistic. However, the developers must exercise caution, because if too little varied content is created and too many decisions link back to the same scenarios, this system can leave decisions feeling inconsequential. 

Although it is difficult to pull off, this system is truly effective in creating an open narrative while still giving players the ability to clearly chose between good and evil, a thematic element that many gamers enjoy.

Approval System: Dragon Age: Origins

This system, seen in Dragon Age: Origins, is interesting to look at because of how different it is from the more common karma systems seen in most games. Rather than measure the "righteousness" or "evilness" of your character, the approval system focuses entirely on the opinions your party members hold of you. There is no good-vs-evil slider, just independent approval ratings for each character in your party. These ratings can go from -100 to +100, expressing the character's level of dislike or admiration for the player respectively.

Approval ratings are important as they come with tangible gameplay bonuses and consequences: a high approval rating can mean an increase in stats for the party member, and when an approval rating reaches -100 there is a risk of the character no longer accepting your leadership and defecting from the party entirely. Perhaps even more significantly, approval ratings also have important narrative consequences: new dialogue options and even the chance for romance can result from high approval.
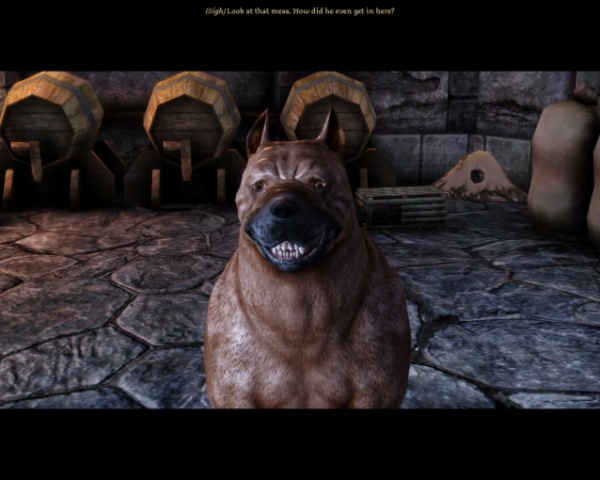
The only party member who will never leave your side, no matter what you do.

This system is particularly interesting because it allows players to distance themselves from choosing to play as a good or evil character, and instead opens up decision making to be more about individual characters' personalities, creating a more human and realistic approach to player choice. When faced with difficult scenarios, the player is encouraged to act according to the values of those surrounding them rather than some isolated moral predisposition they may have. This more closely emulates real human interaction, and the emotional impact of these decisions is thus greatly increased.

In addition, this system also greatly enriches the emotional significance of romantic relationships in the game. Since romance can only be achieved with a high enough approval rating, players must often make choices they don't agree with or even sometimes disappoint their most compatible party members in order to woo their desired lover. This is incredibly interesting from a story telling standpoint, and adds even more complexity to the role playing in the game.

The approval system doesn't have very many flaws; it is an extremely effective design for a gameplay system revolving around player choice and NPC approval. However, it is a very specific system that can't really be used outside of that gameplay style. In a game without party members, or a game more focused on the individual personality of the main character, this type of system would be impossible to properly implement. 

Although it may not be easily adapted into a personal project, the approval system is interesting to look at, as it provides a great example of how a rigid gameplay system can be used to create an experience with a dynamic narrative and emotional depth.

The Choice: Various

Here we have the choice, a very clever system implemented in a range of games. This system, if you can even call it that, is defined by a single decision making point that divides the rest of the game's narrative. In the case of most games employing the choice, this decision comes near or right at the end of the game, and offers the player a way to drastically alter the story's ending.

These types of decisions typically have extreme narrative significance—for example, saving or destroying the world, or killing off main characters. However, on a conceptual level, there is no reason these choices could not be more subtle.

The reason this technique is so clever lies in how incredibly lightweight it is, both from a design and implementation standpoint. Provided you place your narrative-altering decision right at the end of the game, very little additional content needs to be created to offer even a multitude of different endings. People tend to remember the end and beginning of things much better than they do the middle, and this means that even offering a single decision near the end of the experience can leave the player with a significant sense of involvement in the story.
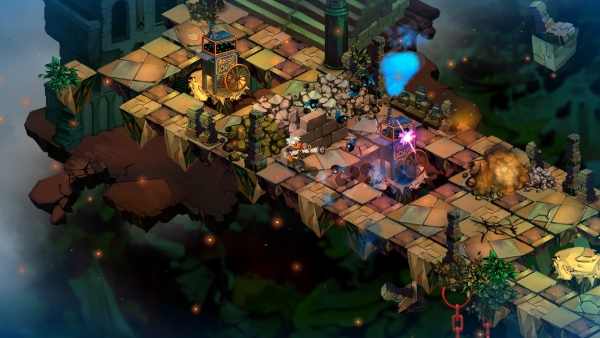
The choice usually takes place right at the end of the game, so to avoid any spoilers here's some pretty Bastion scenery.

Additionally, since so little content needs to be created, it is entirely reasonable to have these types of decisions lead to wildly different outcomes. This provides the ability to create sweeping narrative changes that can elicit strong emotional reactions in players—something that is much more difficult to do with choices that have a smaller narrative impact.

Unfortunately, this ease of implementation does come with some predictable drawbacks. Though it can trick players into leaving a game with the feeling that they affected the plot, their actual involvement in the story or on their character's development on a moment to moment basis is non-existent. This means that role playing isn't possible, and gameplay can't be affected by player choices, unlike traditional morality systems.

In fact, this technique doesn't even perform remotely the same type of function as the more complex systems we looked at earlier. However, in the right type of game, something simple like this can be hugely effective and even sometimes preferable to a more complicated solution. This is especially true for games made with a low budget and small teams, where creation of the content required to support other types of systems is often impossible.

Conclusion

Emotional and narrative depth are quickly becoming important facets of many different genres of video games. The systems we've looked at are only a few of the ways developers have tackled the issue of combining narrative freedom with traditionally rigid gameplay mechanics. None of these systems are perfect for every game, but understanding their core functioning and design philosophies should prove to be helpful if and when you decide to tackle this challenge in a game of your own.
Bone-Based Unity 2D Animation: Creating the Actual Animations

$
0
0

In this series, we're focusing on the bone-based 2D animation tools provided by the Unity engine. The main idea is to present and teach the fundamentals of 2D animation in order for you to apply it to your own games. In this tutorial, we'll add the idle, jump, and fall animations.

Before we start the tutorial, we would like to thank Chenguang (DragonBonesTeam) for providing us with the game art used to produce this tutorial series.

Where We Left Off

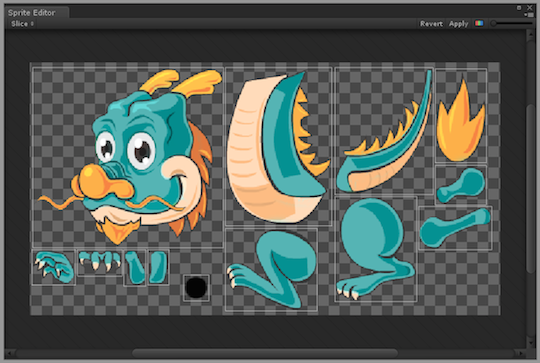
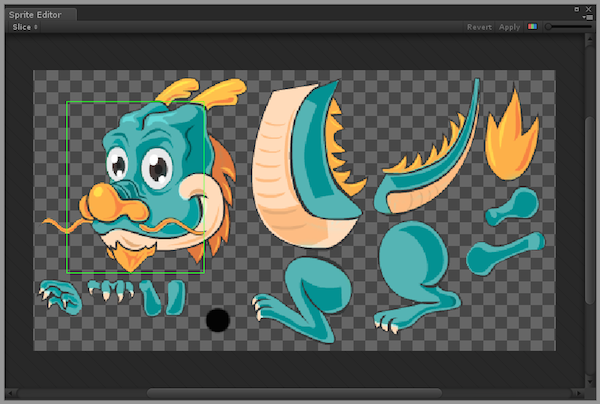
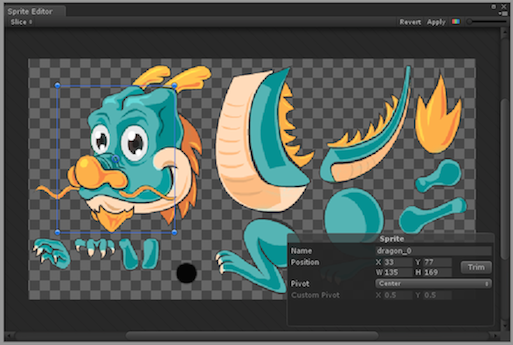
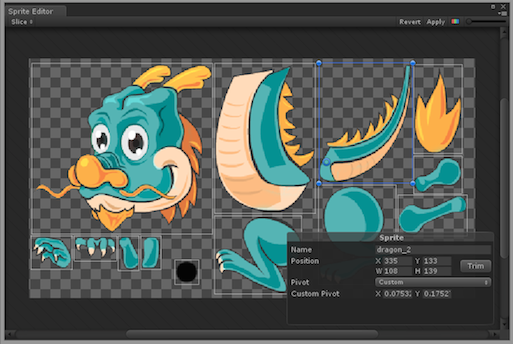
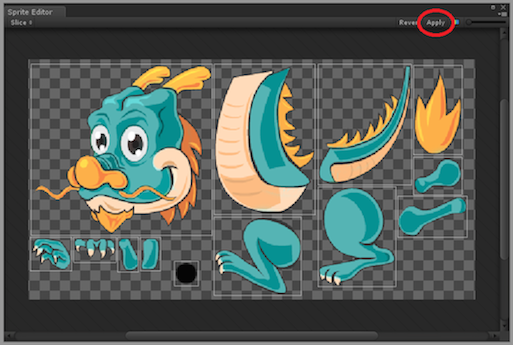
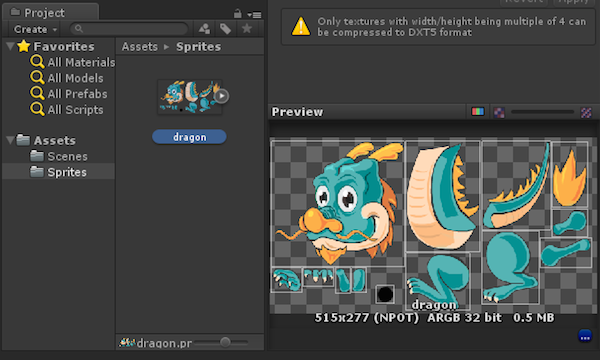
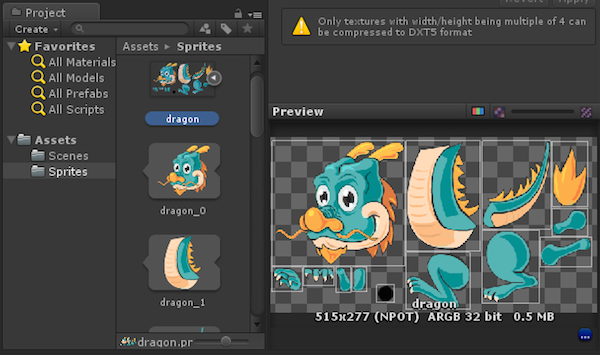
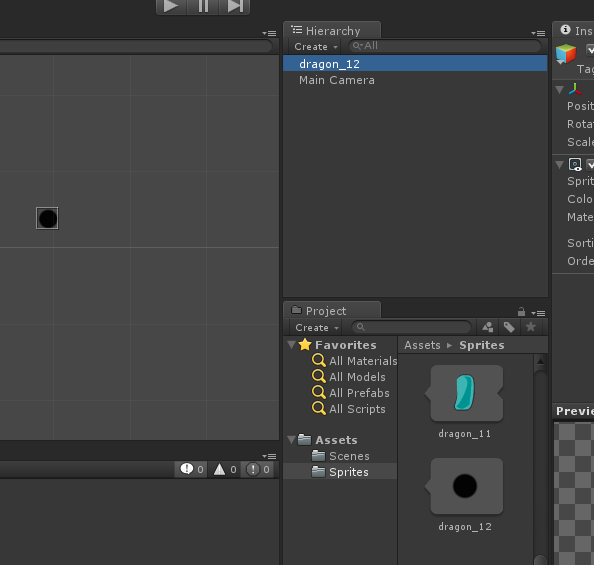
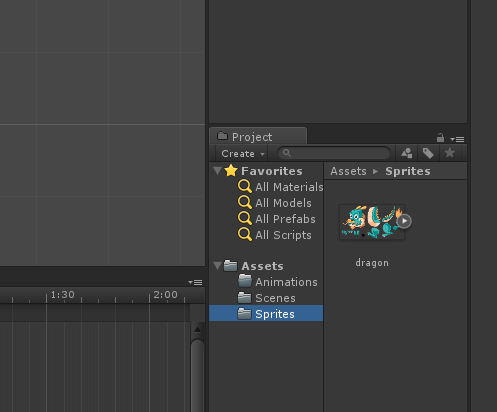
In the previous tutorial, we imported a 2D sprite representing the game character, sliced it with the Unity Sprite Editor, and constructed the base of the character. If you haven't completed the previous tutorial we strongly recommend that you do so, since you are going to need the 2D character in order to follow this tutorial.

Final Preview

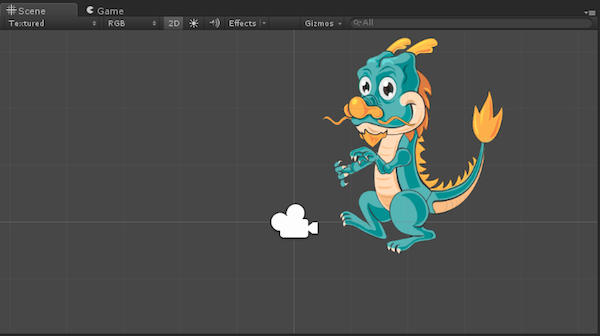
This demo shows the animated dragon we're aiming for—hit Space to make it jump:

General Animation Theory

There are several important concepts that you need to keep in mind while animating. For the purpose of this tutorial, we will assume that you have no experience with animation (2D or 3D), and that you've never worked with animation software before.

Animation, as we know it, has evolved from paint to digital. There are dozens of hybrid animation techniques, but all of those share the same base principles, like lip-syncing, squash or walking cycles.

In order to understand animation, you must first learn the concept of a frame. A frame is one of many still images that compose an animation. If you pause a cartoon, the image that your TV shows would be of a single frame.

The main difference between traditional animation and computer animation lies in the tools used. Traditional animation is a very hands-on process, where the artists would have to draw or compose thousands of individual frames. Computer animation removes the need for many tools and, generally, simplifies the whole process. 

For example, whereas with traditional animation the artist would have to draw almost every single frame of an animation, with computer animation the artist can use what we call key frame points. These key frame points, as the name specifies, are key stages of the animation. Basically, the artist creates those key frame points, and the computer interpolates between them to create the missing frames. As you can imagine, this type of process is much less labor-intensive.

You can define a key frame as a single still image in an animated sequence that takes place at an important point in that sequence. A good example would be in an animation of rock falling: the original position of the rock in the air would be a key frame, and the end position of the rock on the ground would be another. The computer would then generate all the other frames. We call the frames between key frames tweened frames, and they are the responsible for creating the illusion of motion.

The frame can also be used as a unit of time. For example, you can say that an animation lasts 20 frames. The real duration of any animation depends of the frame rate, which can vary with the format of the animation. In North America and Japan the standard is 30 frames per second (fps), while across the rest of the world the standard is usually 25 fps.

Animations

Since you now know the basics of animation and computer animation specifically, let's now return to Unity to start animating our character.

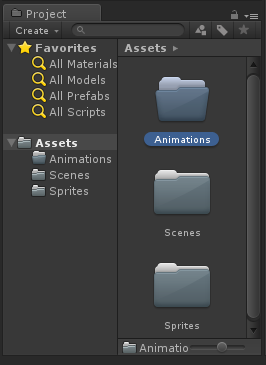
The first step is to create a folder in the Assets directory called animations, in which you will save your characters' animations.

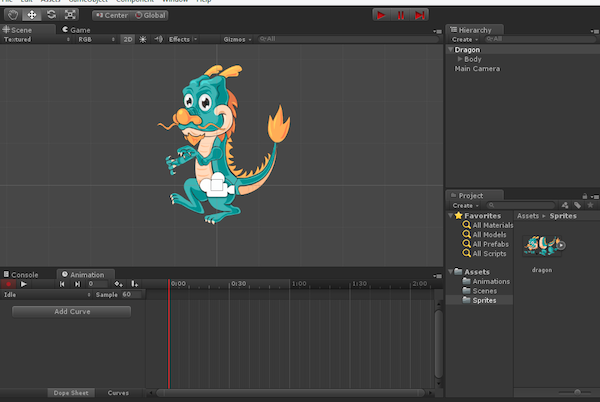
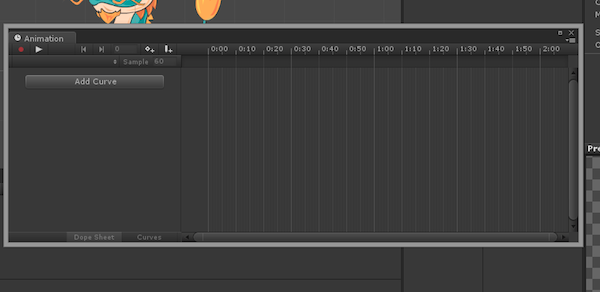
Next, open the Animation panel in Unity (Window > Animation):

As you can see, the panel contains a horizontal time line, a record button, a play button, and a couple of buttons for navigating through the frames. 

Grab the Animation window and dock it next to the Console tab (note that you are using the 2D layout created in the Unity 2D Arkanoid tutorial). This way, you can work on your scene with the animation panel still open.

Idle Animation

You will create three different animations for the dragon: an idle animation, a jump animation, and a fall animation. 

To create the first animation, select the Dragon game object and click Add Curve on the Animation panel. A new window will ask you to name the animation file and the destination folder to save it in. Unity animation files have .anim extension, and you will save them in the Animations folder you created earlier. Create the Idle.anim file.

As you may notice, once you save the file, several things change in the editor layout:

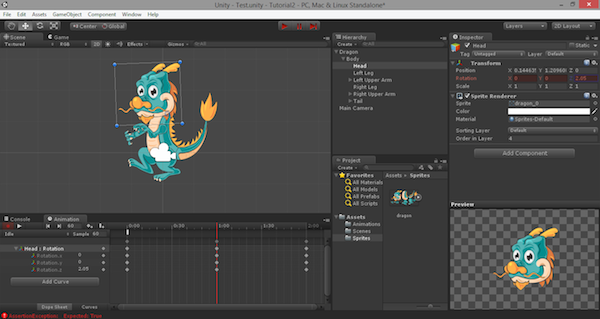
If you take a look at the play buttons at the top of your scene, you will notice that they have become red. In the Animation panel the record button is now red too, and you'll see a red line across the timeline. This means you are in record mode. Also, if you look at the Inspector, you will see that Unity has automatically added a new component to your game object: the Animator.

The Animator component is a reference to an Animator Controller that is used to set up behavior on a character. This includes a setup for State Machines, Blend Trees and events that can be controlled by script. Basically, the Animator is the link between the character and its behaviour.

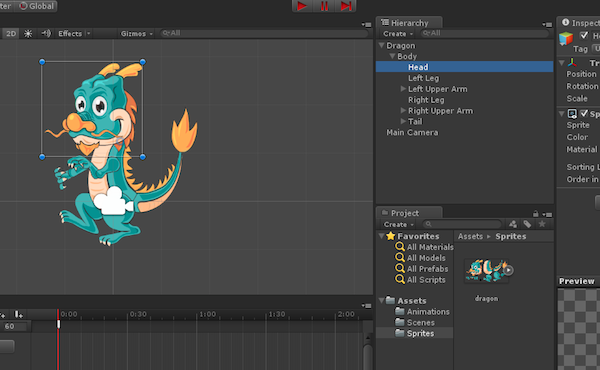
We will cover the Animator component with more depth later; for now, let's just focus on the animation. In your Dragon game object, select the Head:

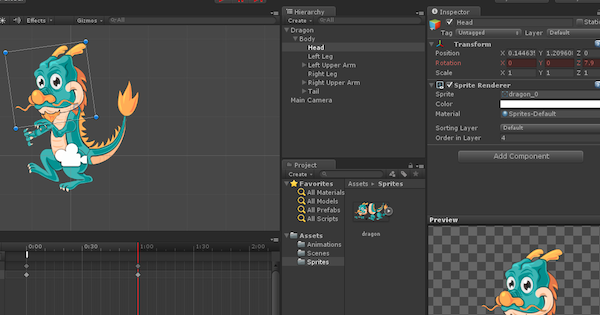
On the Animation time-line, drag the red line to 1:00 (one minute in).

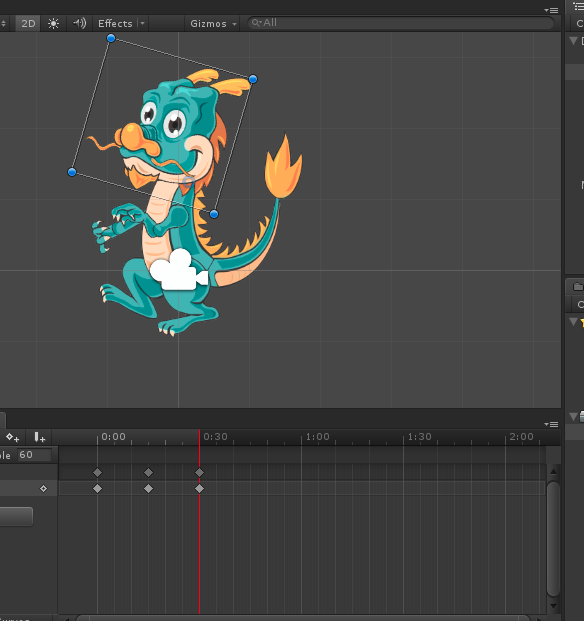
Now, on the Inspector, set the Z Rotation to 7.9. As you may notice, you now have some small shapes on your timeline. These marks indicate the key frames of the animation.

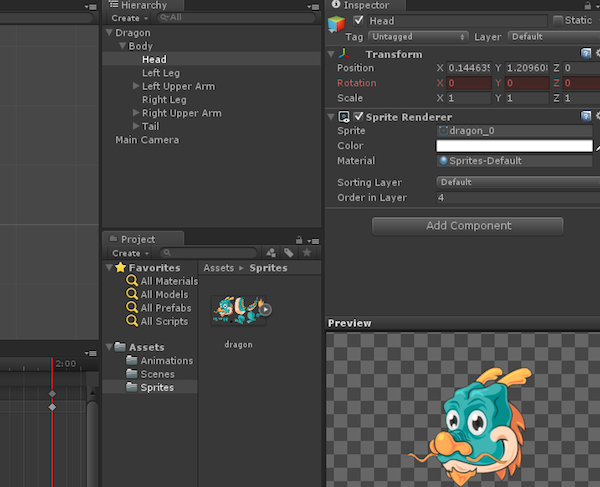
Move the red line to 2:00 and set the Z Rotation of the head to 0.

Press the record button again to deactivate the record mode. You can now press the play button to test your animation. If everything worked, the head of your dragon should be bobbing up and down.

Adjusting the Animation

The dragon head seems to be rotating a bit too much. Since we just want a little nod, we need to edit the animation. 

Turn the record mode on again by pressing the button, and move the red line to 1:00 minute. Alter the Z Rotation value to 2.05.

Press the record button to exit record mode and test the animation again. 

As you can see, to edit an animation, you just need to select the desired key frame and change it. If you need to change the timing of an animation—for example if the animation is too fast or too slow—you can drag the mark in the timeline to the desired frame.

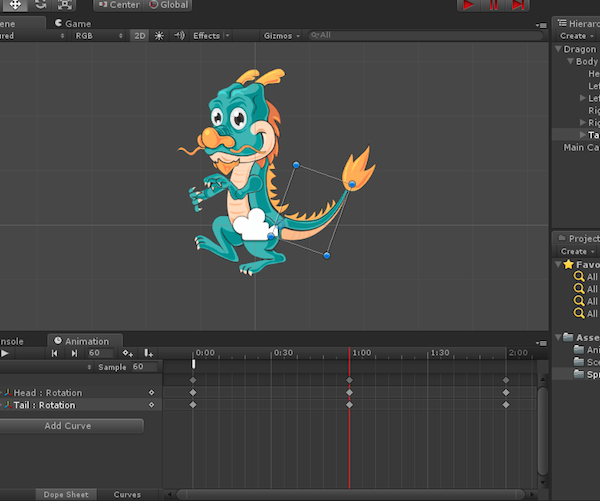
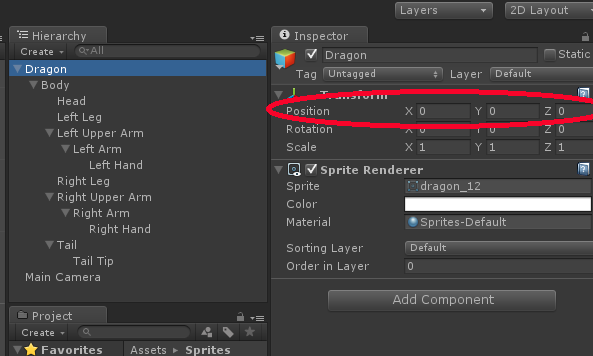
Okay, now you have the head animated, but you want to animate the entire body. Since you built your character as a hierarchy instead of isolated game objects, you don't need to create a single animation for each part of the body; instead, just hit the button marked Add Curve and select a different body part. Click the button and select the dragon's tail.

Try to make the tail go up and down. Just like you did before, use the Z Rotation axis and the timeline between zero and two minutes. 

Thanks to the hierarchy you created, when you move the tail the engine automatically moves the tip as well. However, you can also animate the tip individually if you select it.

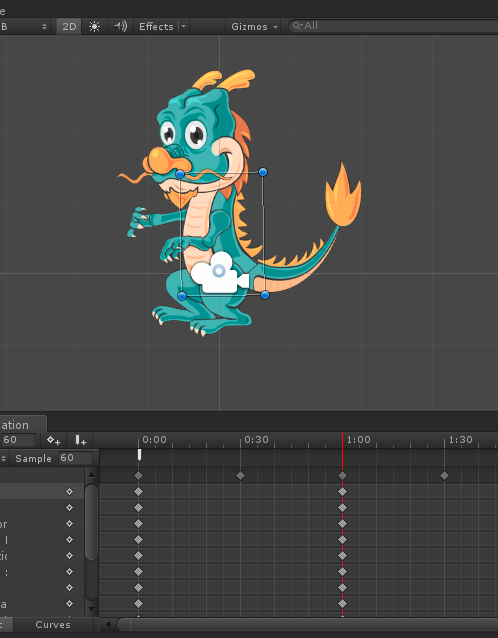
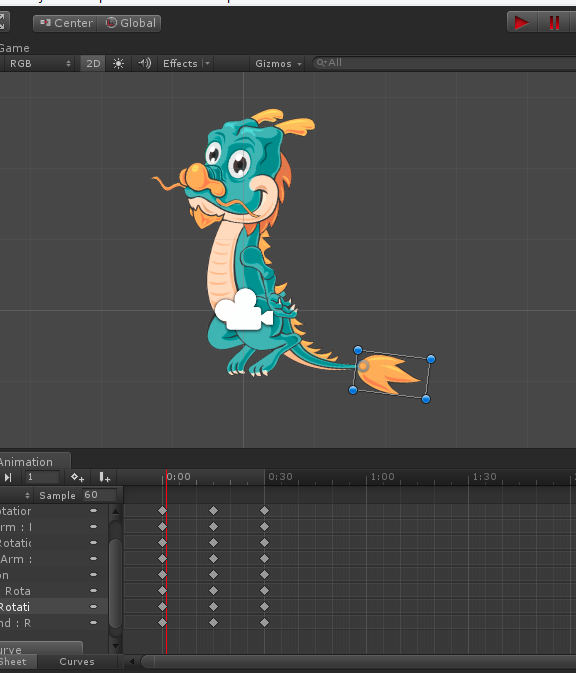
Great! Now animate the rest of the body parts for the idle animation. Take the time you need to edit the animation until you are completely satisfied. Animation takes time and you never get the results you want on the first try. By the end, your timeline should look similar to this:

Note that, for the Idle animation, you don't change any values of the dragon's centre of mass (the black dot).

The Jump Animation

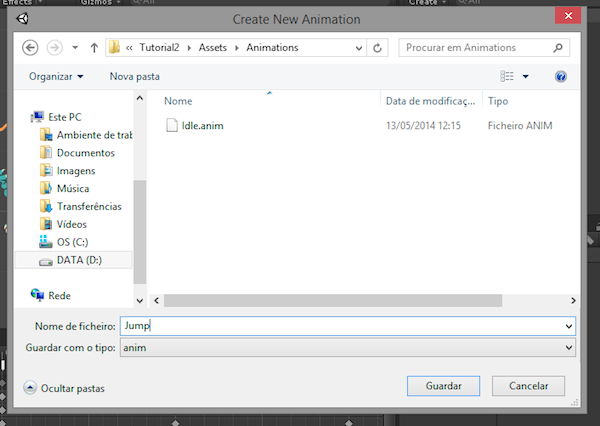
For the Jump animation, you will need to create a new animation file. To do that, in the Animation panel, click on the label that says Idle and select Create New Clip.

Name it Jump.anim and save it in the Animations folder.

For this animation, you want to make your dragon look up while jumping. Since we've already cover the basics of creating animations using Unity, we'll just give you some hints rather than walking you through the process.

As you did before, you need to select the Dragon game object and start by adding curves. Let's start with the head; this animation will be a short one, so 0:30 seconds will do. Rotate the head on the Z-axis to look up.

To prevent the head being completely static, you can add a little motion to it. You can achieve this by adding a little rotation.

Repeat the process for the remaining body parts. Keep in mind that the animation should look like the character is in mid-air. 

We will teach you how to make the complete jump later on. For reference, try to get your character in poses similar to the following one:

Have you done it? Nice!

Now, let's focus on the final animation: the fall animation.

The Fall Animation

Your character can now jump up, but two parts compose a full jump: the jump itself, where the character is lifted from the floor, and the fall, when the character moves back down again. Right now you are missing the second part of the jump, the Fall animation.

Just like before, in the Animation panel, click on the label with the current animation name and select Create New Clip.

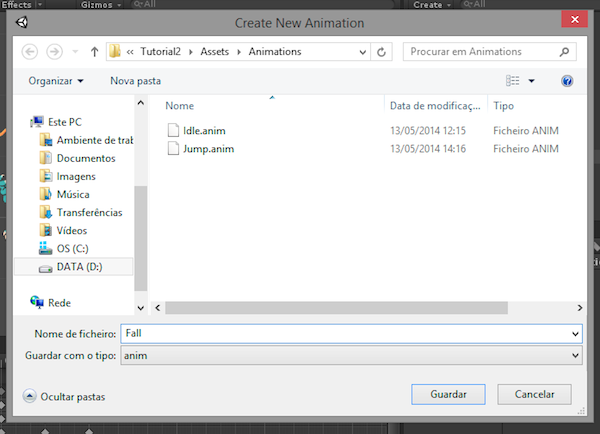
Save the new animation in the Animations folder with the name Fall.anim.

This time, you want the character to look down while falling. To do that, you need to press the Add Curve button and start posing the dragon. Just like the Jump animation, 30 seconds will work for this case.

Repeat the process of selecting the body parts and creating the respective key frames for the entire character (except for the black dot). Once again, you can add middle key frames just to make sure that the character is not static during the falling.

Next Time

This concludes the second tutorial explaining how to create a bone-based 2D animation with Unity. You have now learned the basics of animation and used key frames to create three types of animations. Next time, you will connect the different animations, blend them and call them by script.

If you have any questions or feedback on what we've covered so far, please leave a comment below.

References

  • Dragon sprite sheet: used with permission from Chenguang from DragonBonesTeam

Marketing Your Indie Game: The Single Most Important Thing That No One Knows How to Do

$
0
0

Once upon a time, marketing was considered taboo and almost completely ignored by indie game developers. These days, most devs recognize its importance and do make some effort, but do little to differentiate themselves from the masses. In this article, we explore the art of marketing, and how you can use it to gain much-needed exposure for your game.

Related Posts

What's the Problem?

The independent gaming world will forever remember 2008. It was around that time that a few innovative developers released what would go on to become critically acclaimed, genre-busting masterpieces. Games like Braid and World of Goo helped us remember what guerrilla game development was really about: creativity, passion and, above all, breaking boundaries. Combine their success with the launch of the App Store that July, and the result was millions of wannabe coders and small-time designers starstruck by the prospect of riches and gamedev glory.

The vast majority of these newbie developers needed time to refine their craft, and released games that garnered very little attention, mainly because they weren't all that good. Suffice it to say, they usually didn't make much money. 

But then there were the seasoned developers who created good, and sometimes great, games. In fact, their games were so good that many of them believed the gaming community would welcome them with open arms, and buy their products by the truckload.

Most of them didn't make any money either.

If they can do it why cant you
If they can do it, why can't you?
 

So what was the problem?  Well, game development became so accessible that everyone started creating games, which proved both a blessing and a curse. With so many games being released every day, gaining recognition suddenly became very difficult, regardless of the quality of the game. In short, for all their hard work, most developers failed to properly market their games—and this is still true today.

When to Begin Marketing Your Game

Before we get into specifics, it is important to dispel the common notion that marketing can only begin after a game is released. As most of you already know, a game draws most of its sales within the first few weeks, and even days, of release. If the proper channels don't already know about your title by the time it's launched, your sales during this critical window are going to suffer.  

So, instead of waiting until the eleventh hour, follow this general rule:

  • Begin your marketing campaign the moment you have something that illustrates the fundamental mechanics and look of your game.

Whether it's one finished level, a mocked up (quality) screenshot using Photoshop, or a small demo that displays a nuance of your game, it is imperative that you start generating hype as soon as there is something—anything—worth showing to the public. From that point forward you should be promoting the progress of your game on a semi-regular basis.

Tip: Although it's imperative to start marketing your game early, the last thing you want to do is to start posting early, unpolished screenshots of your game all over the web, especially if you're still in the programmer art phase of development. Google isn't too keen on removing such images, and trust me when I say that they will haunt you for the life-cycle of your development. 

What Every Game Development Team Should Be Doing

Okay, so you've decided to launch your campaign months before your game's targeted release date. Good. So now what? Let's start with the essentials. You'll need:

  • A website: Whether your website acts as a home base for all of your games, or just the one you're currently working on, it needs to be updated frequently and departmentalized. The home page should feature an extended overview, captivating screenshots (a picture of your UI isn't all that exciting), and relevant links. You'll also need a media page that houses images or videos.
  • To do the social media thing: Sorry, there's really no avoiding it. At the very least you should have a Facebook page and a Twitter profile. If your game is small or mid-sized this is probably enough, but in theory you could subscribe to dozens of social media outlets. More on this below. 
  • A development blog: While development blogs are less essential than a website and a strong social media presence, gamers and developers alike love to read about the personal struggles and triumphs associated with making a game. Keep it personal, as if you're speaking directly to your readers. Humanize yourself and viewers will connect with and appreciate your plight. Post as frequently as necessary, but try to avoid posting about every little bug fix or new art piece. It's enough simply to prove that your game is coming along.
  • Trailers: This comes a bit later, but is probably one of the single most important things you can do to get people excited to play your game. Don't overload it with cheesy titles, and don't think you have to be an expert cinematographer to produce a compelling video. Instead, target each facet of gameplay at least once, clearly display the game's title and the name of your company (you do have one, right?), and keep the cut scenes down to a minimum.

You can never have too many trailers. Triple-A games and movies release dozens of teasers, spotlight and full trailers, and they do so for good reason. If you do decide to release multiple videos, you can ignore the previous rule and tailor each one to a specific aspect of gameplay. One could be a combat demo, another a introduction to the game world and the story, and a third solely dedicated to your protagonist. Be sure to space them out—it's the best way to generate hype.

See also: How to Make an Indie Game Trailer With No Budget.

Publicize Yourself

You can create all the websites, dev blogs, and trailers in the world, but if no one knows who you are, they're not going to matter. Perhaps the toughest part about marketing a game is making the public aware that it exists. Once they know about it, the rest is actually pretty easy. Well, it also helps if your game is, you know... good.

Let's break down the different ways that you can get people talking about your game without cramming it down their throats.

So now that I signed up for an account why isnt anyone following me
So, now that I signed up for an account, why isn't anyone following me?

Social Media

We've already mentioned that social media is an integral part of the marketing process. Fair enough, but how do you transition from relative unknown to Internet superstar?

Tips for Posting on Twitter

Of all the social media outlets, Twitter is the one that affords developers the easiest access to potential fans, members of the press and other burgeoning developers. Use it, learn the science behind it, and master it. Here are a few tips:

  • Do not use Twitter to approach random members of the press—no one likes a beggar. Instead, view it as an opportunity to see what they're plugging and what genres of gaming they feel most passionate about. Feel free to reply to their Tweets, but only if you have something engaging to add to the conversation. If you're lucky they'll toss you a follow. And then, when you Tweet about your game, there's a chance they'll see them. 
  • Going further, if a member of the press favorites or retweets one of your posts, don't dismiss it. That's not to say you should immediately request a preview of your half-finished game, but it's a firm indicator that when your game is ready to be showcased, someone might have genuine interest in plugging it. 
  • Post your game development updates during peak hours, ideally somewhere between 11am and 11pm EST. Better yet, post them twice—once in the morning and once during the evening hours. (The reason being that if you only post updates during the middle of the night, then by the time your followers check their feed your post will have already been long buried.)
  • There's a tendency among game developers to follow just about anyone who is making an independent game. These "Serial Followers" care more about receiving a follow in return than they do about your game development team.  And if you dare to not follow them in return, they'll drop you faster than Mario can say "It's-a me."
  • Don't become a "Serial Follower." Instead, follow those who you are genuinely interested in hearing from. Indie developers that you admire are a good starting point. Your favorite indie gaming sites should be included as well. In the beginning it's OK to follow more people than people that follow you, but it's far more preferable to follow 500 people and have 1,000 followers than to follow 2,500 people and have 3,000 followers. If you find yourself falling into the latter category, chances are you've become a "Serial Follower." Do you follow?
  • #gamedev and #ScreenshotSaturday are your friends. Look them up.

Other Social Media Tips

  • The IndieGaming subreddit is a great place to link your YouTube trailers, preview, reviews and game demos. Save the Steam Greenlight plugs for /r/greenlightquality. And whatever you do, don't inundate your reddit post title with flashy buzzwords. "Innovative 2D RPG with pioneering game mechanics and epic storyline" doesn't tell me much. 
  • Your website should link to your social media accounts. Your Twitter account should have links to your Facebook page and website. Your Facebook page... you get the point. 
  • It's worse to have a grossly outdated Facebook page and website than none at all. Keep things current. 
  • If you must relay your gamedev failings to the Internet, try to be funny about it. Same goes for your announcements.

To illustrate the last point, this recent Twitter post fared particularly well for us:

"After two years of toiling, sleepless night and neglected wives we're finally close to releasing an #EchoesofEternea game demo. #gamedev"

As did this musing:

"The difference between coding a 2-hour platformer and a 20-hour RPG: 62 gray hairs, 7 doctor co-payments, and 2,000 hours. #gamedev"

Gaming Booths

Despite the theory that all game developers are vampires who dwell in dark basements, getting out into the light of day and attending public gatherings is one of the smartest things you can do to promote your game. I promise you won't turn to ash.

But in order to snag a booth at one of the bigger conventions like PAX, you'll have to reserve a portion of your meager budget for travel and venue expenses. If you have the money it's well worth the effort. If you're on a tighter budget, consider submitting to Indie Mega Booth. Through them, qualified game developers can have their game showcased at PAX for as little as $500—quite the bargain. 

Better yet, you can submit your game to IndieCade for a paltry 80 bucks. Now, that won't guarantee you entry into the festival, but if you are accepted, you'll gain a slew of additional exposure, the likes of which supersede your upfront costs by a colossal margin. 

Even if you can't afford a booth or are rejected from festivals, go to conventions anyhow and make good use of your social suave. Hand out flyers, physical CDs of your demo, a slip of paper that says "Buy My Game"—anything so that gamers won't instantly forget who you are.

See, as a game developer it's important to connect with other developers, but it's arguably more important to connect with the people who will actually be playing your game. Gaming conventions will allow you to do that and more. By meeting with your target audience face to face, it will further humanize you and your efforts. In addition, it will give gamers the opportunity to play your game, and you the chance to receive meaningful feedback.

See also: Tips for Game Conference Success.

Crowdsourcing

Crowdsourcing is generally thought of as a way to procure a budget for your game, but it's also useful as a marketing device. Our current project, Hiro Fodder: A Blue Hope, benefited from crowdsourcing in several ways.

Firstly, it forced us to create a video and write a detailed description about our product. Secondly, our page was hit tens of thousands of times over the course of a month. So even though we only got a little over 300 people to back the project, it was great exposure for our little RPG. Finally, and this was something that we didn't anticipate, we spent a lot of time communicating with other developers, even going as far as to sign up as the programmers for another project that had over 1,500 backers. We've since grown very close with the developers behind Echoes of Eternea and have become fully immersed in helping their game become a reality.

Now if only we had realized just how long developing two 20-30 hour, homegrown RPGs would take! But fear not, we're getting close!

Kickstarter A great way to make money and friends
Kickstarter: A great way to make money and friends.
 

The great thing about crowdsourcing is that a lot of smaller indie game journalists keep up with new campaigns. Several journalists wrote articles about Hiro Fodder without even asking us first. We have since established a great working relationship with these writers, and will definitely be calling on them when the game gets closer to release.

See also: A No-Name Developer's Guide to Succeeding on Kickstarter and Kickstarter Post-Mortem for Hiro Fodder: A Blue Hope.

Contacting the Press

One could easily write an entire article on dealing with the media. It is such a critical part of running a successful marketing campaign that overlooking it would already place your game at a severe disadvantage. But it's one thing to communicate your game to the press; it's another to do it effectively.

Here are a few tips:

  • Be realistic: Before you contact any of the major players in the gaming community, assess what you hope to achieve. You're probably not going to get IGN to write a feature piece on your Match-3 game, but you may get a smaller indie-focused mag to give you a shot. Once your game garners enough press from smaller sources, you should start taking more chances. No harm is going to come out of telling Kotaku or Joystiq about your upcoming game.
  • Target the right websites: It may seem painfully obvious, but if you're targeting a mobile device, don't contact PC mags. You'd be surprised how often game developers make grievous missteps like emailing PC Gamer about their revolutionary new game for Android devices.
  • Be yourself: You're not writing a cover letter, so don't treat your emails to press members like one. Starting your email with lines like "[Company X] is proud to bring you an innovative gaming experience like no other..." is off-putting. Instead start with something simple, like "Hello." Tell them who you are and a little about your game. Provide them with a few simple links to your media or demo. If you can say what you have to say in fewer words, do so. Remember, these guys probably receive dozens of emails each and every day from developers just like you. Be humble, be straight to the point and never, ever tell them how much you love their site. Sucking up is not a virtue.
People actually send emails like this but you wont
People actually send emails like this, but you won't.
 

When dealing with the press via email:

  • Don't forget to send members of the press working copies of your game. 
  • Don't cram your opinions down their throats. You might think your game is fun and awesome, but let the press draw their own conclusions.
  • Don't forget to include your unique selling point. This is usually a game mechanic that's particular to your game. For instance, our unique selling point is the ability to store accumulated Action Points for future rounds, allowing you to unleash powerful attacks at the risk of leaving your character vulnerable while charging up. Is it revolutionary? No. But unique, yes. 
  • Don't wait. Reviews will hardly help you three weeks after your game is released. Better to have the press mention your game in the weeks and months before it's due to launch. 

Late Stage Marketing

By the time your game hits alpha, you should really consider a few of the more recently available marketing options:

  • Alphafunding: Mid-sized online distributors like Desura offer this service, which allows fans to play your incomplete game and watch it evolve. Even better, they're allowed to contribute money to your game. It's sort of like Kickstarter, except the only thing you're obligated to provide to your fans is an awesome game. It's a really sweet deal, and an awesome way to get people pumped about your upcoming release.
  • Steam Greenlight: At the initial writing of this article, getting your game Greenlit was a difficult task. These days, so many games are accepted that the real hurdle is making your game stand out among the masses. But that doesn't mean you shouldn't place your game on Greenlight. Quite the contrary. The site is visited by tens of thousands of gamers, and you are guaranteed to win some of them over with your game, most of whom will purchase it from your personal website or another distribution portal that isn't Steam. It's not as prestigious as it was a year ago, but Greenlight is still an opportunity that should not be missed. See also: Tips for Getting Greenlit on Steam Greenlight.
  • Press Releases: Press releases probably won't help that much unless your game already has a solid following. But if you ran a sound marketing campaign, there's a good chance it might. Target major distributors like PRWeb and smaller ones tailored towards indies. You should probably only do this about a week before the game is released.
  • Other avenues: If you're an active streamer on Twitch or belong to forum communities, now would be an excellent time to let the public know that your game is nearing release. Just don't become a member of a bunch of well-established communities for the sole purpose of plugging your game. It comes across as obnoxious. 
Definitely a good thing for indies
Definitely a good thing for indies.
 

Conclusion

There you have it. Marketing your game is probably as important as debugging and polishing it. Without marketing, you're completely reliant on gamers knowing about your game without you telling them. Now, if you win a major contest or get picked up by a major distributor, that could very well happen, but for the rest of us, it won't.

It's not entirely necessary to do everything listed in this article, but at the very least you should:

  • Create a website.
  • Create an account and post regularly on Twitter. 
  • Post a YouTube video of your trailer.
  • Contact a few game journalists who have shown prior interest in your type of game. (Remember, keep your emails short and personal.)
  • Place it on Steam Greenlight (as long as it's not super-casual).

Do at least that, and you'll stand a chance of developing your brand. Happy marketing!

    Marketing Your Indie Game: The Single Most Important Thing That No One Knows How to Do

    $
    0
    0

    Once upon a time, marketing was considered taboo and almost completely ignored by indie game developers. These days, most devs recognize its importance and do make some effort, but do little to differentiate themselves from the masses. In this article, we explore the art of marketing, and how you can use it to gain much-needed exposure for your game.

    Related Posts

    What's the Problem?

    The independent gaming world will forever remember 2008. It was around that time that a few innovative developers released what would go on to become critically acclaimed, genre-busting masterpieces. Games like Braid and World of Goo helped us remember what guerrilla game development was really about: creativity, passion and, above all, breaking boundaries. Combine their success with the launch of the App Store that July, and the result was millions of wannabe coders and small-time designers starstruck by the prospect of riches and gamedev glory.

    The vast majority of these newbie developers needed time to refine their craft, and released games that garnered very little attention, mainly because they weren't all that good. Suffice it to say, they usually didn't make much money. 

    But then there were the seasoned developers who created good, and sometimes great, games. In fact, their games were so good that many of them believed the gaming community would welcome them with open arms, and buy their products by the truckload.

    Most of them didn't make any money either.

    If they can do it why cant you
    If they can do it, why can't you?
     

    So what was the problem?  Well, game development became so accessible that everyone started creating games, which proved both a blessing and a curse. With so many games being released every day, gaining recognition suddenly became very difficult, regardless of the quality of the game. In short, for all their hard work, most developers failed to properly market their games—and this is still true today.

    When to Begin Marketing Your Game

    Before we get into specifics, it is important to dispel the common notion that marketing can only begin after a game is released. As most of you already know, a game draws most of its sales within the first few weeks, and even days, of release. If the proper channels don't already know about your title by the time it's launched, your sales during this critical window are going to suffer.  

    So, instead of waiting until the eleventh hour, follow this general rule:

    • Begin your marketing campaign the moment you have something that illustrates the fundamental mechanics and look of your game.

    Whether it's one finished level, a mocked up (quality) screenshot using Photoshop, or a small demo that displays a nuance of your game, it is imperative that you start generating hype as soon as there is something—anything—worth showing to the public. From that point forward you should be promoting the progress of your game on a semi-regular basis.

    Tip: Although it's imperative to start marketing your game early, the last thing you want to do is to start posting early, unpolished screenshots of your game all over the web, especially if you're still in the programmer art phase of development. Google isn't too keen on removing such images, and trust me when I say that they will haunt you for the life-cycle of your development. 

    What Every Game Development Team Should Be Doing

    Okay, so you've decided to launch your campaign months before your game's targeted release date. Good. So now what? Let's start with the essentials. You'll need:

    • A website: Whether your website acts as a home base for all of your games, or just the one you're currently working on, it needs to be updated frequently and departmentalized. The home page should feature an extended overview, captivating screenshots (a picture of your UI isn't all that exciting), and relevant links. You'll also need a media page that houses images or videos.
    • To do the social media thing: Sorry, there's really no avoiding it. At the very least you should have a Facebook page and a Twitter profile. If your game is small or mid-sized this is probably enough, but in theory you could subscribe to dozens of social media outlets. More on this below. 
    • A development blog: While development blogs are less essential than a website and a strong social media presence, gamers and developers alike love to read about the personal struggles and triumphs associated with making a game. Keep it personal, as if you're speaking directly to your readers. Humanize yourself and viewers will connect with and appreciate your plight. Post as frequently as necessary, but try to avoid posting about every little bug fix or new art piece. It's enough simply to prove that your game is coming along.
    • Trailers: This comes a bit later, but is probably one of the single most important things you can do to get people excited to play your game. Don't overload it with cheesy titles, and don't think you have to be an expert cinematographer to produce a compelling video. Instead, target each facet of gameplay at least once, clearly display the game's title and the name of your company (you do have one, right?), and keep the cut scenes down to a minimum.

    You can never have too many trailers. Triple-A games and movies release dozens of teasers, spotlight and full trailers, and they do so for good reason. If you do decide to release multiple videos, you can ignore the previous rule and tailor each one to a specific aspect of gameplay. One could be a combat demo, another a introduction to the game world and the story, and a third solely dedicated to your protagonist. Be sure to space them out—it's the best way to generate hype.

    See also: How to Make an Indie Game Trailer With No Budget.

    Publicize Yourself

    You can create all the websites, dev blogs, and trailers in the world, but if no one knows who you are, they're not going to matter. Perhaps the toughest part about marketing a game is making the public aware that it exists. Once they know about it, the rest is actually pretty easy. Well, it also helps if your game is, you know... good.

    Let's break down the different ways that you can get people talking about your game without cramming it down their throats.

    So now that I signed up for an account why isnt anyone following me
    So, now that I signed up for an account, why isn't anyone following me?

    Social Media

    We've already mentioned that social media is an integral part of the marketing process. Fair enough, but how do you transition from relative unknown to Internet superstar?

    Tips for Posting on Twitter

    Of all the social media outlets, Twitter is the one that affords developers the easiest access to potential fans, members of the press and other burgeoning developers. Use it, learn the science behind it, and master it. Here are a few tips:

    • Do not use Twitter to approach random members of the press—no one likes a beggar. Instead, view it as an opportunity to see what they're plugging and what genres of gaming they feel most passionate about. Feel free to reply to their Tweets, but only if you have something engaging to add to the conversation. If you're lucky they'll toss you a follow. And then, when you Tweet about your game, there's a chance they'll see them. 
    • Going further, if a member of the press favorites or retweets one of your posts, don't dismiss it. That's not to say you should immediately request a preview of your half-finished game, but it's a firm indicator that when your game is ready to be showcased, someone might have genuine interest in plugging it. 
    • Post your game development updates during peak hours, ideally somewhere between 11am and 11pm EST. Better yet, post them twice—once in the morning and once during the evening hours. (The reason being that if you only post updates during the middle of the night, then by the time your followers check their feed your post will have already been long buried.)
    • There's a tendency among game developers to follow just about anyone who is making an independent game. These "Serial Followers" care more about receiving a follow in return than they do about your game development team.  And if you dare to not follow them in return, they'll drop you faster than Mario can say "It's-a me."
    • Don't become a "Serial Follower." Instead, follow those who you are genuinely interested in hearing from. Indie developers that you admire are a good starting point. Your favorite indie gaming sites should be included as well. In the beginning it's OK to follow more people than people that follow you, but it's far more preferable to follow 500 people and have 1,000 followers than to follow 2,500 people and have 3,000 followers. If you find yourself falling into the latter category, chances are you've become a "Serial Follower." Do you follow?
    • #gamedev and #ScreenshotSaturday are your friends. Look them up.

    Other Social Media Tips

    • The IndieGaming subreddit is a great place to link your YouTube trailers, preview, reviews and game demos. Save the Steam Greenlight plugs for /r/greenlightquality. And whatever you do, don't inundate your reddit post title with flashy buzzwords. "Innovative 2D RPG with pioneering game mechanics and epic storyline" doesn't tell me much. 
    • Your website should link to your social media accounts. Your Twitter account should have links to your Facebook page and website. Your Facebook page... you get the point. 
    • It's worse to have a grossly outdated Facebook page and website than none at all. Keep things current. 
    • If you must relay your gamedev failings to the Internet, try to be funny about it. Same goes for your announcements.

    To illustrate the last point, this recent Twitter post fared particularly well for us:

    "After two years of toiling, sleepless night and neglected wives we're finally close to releasing an #EchoesofEternea game demo. #gamedev"

    As did this musing:

    "The difference between coding a 2-hour platformer and a 20-hour RPG: 62 gray hairs, 7 doctor co-payments, and 2,000 hours. #gamedev"

    Gaming Booths

    Despite the theory that all game developers are vampires who dwell in dark basements, getting out into the light of day and attending public gatherings is one of the smartest things you can do to promote your game. I promise you won't turn to ash.

    But in order to snag a booth at one of the bigger conventions like PAX, you'll have to reserve a portion of your meager budget for travel and venue expenses. If you have the money it's well worth the effort. If you're on a tighter budget, consider submitting to Indie Mega Booth. Through them, qualified game developers can have their game showcased at PAX for as little as $500—quite the bargain. 

    Better yet, you can submit your game to IndieCade for a paltry 80 bucks. Now, that won't guarantee you entry into the festival, but if you are accepted, you'll gain a slew of additional exposure, the likes of which supersede your upfront costs by a colossal margin. 

    Even if you can't afford a booth or are rejected from festivals, go to conventions anyhow and make good use of your social suave. Hand out flyers, physical CDs of your demo, a slip of paper that says "Buy My Game"—anything so that gamers won't instantly forget who you are.

    See, as a game developer it's important to connect with other developers, but it's arguably more important to connect with the people who will actually be playing your game. Gaming conventions will allow you to do that and more. By meeting with your target audience face to face, it will further humanize you and your efforts. In addition, it will give gamers the opportunity to play your game, and you the chance to receive meaningful feedback.

    See also: Tips for Game Conference Success.

    Crowdsourcing

    Crowdsourcing is generally thought of as a way to procure a budget for your game, but it's also useful as a marketing device. Our current project, Hiro Fodder: A Blue Hope, benefited from crowdsourcing in several ways.

    Firstly, it forced us to create a video and write a detailed description about our product. Secondly, our page was hit tens of thousands of times over the course of a month. So even though we only got a little over 300 people to back the project, it was great exposure for our little RPG. Finally, and this was something that we didn't anticipate, we spent a lot of time communicating with other developers, even going as far as to sign up as the programmers for another project that had over 1,500 backers. We've since grown very close with the developers behind Echoes of Eternea and have become fully immersed in helping their game become a reality.

    Now if only we had realized just how long developing two 20-30 hour, homegrown RPGs would take! But fear not, we're getting close!

    Kickstarter A great way to make money and friends
    Kickstarter: A great way to make money and friends.
     

    The great thing about crowdsourcing is that a lot of smaller indie game journalists keep up with new campaigns. Several journalists wrote articles about Hiro Fodder without even asking us first. We have since established a great working relationship with these writers, and will definitely be calling on them when the game gets closer to release.

    See also: A No-Name Developer's Guide to Succeeding on Kickstarter and Kickstarter Post-Mortem for Hiro Fodder: A Blue Hope.

    Contacting the Press

    One could easily write an entire article on dealing with the media. It is such a critical part of running a successful marketing campaign that overlooking it would already place your game at a severe disadvantage. But it's one thing to communicate your game to the press; it's another to do it effectively.

    Here are a few tips:

    • Be realistic: Before you contact any of the major players in the gaming community, assess what you hope to achieve. You're probably not going to get IGN to write a feature piece on your Match-3 game, but you may get a smaller indie-focused mag to give you a shot. Once your game garners enough press from smaller sources, you should start taking more chances. No harm is going to come out of telling Kotaku or Joystiq about your upcoming game.
    • Target the right websites: It may seem painfully obvious, but if you're targeting a mobile device, don't contact PC mags. You'd be surprised how often game developers make grievous missteps like emailing PC Gamer about their revolutionary new game for Android devices.
    • Be yourself: You're not writing a cover letter, so don't treat your emails to press members like one. Starting your email with lines like "[Company X] is proud to bring you an innovative gaming experience like no other..." is off-putting. Instead start with something simple, like "Hello." Tell them who you are and a little about your game. Provide them with a few simple links to your media or demo. If you can say what you have to say in fewer words, do so. Remember, these guys probably receive dozens of emails each and every day from developers just like you. Be humble, be straight to the point and never, ever tell them how much you love their site. Sucking up is not a virtue.
    People actually send emails like this but you wont
    People actually send emails like this, but you won't.
     

    When dealing with the press via email:

    • Don't forget to send members of the press working copies of your game. 
    • Don't cram your opinions down their throats. You might think your game is fun and awesome, but let the press draw their own conclusions.
    • Don't forget to include your unique selling point. This is usually a game mechanic that's particular to your game. For instance, our unique selling point is the ability to store accumulated Action Points for future rounds, allowing you to unleash powerful attacks at the risk of leaving your character vulnerable while charging up. Is it revolutionary? No. But unique, yes. 
    • Don't wait. Reviews will hardly help you three weeks after your game is released. Better to have the press mention your game in the weeks and months before it's due to launch. 

    Late Stage Marketing

    By the time your game hits alpha, you should really consider a few of the more recently available marketing options:

    • Alphafunding: Mid-sized online distributors like Desura offer this service, which allows fans to play your incomplete game and watch it evolve. Even better, they're allowed to contribute money to your game. It's sort of like Kickstarter, except the only thing you're obligated to provide to your fans is an awesome game. It's a really sweet deal, and an awesome way to get people pumped about your upcoming release.
    • Steam Greenlight: At the initial writing of this article, getting your game Greenlit was a difficult task. These days, so many games are accepted that the real hurdle is making your game stand out among the masses. But that doesn't mean you shouldn't place your game on Greenlight. Quite the contrary. The site is visited by tens of thousands of gamers, and you are guaranteed to win some of them over with your game, most of whom will purchase it from your personal website or another distribution portal that isn't Steam. It's not as prestigious as it was a year ago, but Greenlight is still an opportunity that should not be missed. See also: Tips for Getting Greenlit on Steam Greenlight.
    • Press Releases: Press releases probably won't help that much unless your game already has a solid following. But if you ran a sound marketing campaign, there's a good chance it might. Target major distributors like PRWeb and smaller ones tailored towards indies. You should probably only do this about a week before the game is released.
    • Other avenues: If you're an active streamer on Twitch or belong to forum communities, now would be an excellent time to let the public know that your game is nearing release. Just don't become a member of a bunch of well-established communities for the sole purpose of plugging your game. It comes across as obnoxious. 
    Definitely a good thing for indies
    Definitely a good thing for indies.
     

    Conclusion

    There you have it. Marketing your game is probably as important as debugging and polishing it. Without marketing, you're completely reliant on gamers knowing about your game without you telling them. Now, if you win a major contest or get picked up by a major distributor, that could very well happen, but for the rest of us, it won't.

    It's not entirely necessary to do everything listed in this article, but at the very least you should:

    • Create a website.
    • Create an account and post regularly on Twitter. 
    • Post a YouTube video of your trailer.
    • Contact a few game journalists who have shown prior interest in your type of game. (Remember, keep your emails short and personal.)
    • Place it on Steam Greenlight (as long as it's not super-casual).

    Do at least that, and you'll stand a chance of developing your brand. Happy marketing!

      How To Fix Common Physics Problems in Your Game

      $
      0
      0

      Many games use physics engines to drive the way things move and react. Using a physics engine can add immersion, eye candy, and, best of all, emergent gameplay, but can also, if used incorrectly, lead to unrealistic results or game-breaking problems. In this post, I'll explain how to identify and fix common problems seen in games of today. 

      We will examine and solve these problems as seen in Unity, focusing on the built-in 3D physics engine Nvidia PhysX, but the core principles can be applied to any other platform and physics engine.

      Demo

      This demo shows most mistakes mentioned in this article in both a incorrect or broken state, and in a fixed state:

      Normal Scale

      This is a simple scene with a ball that hits into a stack of barrels. The alternate version Incorrect Scale (10x) shows how the scene changes at 10x scale (see the scale markings on the floor of the demo). Notice how it appears to be in slow-motion, but this effect is simply caused by the scale of the scene.

      Character Controller

      This shows a simple side-scroller game working as intended. The "bad" alternative; Rigidbody & Character Controller Together shows the same game, but with a Rigidbody component attached to the character. Notice how the Rigidbody breaks the behavior of the Character Controller.

      Objects With Bounciness

      Barrels are shot from the side of the scene and are hurled into the air. As they come crashing down, they bounce off the ground and move in simple but majestic ways. The broken version shows the same scene without bounciness, and it looks so much more boring in comparison.

      Not Directly Modifying a Rigidbody's Transform

      In this scenario, a heavy ball is pushed up a ramp using Rigidbody.AddForce(). In the second scenario, instead of using Rigidbody.AddForce() to move the ball up the ramp, Transform.position is used. The result of using Transform.position is that the ball rolls back down, due to the fact that the rigidbody isn't properly taking into account the rigidbody's velocity change, but then the position modification causes the ball to jitter up and down the ramp.

      Common Mistakes

      Incorrect Scale

      In most games, players would assume that the scale of the world is relatable to Earth's scale. They would expect, for example, an enemy falling from a watch tower to fall at the same rate you would perceive on Earth. If the enemy falls too slowly or too quickly, it can detract from the immersion—particularly if the enemy is human-sized!

      Nvidia PhysX in Unity is set up to use one unit per meter. You can use this trait to check whether the scale of your objects are correct by simply adding in a Unity primitive cube. The primitive cube is exactly one cubic meter. If you notice, for example, that a oil barrel in your scene is 2x bigger than the the cube, that means your oil barrel is two meters tall (6.56 feet)!

      Fixing the scale is as easy as scaling every object in the scene. Just select all the objects in your scene and use the Scale tool to make them bigger or smaller. If you notice your objects are moving too quickly, make the objects larger. If you notice the opposite—that the objects move too slowly—you should scale the objects down.

      You can scale your objects with more precision by grouping them into one null object, and scaling that one object. For example, setting the scale of the parent object to 1.2 on each axis will increase the size of every object within the object by 20%. You can also scale the objects in increments using the scale tool by holding down Ctrl-LMB (Windows) or Cmd-LMB (OS X).

      Using a Rigidbody and a Character Controller Together

      I've seen this happen a few times, and it actually makes sense how often this occurs. The developer assumes that a Character Controller is necessary to control their avatar, but they want the avatar to be affected by gravity and other objects in the environment.

      The problem is that a Character Controller is designed for more classical controls, like those typically found in a platformer or first person shooter. A Rigidbody is simply a non-deformable object that is affected by gravity and other physical forces (such as other objects colliding with it). These are two very separate components, with different intended uses.

      Choose only a Character Controller when you want to complete control over how the player moves. On the other hand, if you want your character to be driven by the physics engine, use a Rigidbody. In adding a Rigidbody to a character, you will probably want to constrain rotation so that the player doesn't topple over.

      Directly Modifying a Rigidbody's Transform

      Unlike a Character Controller, it's not good practice to set the position or rotation of a rigidbody, or scale a rigidbody object constantly (for player control and such). Instead, you should use the AddForce() and AddTorque() methods found in the Rigidbody class. It is okay to directly set the position and rotation of a Rigidbody if, for example, you're spawning in the object for the first time, or resetting the scene. In that situation it will be fine, as long as the Rigidbody is not intersecting other objects.

      This matters because, when a rigidbody is moved to an exact position or rotational state, it could pass through an object. The physics engine then has to correct this issue, and most of the time the physics engine does not run at the same time Unity's Update() message does. The end result is jittery behaviour whenever there's an intersection, and it's possible that the rigidbody may pass through objects entirely.

      Another bad side effect that can occur when, say, moving a rigidbody along an axis for player movement is that internally the rigidbody is simulated and then it applies it's position. Updating the position then moves the rigidbody without taking into account the velocity change and such. If the rigidbody is rolling back down a slope, it will be moving the rigidbody backwards while your position altering code is moving the rigidbody back up the slope.

      Objects Rolling Forever

      Let's say you're developing a golf game. There is a problem with how the golf ball does not stop rolling, and somehow manages to continue rolling on forever as long as there isn't any kind of hole or ditch in its path. The reason why this happens is because in real life, the ball would be slowed down by the grass it runs over (among other things), since it has to push the tiny grass blades down, the grass essentially is like a constant ramp. This is called rolling resistance. Unity cannot simulate this behaviour accurately, so instead artificial stopping forces must be used.

      In Unity the best force to use to stop an object from rolling forever is "angular drag". Changing the angular drag on the golf ball is the way to fix this issue. The exact value really depends on the behaviour you're looking for, however you may notice that a value of 1.0 angular drag may not even be enough in some cases.

      Objects Without Bounciness

      Almost every object in the world bounces after an impact. Unity's internal, default physics material has no bounce at all. Meaning every object will not bounce unless your override the default physics material or apply a physics material to the objects in your scene with a bounciness value higher than 0.

      One of the best ways on fixing this issue is by creating a creating your own default physics material and assigning it in the Physics Manager found by clicking Edit > Project Settings > Physics.

      Rigidbodies Partially Sinking Into Geometry

      Most physics engines have some kind of parameter dictating how much two objects can be interpenetrating or intersecting until they are pushed away from one another. This parameter is called Min Penetration For Penalty in Unity. By default this value is 0.01 (meters), meaning that, by default, objects can be intersecting up to 1 centimeter (almost 0.4 inches) before being pushed apart.

      You should set Min Penetration For Penalty to a value where it is barely noticeable that objects are intersecting. Setting the value to something tiny, such as 0.0001, may result in jittery rigidbodies.

      How to Prevent Mistakes

      Writing Code for Rigidbodies (for Programmers)

      If you aren't a programmer, you don't have to worry about the following scenario. When writing code that moves, rotates, or scales rigidbodies, it is important to keep this in the FixedUpdate loop. Writing this code in the Update loop will potentially lead to unstable results, since the Update function may be called at 1000 Hz, while the physics engine and the FixedUpdate function are each called at 50 Hz by default. 

      You can change the frequency on physics steps by changing the parameter Fixed Timestep, found in Edit > Project Settings > Time. The value determines how much time is waited, in seconds, between each physics update or step. You can work out the frequency in Hertz by dividing 1 by the value (for instance, a 0.01 second wait means 1 / 0.01 = 100 Hz). The more frequent the steps, the more accurate and stable the simulation will be. However, setting the frequency higher than the CPU can handle will result in a very unstable simulation. Try to keep the Fixed Update frequency between 30 Hz and 100 Hz.

      While working on a destructible brick wall, I ran into an issue caused by Instantiating bricks after a chunk of the wall had been destroyed. I fixed this issue by placing the problematic code into a Coroutine, and placing the following line before Destroying the object:

      // Wait a frame
      yield return null; // C#
      
      yield; // UnityScript

      In waiting for a frame, it would guarantee that the logic was synced up in Update time, rather than FixedUpdate time. This seems to mean that the Destroy function is executed in sync with the Update loop.

      Bonus Unity Tip: Don't Use The Standard Assets Physics Materials!

      The Physics Materials package, which comes as part of the Unity Standard Assets, is actually almost completely useless. There are five physics materials contained in the package, and all of them are unrealistic in some way. 

      Each material has identical static and dynamic friction. In the real world, objects that are standing still have slightly more friction then when they are moving. The Rubber material's coefficient of friction is 1.0, which is not similar to any rubber found in the real world. And if that doesn't sound silly enough, every material has 0 "bounciness" (excluding the "Bouncy" material). This all means that the materials not even a close representation of their real life counterpart. 

      It is best to create your own physics materials when necessary. There are a lot of websites around that share physical properties of materials—the important ones being dynamic friction, static friction, and restitution or bounciness.

      Conclusion

      Very few physics related problems are actually that difficult to fix. If there is any kind of physics-related bug that seems difficult to track down, try slowing downtime to see what's going on. If you notice that the issue starts around a certain line of code, you can use Debug.Break to pause the editor and inspect what's going on. Feel free to comment here if you have any questions or need help.


      Bone-Based Unity 2D Animation: Mecanim and Scripting

      $
      0
      0

      In this series, we're focusing on the bone-based 2D animation tools provided by the Unity engine. The main idea is to present and teach the fundamentals of 2D animation in order for you to apply it to your own games. In this tutorial, we'll use Unity's excellent Mecanim tool to blend animations, and we'll add some simple scripting to demonstrate the final result.

      Before we start the tutorial, we would like to thank Chenguang (DragonBonesTeam) for providing us with the game art used to produce this tutorial series.

      Where We Left Off

      In the previous tutorials, we set up the project, assembled a 2D dragon character, and created three different animations. If you haven't completed the previous tutorials yet, we strongly recommend you do so before continuing.

      Final Preview

      This demo shows the animated dragon we're aiming for—hit Space to make it jump:

      Mecanim

      At this point, you have your dragon completely assembled with three defined animations. However, there's no connection between them. So, our initial goal is to connect the different animation clips and blend them together. For this, Unity provides an awesome tool called Mecanim that does exactly what you need.

      Mecanim is a powerful and flexible animation system. Since it's integrated with Unity itself, there is no need for third party software. You can easily animate anything, from sprites to blend shapes or even lights. Mecanim allows you to create state machines and blend trees to control your character.

      But, before we go any further, let's talk a little bit about blending animations and state machines so you'll have a better understanding of what we are about to do.

      What is a State Machine?

      In Unity, you can blend two or more similar motions—for example, you may want to blend running and walking animations depending on the character's current speed. Basically, you have two different ways to blend animations in Unity. In some situations you may want to use Transitions; in others you will need to use Blend Trees:

      • Transitions are used for transitioning smoothly between animations. This usually works well if the transition is quick.
      • Blend Trees allow multiple animations to be blended smoothly, while incorporating parts of them in variable amounts. These amounts are controlled by numerical parameters. To give a practical example, imagine that we have a shooter game; you may want the character to fire and run at the same time. Blend trees allow you to blend the two animations together, letting the character run and shoot at the same time, without needing to create a third animation for that specific mixture of actions.

      A state machine stores the state of an entity at a given time, and can react to an input to change the state of that entity, or to cause an action or output. For more information, see Finite-State Machines: Theory and Implementation.

      In Unity, you use state machines to control the state of the game's characters. For example, one state for a character could be Walk, and another could be Jump. The character can change from the Walk state to the Jump state based on input from the player (probably hitting the Jump button). 

      Here you can see an example of a (more complex) state machine from the Unity documentation. Each box represents a state, and the arrows represent possible transitions between them:

      We're going to create a state machine with our existing animations, and then use transitions to blend them together.

      Building Our State Machine

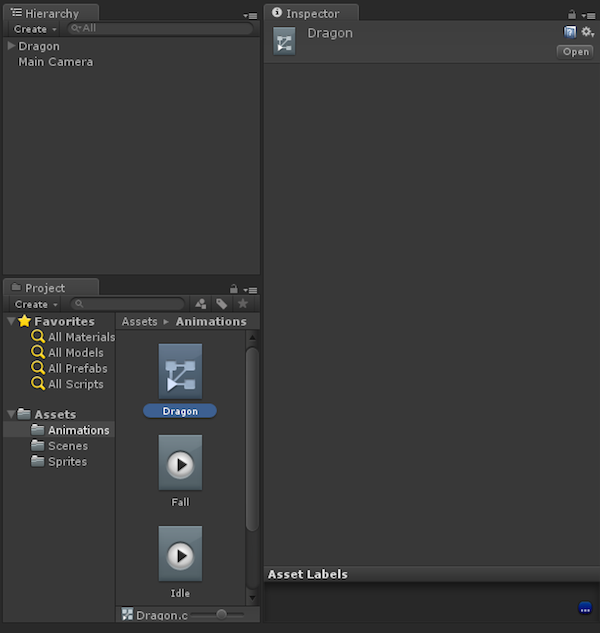
      If you check the Animations folder where you have been saving your .anim files, you will find a Dragon.controller file. This is the mecanim file associated with the character that Unity automatically generated when you saved your first animation.

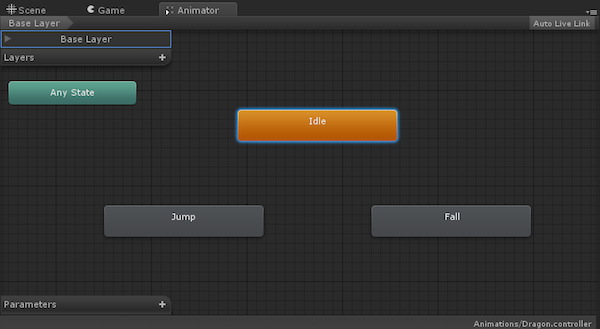
      Double-click on the Dragon.controller file, and Unity will open a Animator view tab next to your Scene and Game tabs.

      As you can see, Unity already added the three animations to the file. Since the animations are already in place, there is no need to add them, but, if you wanted to add an extra animation to the controller, all you'd need to do is drag the .anim file to the Animator view. In the same way, if you want to remove an existing animation from the controller, you should just select on the Animator view and press Delete. Feel free to try this for yourself.

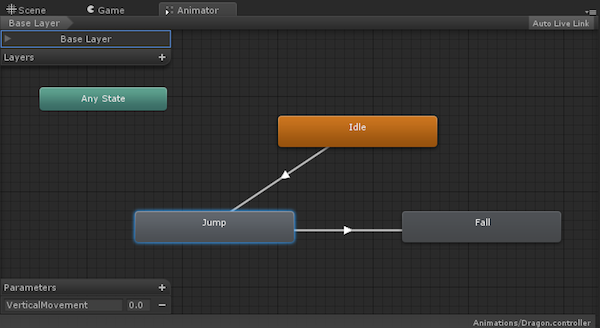
      We have four different boxes in the Animator:

      • Any State
      • Idle
      • Jump
      • Fall

      Any State is the default state that the mecanim creates, and you will not use it. You can drag it to any corner of the Animator window and leave it there.

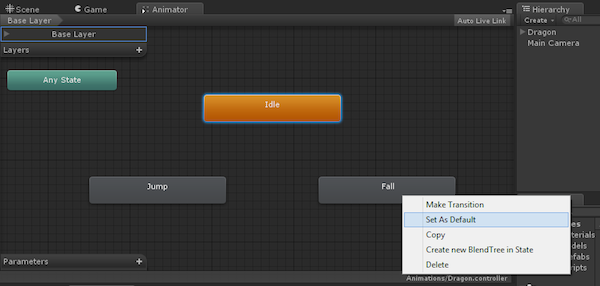
      The other three boxes refer to the three animations that we created. As you may notice, Idle is colored with orange, while the other two are grey. That's because Idle is the root animation; it's the animation that the character is going to play by default. If you press the play button on your editor and test it, you will see that the character does this Idle animation. In this particular case, that's exactly the behavior we want; however, if you wanted, say, the Fall animation to be the root animation, all you'd have to do is right-click it select Set As Default.

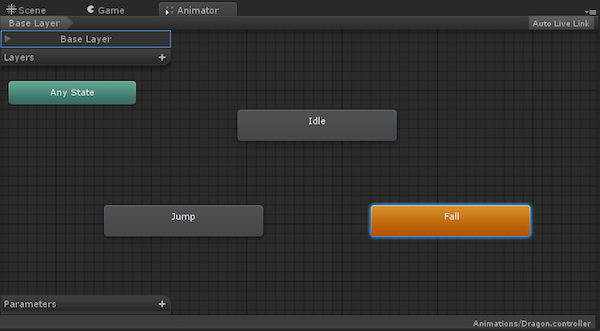
      As you can see, the Fall animation is now orange and the Idle is grey.

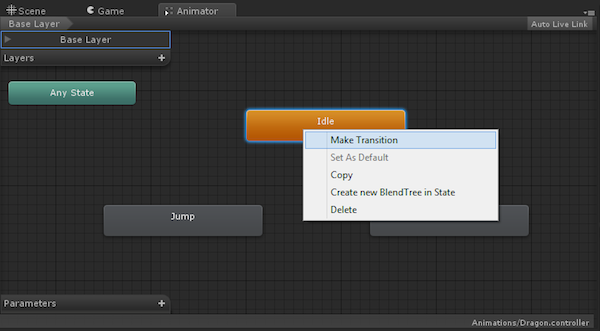
      Since you want Idle to be the root animation, just repeat the process to make it orange again.

      It is now time to connect the animations. Right-click Idle and select Make Transition.

      This will create a small arrow that starts from Idle. Click on the Jump animation to make the arrow connect the two animations.

      If you select the arrow you just created, you will see that new properties show up in the Inspector tab.

      As you can see, you have a time-line, and the animations Idle and Jump. There is a blue band over the animations that starts on Idle but then changes to Jump. Also, there is a period in time during which the two animations overlap.

      Since the Preview area is empty, even if you click on the play button over the preview, you can't see what is happening.

      To preview the transition that you are working on, just select the Dragon game object from the Hierarchy tab and drag it to the Preview area. Now you can see the character in the preview and, if you press play, you can see the transition between the two animations.

      In the Inspector, the area where the blue band changes from Idle to Jump is our transition:

      You can edit the transitions by dragging the two blue arrows on the timeline that limit the transition area. By changing their position, you can make the transition quicker or softer.

      The next thing you need to do is define when you want this transition to happen. To do that, create a new parameter by clicking on the + sign in the Parameters list.

      Next, select the Float option and call it VerticalMovement:

      Now, go back to the Inspector, and under Conditions the variable VerticalMovement will show up. Select it.

      You've just defined the condition to determine when to change the state in the state machine: if the value of VerticalMovement is greater than 0, then the character will start the Jump animation. 

      We also want a transition between the Jump animation and the Fall animation:

      The maximum value that VerticalMovement is going to reach is 1, so, for the transition between Jump and Fall, we can activate it when that value is less than 0.5.

      Now we need to make the character return to the Idle animation after the fall. Since Idle should be playing when the character is on the floor, you should create a transition between Fall and Idle.

      To finish, you have to make sure it activates when the character is on the ground. You can do that be setting the transition parameter of VerticalMovement to less than0.1—that basically means that the VerticalMovement is 0, meaning that the character is on the ground.

      We now need to make sure that we don't see any Idle animations while the character is in the air between the Jump and Fall animations. To do that, create a new parameter, this time a Bool.

      Call it OnGround.

      Select the transition between Jump and Fall. You want this transition to happen when the character is still in the air, right? So go to the Inspector, click the +, and add a new parameter to the transition. Basically, you want this to happen when the value of OnGround is false.

      Next, on the transition from Fall to Idle, add the parameter OnGround and set the value to true:

      Our work with Mecanim is done. Now it's time to move to scripting.

      Scripting Animations

      In your asset directory, create a new folder called Scripts. Next, create a new C# script called CharacterMove.cs. Note that the script you are about to create is a very simple one, which the main goal is to show how you can change the animations of the character by code. 

      The best practice is to use Unity's physics when you want to create robust games. However, for the sake of simplicity and understanding, we'll just create a small simulation.

      Create four variables in the script: one to reference the Animator component, another for the speed of the fall, a third one for the amount of vertical movement, and a flag to check whether the character is on the ground.

      public class CharacterMove : MonoBehaviour {
      
          // Variables
      	public Animator anim; // Refrerence to the animator
      	private float fallSpeed; // The speed the character falls
      	private float verticalMovement; // The amount of vertical movement
      	private bool onGround; // Flag to check whether the character is on the ground

      In the Start() method, you need to make sure that the speed is set to 0.03 (or whichever other value you feel suits your animations) and that the character is grounded.

      void Start () {
          // The character starts on the ground
      	onGround = true;
          // Set the fall speed
      	fallSpeed = 0.03f;
      }

      Now, on the Update() method, there are several things you need to check. First, you need to detect when the Space Bar is pressed, to make the character jump. When it's pressed, set the vertical movement to 1 and the onGround flag to false.

      void Update () {
          // If the space bar is pressed and the character is on the ground
      	if (Input.GetKeyDown(KeyCode.Space) == true && onGround == true)
      	{
      		verticalMovement = 1f;
      		onGround = false;
      	}
      }

      What happens when the Space Bar is not being pressed? Well, you need to check if the character is in the air and its vertical movement is greater than 0; if so, you need to reduce the vertical movement by subtracting the fall speed.

      void Update () {
      
      	// If the space bar is pressed and the character is on the ground
      	if (Input.GetKeyDown(KeyCode.Space) == true && onGround == true)
      	{
      		verticalMovement = 1f;
      		onGround = false;
      	}
      	else
      	{
      		// Check if the character is in the air and the vertical movement greater than 0
      		if(onGround == false && verticalMovement > 0)
      		{
      			// Reduce vertical movement
      			verticalMovement -= fallSpeed;
      		}
      	}
      }

      As you'll recall, once verticalMovement drops below 0.5, the Fall animation will start playing. 

      However, we don't want to subtract fallSpeed from verticalMovement forever, since the character will land at some point. If the vertical movement value is equal to or less than 0, we'll say that means the character has hit the ground.

      void Update () {
      	// If the space bar is pressed and the character is on the ground		if (Input.GetKeyDown(KeyCode.Space) == true && onGround == true)		{
      		verticalMovement = 1f;
              onGround = false;
      	}
      	else
      	{
      	// Check if the character is in the air and the vertical movement greater than 0
      	if(onGround == false && verticalMovement > 0)
      	{
          	// Reduce vertical movement
      		verticalMovement -= fallSpeed
      		// If the vertical movement is less or equal to 0, the character is on the floor
      		if (verticalMovement < 0)
              {
                  verticalMovement = 0;
      			onGround = true;
      		}
          }
      	}
      }

      To end the Update() method, you need to pass the values of verticalMovement and onGround to the Animator component:

      void Update () {
      
      	// If the space bar is pressed and the character is on the ground
      	if (Input.GetKeyDown(KeyCode.Space) == true && onGround == true)
      	{
      		verticalMovement = 1f;
      		onGround = false;
      	}
      	else
      	{
      		// Check if the character is in the air and the vertical movement greater than 0
      		if(onGround == false && verticalMovement > 0)
      		{
      	    	// Reduce vertical movement
      	    	verticalMovement -= fallSpeed;
      	    	// If the vertical movement is less or equal to 0, the character is on the floor
      	    	if (verticalMovement < 0)
                  {
      	    	verticalMovement = 0;
      	    	onGround = true;
      	    	}
          	}
          }
      
      	// Update the animator variables
      	anim.SetFloat("VerticalMovement", verticalMovement);
      	anim.SetBool("OnGround", onGround);
      }

      The script is finished. Now you have to add it to the Dragon game object and add the reference to the Animator component. To do this, once you add the script, drag the Animator to the proper field on the script.

      If you press play and test it, the animations should be changing like they're supposed to. The dragon starts on Idle, but once you press the Space Bar it will Jump and then start playing the Fall animation before returning to Idle.

      External Tools and Technologies

      Although in this tutorial series we've only used the default tools that come with Unity, there are a lot of great 2D tools on the Unity Asset Store that can help you make this process even easier and faster. Two good examples are Smooth Moves and Puppet 2D, each of which can help you to define the characters, the hierarchy and the animations in an intuitive and easy way. 

      Plug-ins like these offer some extras, like the ability to add 2D "bones", making the whole animation process easier and the deformations more realistic. If your idea is to use 2D animations with several degrees of detail, we strongly recommend you to check out those plugins.

      Conclusion

      This concludes our tutorial series about how to create a bone-based 2D animation with Unity. We've covered a lot of ground in this short series, and you should now know enough to get started with your 2D animations. If you have any questions or comments, as always, feel free to drop us a line in the comments.

      References

      • Dragon sprite sheet: used with permission from Chenguang from DragonBonesTeam

      Add Motion Control to a Kiwi.js Game With the Leap Motion Controller

      $
      0
      0

      In this tutorial, I'll help you make your first HTML5 game that is controlled by a Leap Motion Controller, using the Kiwi.js engine. (In case you haven't heard of it, Kiwi.js is a relatively new game engine that targets HTML5, WebGL, and JavaScript.)

      After hearing about the Leap Motion Controller, I knew I had to get my hands on one. It's a computer hardware sensor device that supports hand and finger motions as input, requiring no hand contact or touching. 

      I saw this as a new frontier to gaming not yet fully explored. How could I pass up on an opportunity this exciting? After my controller arrived, and I'd spent the next few days playing with all of the apps on the Airspace store, I decided that I wanted to take it further and make my own games with it.

      Getting Ready

      To follow this tutorial, you will need a text editor and a browser. I use Sublime Text 2, and I prefer Google Chrome for its extensive developer tools, but the workflow will be pretty much the same with whichever text editor and browser you choose.

      You’re also going to need a copy of Kiwi.js, the Kiwi.js Leap Motion Controller Plugin, and a Leap Motion Controller. To help us get started we’ll use a Kiwi.js game blueprint; blueprints are templates that speed up game creation by including all the initial non-game-specific setup (such as creating folder structures). You should download the Getting Started blueprint from the Kiwi.JS site.

      Once you have downloaded the blueprint, you should be able to navigate to the plugin folder located inside it. Once there, you will need to extract the Leap Motion Controller plugin to the plugins folder.

      Loading Assets Into the Game

      In the Getting Started blueprint, you will notice that inside the states folder, located inside the src folder, there are three JavaScript files. These contain the main states that we will need to run this particular Kiwi.js game. 

      A State in Kiwi.js is the main class that we use when wanting to create a game. States are used to keep different sections of a game separated; a single game may be composed of many different States. This means we can only ever have a single State active at a given time.

      The blueprint has separated the Kiwi.js game into three states for us: the Loading State, the Intro State, and the Play State.

      Inside the Loading State, we need to load our assets into the game. Since we are making a basic game to start off with  will will not be loading many assets. The game we will make will simply give visual feedback on the position of your hand and fingers, represented by dots.

      For this example, we'll use the two assets below. (Don’t worry, these graphics aren't meant to be pretty!)


      The green dot will be used to show the position of your hand in the game, and the red dot will be used to show the position of each finger, so I have named them hand.png and finger.png, respectively. Save them under these names in the img folder inside the assets folder.

      To load these assets into the game, you will have to add them to the game’s cache via the preload() method of LoadingState, which is found in the States folder, in the file named loading.js, like so:

      GettingStarted.Loading.preload = function () {
         KiwiLoadingScreen.prototype.preload.call(this);
      
         this.addImage('hand', 'assets/img/finger.png');
         this.addImage('finger', 'assets/img/hand.png');
      };

      Doing this means that we will be able to access and use the images from other States of the game, so let's start using them.

      Creating Objects for the Controller and Sprites

      To enable the Kiwi.js game to use the Leap Motion Controller, you need to create a controller object from the Leap Controller plugin. 

      First, we need to include the Leap Controller Scripts in theindex.html file, like so:

      <script type="text/javascript" src="plugins/LEAPController/LEAPController-0.1.3.js"></script><script src="http://js.leapmotion.com/leap-0.6.0.js"></script>

      Second, we need to make sure that the Game object knows we are using the Leap Controller plugin. 

      The Game object is the engine of a Kiwi.js game; it handles the initialization of all the various individual game managers. To let the Game know we want it to use the Leap Motion Controller plugin, we need to edit its game options. This can be done by adding a line of code inside the game.js file that is located inside the src folder:

      var gameOptions = {
          renderer: Kiwi.RENDERER_WEBGL, 
      	plugins:['LeapMotion'], //Add this line of code
      	width: 800,
      	height: 600
      }

      Now we are ready to create our controller object, by calling the following line inside the init() method of the Play State, which you can find inside the states folder inside the play.js file. You will notice that the state does not yet have a init() method, so you will have to add this. For convenience, we'll call the Leap Controller object control:

      GettingStarted.Play.init = function () {
        this.control = Kiwi.Plugins.LEAPController.createController();
      }

      Next, we'll create sprites that we can use to show the position of our hand and fingers in the game—one "hand" sprite and five "finger" sprites, specifically. To do this, simply create aKiwi.GameObject.Sprite and add it to the state; the best place to do this is in the create method of the state. 

      In this snippet, we create the sprites and add them to the stage, then store them in the fingers array:

      GettingStarted.Play.create = function () {
          this.hand = new Kiwi.GameObjects.Sprite(this, this.textures['hand'],  0, 0);
          this.addChild(this.hand);
          this.fingers = [];
          for (var i = 0; i <= 5; i++) {
            var temp = new Kiwi.GameObjects.Sprite(this, this.textures['finger'], 0, 0);
            this.addChild(temp); 
            this.fingers.push(temp);
          };
      }

      Using the Leap Motion Controller Object

      Once the game has preloaded its assets and been created, the Play State update loop will start running. This is where all of the fun stuff you create will happen! 

      In this case, we're going to move the sprites we just created to the positions of their corresponding hand and fingers, as detected by the Leap Motion Controller. This can be done easily by accessing various properties of the Leap Controller object:

      • hands[0].posX and hands[0].posY will give you the x- and y-coordinates, in the vertical plane parallel to the Leap Motion Controller, of the first hand that the controller detects.
      • hands[0].pointables[n].tipX and hands[0].pointables[n].tipY will give you the x- and y-coordinates, in the same space, of the tip of the nth finger on that hand.

      In the following snippet, you will see that I have centered the position of the hand and fingers by moving the x-position over by half of the stage width, reversing the y-position, and adding the height of the stage to the y-position:

      GettingStarted.Play.update = function() {
        Kiwi.State.prototype.update.call(this);
      
        this.hand.x = this.control.hands[0].posX + (game.stage.width * 0.5);
        this.hand.y = -this.control.hands[0].posY + (game.stage.height);
      
        for (var i = this.fingers.length - 1; i >= 0; i--) {
          this.fingers[i].x = this.control.hands[0].pointables[i].tipX;
          this.fingers[i].x += game.stage.width * 0.5;
      
          this.fingers[i].y = -this.control.hands[0].pointables[i].tipY;
          this.fingers[i].y += game.stage.height;
        }; 
      };

      Check out the example below to see what we have made!

      With the example above you will be able to start to see how fast and accurate the Leap Motion Controller is with Kiwi.js. Also, with the Leap Motion Controller's tracking capabilities, you can quickly see how you are able to manage multiple interactions with just one hand.

      Below is a list or values that the Leap Motion Controller plugin currently tracks for Kiwi.js:

      • Active Fingers: This indicates how many fingers the controller can detect. It can be found  via the pointables.active property.
      • Active Hands: This indicates the current number of hands that the controller can detect. It can be found with the hands.active property.
      • The current hand's x-, y-, and z-coordinates, relative to the controller. This can be done by accessing the posX, posY, and posZ values of the hand object, as we've seen.
      • The orientation of the hand: the roll, the pitch, and the yaw. These are taken from the normal vector of the palm of the hand—that is, the vector that points outward from the surface of your palm.

      This is also time to look the range at which the Leap Motion controller can track your hand. You will notice that the controller does have limitations to it's tracking range, as represented by the image below. 

      So you are probably thinking, "What happens when my hand leaves this range?" Well, the Leap Controller instantly notices that your hand is no longer visible and sets the active property of the hand to false. It also saves all of the data of the last known position of your hand until your hand becomes visible again.

      Going One Step Further

      So far we have only made a basic demo, which may be cool to experiment with, but isn't exactly fun. Next, let's make an actual game like the one shown below:


      Use your hands to move the character.

      Loading Assets

      In this game, we will animate some sprites. I have created a "FlappyNyan" sprite sheet that I will use for the this tutorial, along with some colored blocks which will be used for the color trail that FlappyNyan leaves behind. You are welcome to use these assets. Just grab them from the tutorial's GitHub repo.

      Creating Classes

      Instead of using the standard SpriteGameObject, we will want to create a new class that extends Sprite. The purpose of this class is to assist in creating the color trail of the cat. If you wanted to further your game, you could implement arcade physics into the class, allowing for simple collision detection, and giving access to properties such as velocity and acceleration.

      To create a class you will need to create a separate JS file in the entities folder; call it Nyan.js. You will also need to include this script in your index.html file, in the same way as the plugin scripts:

      <script type="text/javascript" src="src/entities/FlappyNyan.js"></script>

      Within this file, create a FlappyNyan class that has an animation of six frames:

      var FlappyNyan = function(state, x, y){
          Kiwi.GameObjects.Sprite.call(this, state, state.textures['FlappyNyanCat'], x, y);
          this.state = state;
          this.animation.add('walk', [0, 1, 2, 3, 4, 5], 0.1, true);    
          this.animation.play('walk');
      
          FlappyNyan.prototype.update = function(){
              Kiwi.GameObjects.Sprite.prototype.update.call(this);
          }
      }
      Kiwi.extend(FlappyNyan,Kiwi.GameObjects.Sprite);

      Next, we want to create the FlappyNyan’s trail. To do this, we will continuously spawn boxes that will look like what FlappyNyan always leaves behind: a glorious rainbow of colour. 

      For this, I have created another class, called MovingBox. This class simply creates a box of a certain color, moves left until it is off the screen, and then removes itself from the game:

      var MovingBox = function(state, x, y, texture){
          Kiwi.GameObjects.StaticImage.call(this, state, state.textures[texture], x, y, false);
          this.physics = this.components.add(new Kiwi.Components.ArcadePhysics(this, this.box));
      
          this.xVelo = -200;
          this.yVelo = 0;
          this.physics.velocity.x = this.xVelo;
          this.physics.velocity.y = this.yVelo;
          
          MovingBox.prototype.update = function(){
              Kiwi.GameObjects.StaticImage.prototype.update.call(this);
              this.physics.update();
              if (this.x < -50) {
                  this.destroy();
              }
          }
      }
      Kiwi.extend(MovingBox,Kiwi.GameObjects.StaticImage);

      Remember to include the MovingBox class in the index.html page.

      Using Classes

      Now you might be wondering how to use these boxes—let's tackle that next. These boxes that will be following FlappyNyan will represent the number of active fingers (that is, fingers that the Leap Motion Controller can see).

      Since we want the boxes to follow the FlappyNyan object, we will create a method to spawn these boxes inside the FlappyNyan class.

      To do this, all you need to do is add this method to theFlappyNyan class:

      FlappyNyan.prototype.spawnBoxes = function(one, two, three, four, five){
      
      if(one){    
          this.state.streamerGroup.addChild(new MovingBox(this.state, this.x , this.y + 05,  'yellowBox'));
          }
          if(two){ 
              this.state.streamerGroup.addChild(new MovingBox(this.state, this.x , this.y+ 15, 'orangeBox'));
          }
      
          if(three){ 
              this.state.streamerGroup.addChild(new MovingBox(this.state, this.x , this.y + 25,  'greenBox'));
          }
      
          if(four){ 
              this.state.streamerGroup.addChild(new MovingBox(this.state, this.x, this.y + 35,  'pinkBox'));
          }
      
          if(five){ 
              this.state.streamerGroup.addChild(new MovingBox(this.state, this.x, this.y + 45, 'blueBox'));
          }
      }

      Since we want to create these boxes every frame, add the spawn method to the update loop of the FlappyNyan class:

      this.spawnBoxes(this.state.control.hands[0].pointables[0].active, this.state.control.hands[0].pointables[1].active, 
      this.state.control.hands[0].pointables[2].active, 
      this.state.control.hands[0].pointables[3].active, 
      this.state.control.hands[0].pointables[4].active);

      Now that we have set up the two classes we need, all we need to do now is create a FlappyNyan object in the Create() method of the Play State, and add a Kiwi.Group to store the boxes in, then add these to the stage. 

      this.streamerGroup = new Kiwi.Group(this);
      this.addChild(this.streamerGroup);
      this.flappyNyan = new flappyNyan(this, 100, 100);
      this.addChild(this.flappyNyan);

      Once this is done we want to update its position, just as we have done for the hand object in the previous game.

      this.flappyNyan.x = this.control.hands[0].posX + game.stage.width * 0.5;
      this.flappyNyan.y = -this.control.hands[0].posY + game.stage.height;

      And that’s it! You should now have a game where you are controlling a FlappyNyan! 

      If you have any questions, feel free to ask. You can find all of the source code and assets in the tutorial's GitHub repo.

      How to Polish Your Games' Environments

      $
      0
      0

      Your players will get bored far faster than you would expect if your play spaces don't retain their attention. In this tutorial, I'll show you how you can easily crank the polish of your world up a couple of notches—this will go a long way towards capturing the imagination of players!

      Disclaimer: Not every game will benefit from this article. There are games that look better with less. There are games that look amazing empty and minimalistic. However, if you are looking to make something with a bit more oomph, the following should help you on your way.

      All too often, I see promising games held back because the developers didn't spend enough time developing the space their game takes place in. Games with bland worlds that lack a sense of wonder or intrigue. To fix this is normally seen as a huge undertaking that is outside of a developer's skills, but this is absolutely not true—it just takes a little imagination to use art assets to make a vibrant and living world.

      For example, this game world was  made with only two tree models. And as for the trees themselves: they're each simply a sphere on a cylinder (both with reduced vertices). Easy art with a big impact.

      Creating Assets to Use

      What Kinds of Assets Should You Make?

      In order to create environments that look polished, you are going to need assets. Before you start creating things, you must first figure out and understand what is needed in order to give life to your world. What inhabits your world? What sort of feeling do you want your world to have?

      In the picture above, we can see that the world in my game, Rabytt, is filled with flowers. That's it—and I used these flowers because I wanted to create a uplifting, loving feeling in the game. However, keep in mind that these flowers were easy to create (albeit time consuming), and went a long way in creating a more polished and vibrant world.

      Create a Story With Your Assets

      When you are deciding on your assets, make sure to create a story with them. Everything you add to your game has an impact on the player's view of your game world. So, before you start making the assets, first create a list of things that would populate your world. 

      Are you in a space station? Then wires, vents, buttons and dials, and computer panels all come to mind when I'm thinking of a space station. Is the space station destroyed? Then these things might appear broken. Create a list of things that would populate your world.

      Monaco is a great example of using a small number of assets to achieve a big payoff.

      Do you have that list? Yeah? Okay, good. Now pick three things from that list.

      "Whoa! But what about all this other stuff that's in this world?" you say. Well, hush: ever hear the saying "less is more?" If you were to try to create more than the three things it would:

      1. end up becoming a big undertaking, which defeats the purpose of this tutorial 
      2. make it harder to create a visual vocabulary
      3. make it difficult for accents to your world to stand out and create a more powerful atmosphere

      Keep it Consistent

      By now, you may have noticed that I haven't talked about how to actually physically create the art yet. That's because I'm not writing this to teach you how to draw. You as a designer must understand the limits of what is possible for you to do. Can't create amazing painterly style art? Go with pixel art. Can't do pixel art? Well that's a lie, everyone can do pixel art. You just need to start doing it.

      Now that that's out of the way, the most important thing that you can do is make sure that all of your art shares the same style. I'm sure that once you get to the point where you need to populate your game with assets, you will already have a style in place. Make sure that the art adheres to that style. If it doesn't look quite right the first time around, do it over. Take pride in making sure that your game looks as good as you can make it.

      To polish my game's overall look, I only used these simple, easy-to-make flowers.

      It's also important to make sure that for each asset you create slight variations of that asset. Color variations, little markings, different sizes and shapes. Nothing too big, but small changes can go a long way in making sure that the player still recognizes objects without noticing patterns.

      Now What?

      Where Should You Place the Art?

      Short answer: Everywhere.

      Long answer: Everywhere.

      Basically, don't be stingy with what you have. Put them everywhere that you can put them. However, be careful. You need a point at which you stop putting down objects. The best judge of that would be yourself and the type of atmosphere you game is aiming for. There will be a point where you feel like "this is enough".

      In my mind it felt weird to place flowers on the ceiling and walls, but I'm glad I stuck to it. Don't hold back.

      Use rotation and scale, flip them, do everything you can possibly think with them (as long as it fits your aesthetic). Holding back will stop you from coming up with some truly unique worlds.

      Avoid Saturation

      Do be careful with how much of the same asset you use in any one area. The reason you should create variations of the same assets is so you can ensure that the player won't notice patterns in the world. In the picture above, I used one asset twelve times in the scene—I just used variations in color, scale, and rotation to keep the player from realizing it.

      Use the variations to break up patterns and stop the player from recognizing and getting bored of the same visuals over and over again. If you catch yourself using the same asset multiple times in the same area, try switching it out for a variation of that asset. The player will stop noticing the pattern and start seeing a world.

      Fleshing Out the World

      Sealing the Seams of the Game World

      Seams are the parts of the world that don't look finished, or that feel like they're missing something. Obviously the first step in fixing this is finding out what is missing. Is a space in your world feeling empty? Is it boring? Too visually busy?

      This is hard to address, because it can easily change from game to game and really depends on the art style of the game. Sometimes empty is good. Sometimes boring is good. But this comes down to your own choices as a designer.

      In this particular game, for me, the seam was the background. It was empty (even with the trees), so I just used the flowers I made before, except this time silhouetted.

      If there is something you feel is out of place, then figure out what it is and see if any of your existing assets can fill in the problem.

      Special Art Assets

      Special art assets are things that accent your world.; they give it life and a story that can't be told with words. These are one-offs, but they are extremely powerful in leaving impressions on the player of what your world is like.

      These are assets that you only use once, tentatively twice, throughout your entire game. These assets are specific, and can't be generalized. Most of the time, you'll see these types of assets used for story purposes.

      In Papers, Please, this style of passport is used only once. However, it communicates so much to the player about the world and the people in it.

      Try to distil pieces of what you are trying to communicate to the player about your game into these art assets. Also, keep in mind exactly where you will be placing them. These aren't pieces of art that can be placed randomly; timing and position is important. However, this is something that is different for each game, so it is up to you as a designer to figure out how to get the most bang for your buck in these situations.

      Conclusion

      Don't ever assume that just because you aren't the world's greatest artist, or because you are strapped for time, that you can't create some beautiful game worlds. With a few simple art assets and a few moments to spread that art around as you go along, you will end up with a great, polished game world.

      References

      Funding Your Indie Games With Client Work: Building Up Your Practice

      $
      0
      0

      Now that you've started working on other people's games (and are getting paid for the work), the next step is to start building it into a sustainable effort to keep work coming. In this article, you'll learn a few tips that can help you avoid some of the pitfalls and grow your game development business.

      Building Your ​Portfolio

      Your portfolio determines whether you'll​ be hired for a job. Include everything you are proud of in your portfolio: student projects, community projects (yes, branch those open source projects), previous work experience, hobby projects, past client work, and anything else. But make sure you only put work you are proud of on your portfolio! You are only as good as what your portfolio shows to people who don't know you in person. 

      Again, looks are important. We live in a fast-paced, instagram​, snapchatting world where no one has time for anything, let alone words and descriptions. When potential customers have 100 portfolios to read through in two days, visuals are going to count quite a bit. 

      What if you are a programmer? Make your code and projects easy to read and easy to understand for non-technical customers. Link to your GitHub portfolios; GitHub's clean interface works to your advantage (and make sure you have nicely written README.md files with clear context and descriptions for each project). 

      The people ​making hiring decisions​ are frequently not the tech leads, but rather the producers, who may or may not have a technical background. It is your job to make sure your portfolio is as easy to grasp as possible for the client in ​just ​a few minutes.

      Building Trust

      Trust is crucial to the success of your client service business. You need the clients to trust that you have the ability to finish the project, trust that you are billing them correctly, trust that you are putting the right people on the project, and trust that you are building something solid underneath the surface.

      ​This is similar to hiring a babysitter​, from the client's perspective; you've got this ​seed of an idea and you want it to be amazing and to blossom, and you are trusting someone else to help you get there. When the client hands the project over to you, they are ​in​ a very vulnerable position. What if you take the project and run away with it? What if you deliver something that ​isn't what you've promised​?​ What if you've stolen art assets or other people's copyrighted work? It is scary hiring someone else to work on your valuable ideas and projects, and that's why trust is critical to your success.

      For people outside of your personal network, how do you build trust? The strength of your portfolio will help, but trust is built on soft skills. There are two ways to build ​trust: 

      First, you can build trust through all your communication with a potential customer from the very beginning, be it ​via ​email, on the phone, or in person. You have to be professional and genuine—the latter ​is ​especially important—and you have to be able to show what you know without coming across as ​egotistic, and show warmth​. ​

      I recommend you watch this TED Talk by Amy Cuddy.

      Trust is often built in the blink of an eye (for more on this, read Blink) and continuous improvements in personal communication will help—so start toda​y​!

      Second, ​trust can be built ​through word of mouth and your reputation. If you are already vetted by someone the client trusts, you are half way ​to getting the project. Give talks at conferences (start small and local if you can), write articles, help other developers out, and get involved in community work: find your local IGDA or game developer communities, or start one ​yourself.

      The best type of clients are repeat clients—people who love your work and trust that you have their best interests at heart​. Occasionally, you'll have to take a financial loss​ to maintain a good relationship or to repair trust with a client; just know that nothing is more valuable than ​holding their ​trust in the long run. Plenty of people will pay a premium to work with someone they can trust, but no one will hire someone whom they can't trust, no matter how much cheaper it is.

      Building Expertise

      Potential customers need to know that you know your stuff. You can show this in your portfolio, your blog posts, and your pet projects, but the most effective way to do this is by giving talks and publishing books. 

      Ask community organizers for talk opportunities; propose a talk on a topic that you are interested in and that is unique. I organize a developer community, and I am always looking for people to come talk to the group, so you'll be doing the organizer a favor by reaching out. 

      As for books, there are many ways you can get published (including ebooks and self-pub​l​i​s​hing). Don't expect huge profits from your books, but being able to talk about a particular topic for pages shows expertise and dedication—two important aspects when people are looking for help.

      Building Testimonials

      How do you build a sustainable business if you are always working on other people's intellectual portfolio? By building your portfolio, building your network, and building your testimonials. 

      Think of testimonials as word-of-mouth from someone you don't know; it's the closest second to being vetted by a trusted common friend. After each successful project, ask your clients if they can give you a testimonial, and also be sure to ask how you could​ further improve. 

      When a client writes you a testimonial, it also further strengthens your relationship with the client (building potential for repeat work), and acts as further social proof for trust with new customers.​ Asking for feedback ​also helps you grow as a studio and improve on your next project.

      A Note on Getting Paid

      Getting paid isn't always as straightforward as it should be. First thing's first: in your contract, make sure you have a clause that says unless you are fully paid, the IP remains with you (check with your legal counsel on this). The last payment is often the hardest to get, because once you've finished the project, there's little reason for the client to pay you as quickly as they should. Make sure this is in writing to protect yourself.

      Pay attention to payment terms. We used to do 30-day terms (meaning the client has up to 30 days to pay once we invoice them). But the problem is, we pay the team much earlier than that, and this 30-day difference puts a lot of risk and financial burden on the company, so ​we were constantly dealing with negative cash flow every beginning of the month. 

      Also communicate with your clients to find out when their accounts payable process invoices—this can come in handy for you to schedule the invoices at the right time so you don't miss their payment cycle.​ Aim to make it easy for them and they'll thank you for it, and you'll get paid.​

      If you have worked with a repeat customer for some time, you can negotiate a retainer, which is an upfront payment for a fixed amount of time to work on their projects each month. This is a great setup for both sides, as you​'ll​ get cash upfront (negative working capital) and the client will know that you'​ll​ reserve a certain amount of time for their projects. Retainers require a lot of trust, but they can simplify things and be hugely beneficial to all involved.​ Just be sure that the retainer covers all of your billable hours, or you'll end up spending more time on a project and lose out financially.​

      Conclusion

      ​For three years now, my company has worked on both client projects and our ​own IPs​. Client work has allowed us to stay independent and survive in ​an industry that's going through continuous changes. Despite some of the challenges it presents and the learning curve that’s involved, ​it’s one of the most reliable ways to fund your game studio, work on cool ideas and projects you wouldn't get to otherwise, grow your skillset, and meet lots of great people!

      How to Deal With a 'Bad' Game Jam Theme

      $
      0
      0

      You’re sitting at your computer, staring at the second hand on the clock. It’s almost time. You’ve cleared your schedule. The next 48 hours will be devoted to rapid game development, and you’ve never been more prepared for anything else in your entire life. The second hand ticks, the game jam begins, the theme is announced, and it’s terrible.

      Shortly after the announcement of the theme: "Waffles As Weapons"

      Having participated in my fair share of game jams, I can promise you that it’s not nearly as terrible as you think it is. In fact, there is actually no such thing as a ‘bad’ game jam theme. But before I convince you of that, allow me to share a few tips that will help get those creative juices flowing as quickly as possible.

      Break it Down

       If the theme consists of more than one word, break it apart and tackle each word individually. You may find that you only have a problem with one of the words in the theme. Start with the words you’re the most comfortable with, then go from there.

      Use a Dictionary

       Words often have multiple meanings, so make sure you fully understand the available interpretations of a theme before dismissing it entirely.

      Don’t Take it so Literally

       Suppose the theme is “Eat the Potato”. Yes, you could make a game about a potato that needs to be eaten, but how about an adventure game about a heroic potato named “Eat”? Don’t be afraid to twist the meaning of a theme.

      Setting vs Gameplay

       The strongest way to implement a theme is to work it into the gameplay. If you’re having difficulties coming up with a gameplay idea, inject the theme into the setting or story of your game instead. You may not end up with the most interesting theme interpretation, but anything is better than giving up.

      Take a Walk / Exercise

       A study by Charles Hillman of the University of Illinois has shown an increase in brain function after only 20 minutes of walking/exercise. You can think while walking, and maybe you will even see something on your journey that sparks inspiration. And if not, then the increased brain activity can only help you once you get back to your computer.

      Use the Internet

       It seems so obvious, but the internet is often taken for granted in situations like this. It’s the single largest source of information on the planet, and the answer to your problem is out there waiting to be discovered. Type the theme into Google and search through the text, image, and video results. You WILL find something to inspire you!

      There ARE No ‘Bad’ Game Jam Themes

      The most important thing to remember is that while you’re struggling to accept the theme, someone else is already hard at work on an amazing idea. The problem is NEVER the theme. The real issue is how you choose to approach it. Some of the most critically and commercially successful games of all time can be broken down into ‘bad’ themes if you try hard enough.

      Super Mario Brothers – “Plumbers not plumbing”
      Ico – “Hand holding”
      Skyrim – “Shouting”
      Journey – “Be quiet”

      A game about being quiet, knitting a magical scarf, and sand surfing. Awesome.

      So before you get angry at a theme announcement or throw your hands up in the air in defeat, remember that you could be less than 48 hours away from the greatest game you’ve ever made. You just haven’t thought of it yet.

      Using the HTML5 Gamepad API to Add Controller Support to Browser Games

      $
      0
      0

      As web-based gaming gets more popular, one of the biggest sticking points for players is input control. While my first FPS games were purely mouse- and keyboard-based, I've now got so much more used to a proper console controller that I'd rather use it for everything, including web-based games. 

      Luckily, the HTML5 Gamepad API exists to allow web developers programmatic access to game controllers. Unluckily, although this API has been around for a long time, it is only now, slowly, moving into the most recent versions of desktop browsers. It languished for a long time in one build of Firefox (not one build higher, no—one nightly build) and was problematic in Chrome. Now it is—well—not perfect, but slightly less problematic and actually pretty easy to use. 

      In this article, I'll discuss the various features of the API, how to get it working in both Firefox and Chrome, and show a real (if simple) game and how easy it is to add gamepad support to it.

      The Basics

      The Gamepad API comprises the following features:

      • The ability to listen for connect and disconnect events.
      • The ability to recognize multiple gamepads. (In theory, you could plug in as many gamepads as you have USB ports.)
      • The ability to inspect these gamepads and recognize how many axes they have (joysticks), how many buttons they have (have you played a modern game console lately?), and what state each of these individual items are in.

      Let's begin by discussing how you can detect support for a gamepad at a high level. 

      Both Firefox and Chrome support a method on navigator, getGamepads(), that returns an array of all connected gamepad devices. We can use this as a simple method of detecting whether the Gamepad API is present. Here is a simple function for that check:

      function canGame() {
          return "getGamepads" in navigator;
      }

      So far so good. Now for the funky part. The Gamepad API has support for events that detect when a gamepad is connected and disconnected. But what happens if the user already has a gamepad connected to their laptop when they hit your page? Normally, the web page will wait for the user to do something, anything really, with the actual gamepad. This means we have to provide some type of message to the user that lets them know that they need to "wake up" support for the gamepad if it is connected. You could tell them to hit any button or move a stick. 

      To make things even more interesting, this particular check does not seem to be required when you reload the page. You'll find that once you've used the Gamepad API on a page and then reloaded it, the page recognizes this fact and automatically considers it connected.

      But wait—it gets better. Chrome doesn't support the connected (or disconnected) events at this time. The typical work around for this (and the one demonstrated in the good MDN docs for the API) is to set up a poll and see whether a gamepad "shows up" in the list of connected devices.

      Confusing? Let's start off with an example supporting Firefox only:

      <!DOCTYPE html><html><head><meta charset="utf-8"><meta http-equiv="X-UA-Compatible" content="IE=edge,chrome=1"><title></title><meta name="description" content=""><meta name="viewport" content="width=device-width"><script type="text/javascript" src="http://ajax.googleapis.com/ajax/libs/jquery/2.1.0/jquery.min.js"></script></head><body><div id="gamepadPrompt"></div><script>
      	function canGame() {
      		return "getGamepads" in navigator;
      	}
      
      	$(document).ready(function() {
      
      		if(canGame()) {
      
      			var prompt = "To begin using your gamepad, connect it and press any button!";
      			$("#gamepadPrompt").text(prompt);
      
      			$(window).on("gamepadconnected", function() {
      				$("#gamepadPrompt").html("Gamepad connected!");
      				console.log("connection event");
      			});
      
      			$(window).on("gamepaddisconnected", function() {
      				console.log("disconnection event");
      				$("#gamepadPrompt").text(prompt);
      			});
      
      		}
      
      	});
      	</script></body></html>

      In the example above, we begin by checking to see whether the browser supports the Gamepad API. If it does, we first update a div with instructions for the user, and then begin listening immediately to both the connect and disconnect events. 

      If you run this with Firefox and connect your gamepad, you should then have to also hit a button, at which point the event is fired and you're ready to go. 

      Again, though, in my testing, when I reload the page, the connection event is immediate. This does create a slight "flicker" effect that may be undeseriable. You could actually use an interval to set the directions for something like 250ms after the DOM has loaded and only prompt if a connection didn't occur in the meantime. I decided to keep things simple for this tutorial.

      Our code works for Firefox, but now let's add Chrome support:

      <!DOCTYPE html><html><head><meta charset="utf-8"><meta http-equiv="X-UA-Compatible" content="IE=edge,chrome=1"><title></title><meta name="description" content=""><meta name="viewport" content="width=device-width"><script type="text/javascript" src="http://ajax.googleapis.com/ajax/libs/jquery/2.1.0/jquery.min.js"></script></head><body><div id="gamepadPrompt"></div><script>
      	var hasGP = false;
      
      	function canGame() {
      		return "getGamepads" in navigator;
      	}
      
      	$(document).ready(function() {
      
      		if(canGame()) {
      
      			var prompt = "To begin using your gamepad, connect it and press any button!";
      			$("#gamepadPrompt").text(prompt);
      
      			$(window).on("gamepadconnected", function() {
      				hasGP = true;
      				$("#gamepadPrompt").html("Gamepad connected!");
      				console.log("connection event");
      			});
      
      			$(window).on("gamepaddisconnected", function() {
      				console.log("disconnection event");
      				$("#gamepadPrompt").text(prompt);
      			});
      
      			//setup an interval for Chrome
      			var checkGP = window.setInterval(function() {
      				if(navigator.getGamepads()[0]) {
      					if(!hasGP) $(window).trigger("gamepadconnected");
      					window.clearInterval(checkGP);
      				}
      			}, 500);
      		}
      
      	});
      	</script></body></html>

      The code is a bit more complex now, but not terribly so. Load the demo in Chrome and see what happens.

      Note that we've got a new global variable, hasGP, that we'll use as a general flag for having a gamepad connected. As before, we have two event listeners, but now we've got a new interval set up to check to see whether a gamepad exists. This is the first time you've seen getGamepads in action, and we'll describe it a bit more in the next section, but for now know that it just returns an array, and if the first item exists, we can use that as a way of knowing that a gamepad is connected. 

      We use jQuery to fire off the same event Firefox would have received, and then clear the interval. Notice that this same interval will fire once in Firefox as well, which is slightly wasteful, but honestly I thought it was a waste of time adding in additional support to sniff Chrome versus Firefox. One small call like this wasted in Firefox should not matter at all.

      Now that we've got a connected gamepad, let's work with it!

      The Gamepad Object

      To give you an idea of just how old I am - here is the state of the art joystick I used for my first gaming system.


      Image from Wikimedia Commons.

      Nice - simple - and it hurt like hell after an hour of playing. Modern consoles have much more complex gamepads. Consider the PS4 controller:

      Image from Wikimedia Commons.

      This controller has two sticks, a directional pad, four main buttons, four more on the back, a Share and Options button, a PS button, some funky touch control thing, a speaker, and a light. It also probably has a flux capaciter and a kitchen sink. 

      Luckily, we've got access to this beast via the Gamepad object. Properties include:

      • id: This is the name of the controller. Don't expect something friendly from this. My DualShock 4 was reported as 54c-5c4-Wireless Controller in Firefox, whereas Chrome called the same controller Wireless Controller (STANDARD GAMEPAD Vendor: 054c Product: 05c4).
      • index: Since the Gamepad API supports multiple controllers, this one lets you determine which numbered controller it is. It could be used to identify player one, two, and so on.
      • mapping: Mapping isn't something we're going to cover here, but essentially this is something the browser can do to help map your particular controller to a "standard" controller setup. If you've played multiple consoles you know they have some similarities in terms of control, and the API tries to "mash" your controller into a standard. You don't have to worry about this for now, but if you want more details, check the mapping section of the API docs.
      • connected: A Boolean indicating whether the controller is still connected.
      • buttons: An array of button values. Each button is an instance of GamepadButton. Note that the GamepadButton object supports both a simple Boolean property (pressed) as well as a value property for analog buttons.
      • axes: An array of values representing the different sticks on the gamepad. Given a gamepad with three sticks, you will have an array of six items, where each stick is represented by two array values. The first in the pair represents X, or left/right movement, while the second represents Y, up/down movement. In all cases the value will range from -1 to 1: for left/right values, -1 is left and 1 is right; for up/down values, -1 is up and 1 is down. According to the API, the array is sorted according to "importance", so in theory, you can focus on axes[0] and axes[1] for most gaming needs. To make things more interesting, using my DualShock 4, Firefox reported three axes (which makes sense—see the picture above), but Chrome reported two. It seems as if the d-pad stick is reported in Firefox as an axis, but no data seems to come out of it. In Chrome, the d-pad showed up as additional buttons, and was correctly read.
      • timestamp: Finally, this value is a timestamp representing the last time the hardware was checked. In theory, this is probably not something you would use.

      Okay, so that's lot to digest. In the example below, we've simply added a interval to get, and inspect, the first gamepad, and print out the ID and then the buttons and axes:

      <!DOCTYPE html><html><head><meta charset="utf-8"><meta http-equiv="X-UA-Compatible" content="IE=edge,chrome=1"><title></title><meta name="description" content=""><meta name="viewport" content="width=device-width"><script type="text/javascript" src="http://ajax.googleapis.com/ajax/libs/jquery/2.1.0/jquery.min.js"></script></head><body><div id="gamepadPrompt"></div><div id="gamepadDisplay"></div><script>
      	var hasGP = false;
      	var repGP;
      
      	function canGame() {
      		return "getGamepads" in navigator;
      	}
      
      	function reportOnGamepad() {
      		var gp = navigator.getGamepads()[0];
      		var html = "";
      			html += "id: "+gp.id+"<br/>";
      
      		for(var i=0;i<gp.buttons.length;i++) {
      			html+= "Button "+(i+1)+": ";
      			if(gp.buttons[i].pressed) html+= " pressed";
      			html+= "<br/>";
      		}
      
      		for(var i=0;i<gp.axes.length; i+=2) {
      			html+= "Stick "+(Math.ceil(i/2)+1)+": "+gp.axes[i]+","+gp.axes[i+1]+"<br/>";
      		}
      
      		$("#gamepadDisplay").html(html);
      	}
      
      	$(document).ready(function() {
      
      		if(canGame()) {
      
      			var prompt = "To begin using your gamepad, connect it and press any button!";
      			$("#gamepadPrompt").text(prompt);
      
      			$(window).on("gamepadconnected", function() {
      				hasGP = true;
      				$("#gamepadPrompt").html("Gamepad connected!");
      				console.log("connection event");
      				repGP = window.setInterval(reportOnGamepad,100);
      			});
      
      			$(window).on("gamepaddisconnected", function() {
      				console.log("disconnection event");
      				$("#gamepadPrompt").text(prompt);
      				window.clearInterval(repGP);
      			});
      
      			//setup an interval for Chrome
      			var checkGP = window.setInterval(function() {
      				console.log('checkGP');
      				if(navigator.getGamepads()[0]) {
      					if(!hasGP) $(window).trigger("gamepadconnected");
      					window.clearInterval(checkGP);
      				}
      			}, 500);
      		}
      
      	});
      	</script></body></html>

      You can try the demo in either Chrome or Firefox.

      I assume this is all pretty self explanatory; the only real difficult part was handling the axes. I loop over the array and count by twos to represent both the left/right, up/down values at once. If you open this up in Firefox and connect a DualShock, you may see something like this.

      As you can see, Button 2 was pressed when I took my screenshot. (In case you're curious, that was the X button.) Note the sticks; my gamepad was sitting on my laptop and those values were constantly fluctuating. Not in a way that would imply the values were bad, per se—if I picked up the game pad and pushed all the way in one direction, I saw the right value. But I believe what I was seeing was just how sensitive the controller is to the environment. Or maybe gremlins.

      Here is an example of how Chrome displays it:

      I was, again, holding the X button—but notice how the button index is different here. As you can tell, you're going to need to do a bit of... massaging if you want to use this API for a game. I'd imagine you could check both Buttons 1 and 2 for "fire" and follow up with a good deal of testing.

      Putting It All Together

      So, how about a real demo? Like most coders who started their life playing video games, I dreamed of being a hotshot video game creator when I grew up. It turns out that math gets real hard after calculus, and apparently this "web" stuff has a future, so while that future didn't pan out for me, I'd still like to imagine that one day I could turn these web standards skills into a playable game. Until that day, what I've got today is a pretty lame canvas-based version of pong. Single-player pong. As I said, lame.

      The game simply renders a paddle and a ball, and gives you keyboard control over the ball. Every time you miss the ball, the score goes up. Which makes sense for golf rather than pong, I suppose, but let's not worry too much about it. The code can be found in game1.html and you can play the demo in your browser

      I won't go through all the code here, but let's look at a few snippets. First, here is the main loop function which handles all animation details:

      function loop() {
          draw.clear();
      	ball.move();
      	ball.draw();
      	paddle.draw();
      	paddle.move();
      	draw.text("Score: "+score, 10, 20, 20);
      }

      The paddle is driven by the keyboard using two simple event handlers:

      $(window).keydown(function(e) {
         switch (e.keyCode) {
          	case 37: input.left = true; break;                            
      		case 39: input.right = true; break;                            
         } 
      });
      
      $(window).keyup(function(e) {
         switch (e.keyCode) {
      		case 37: input.left = false; break;                            
      		case 39: input.right = false; break;                            
         } 
      });
      

      The input variable is a global variable that is picked up by a paddle object move method:

      this.move = function() {
          if(input.left) {
      		this.x -= this.speed;
      		if(this.x < 0) this.x=0;
      	}
      	if(input.right) {
      		this.x += this.speed;
      		if((this.x+this.w) > canvas.width) this.x=canvas.width-this.w;
      	}
      }

      Again, nothing too complex here. Here is a screenshot of the game in action. (I know—I shouldn't quit my day job.)

      So, how do we add gamepad support? Luckily, we've got the code done for us already. In the previous demo, we did everything required to check for and notice updates to the code. We can take that code and simply append it to the game's existing code. 

      Since it is (virtually) the same, I won't repeat it (though the full listing is available if you want it), but I will share the modified code run every 100ms once a gamepad is detected:

      function checkGamepad() {
          var gp = navigator.getGamepads()[0];
      	var axeLF = gp.axes[0];
      	if(axeLF < -0.5) {
      		input.left = true;
      		input.right = false;
      	} else if(axeLF > 0.5) {
      		input.left = false;
      		input.right = true;
      	} else {
      		input.left = false;
      		input.right = false;
      	}
      }

      Again, you can try the demo in either browser.

      As with the previous example, we've assumed that we only care about one gamepad. Since our game only has a paddle and it only moves horizontally, we can get by by only checking the very first axis. Remember, according to the API this should be the "most important" one, and in my testing it was the left stick, which is pretty standard for games. 

      Since our game uses a global variable, input, to represent left and right movement, all I have to do is modify that value based on the axis value. Now, notice that I didn't simply check for "less than zero" and "greater than zero". Why? If you remember from the earlier demo, the gamepad was very sensitive, and would often report values even when I didn't think I had actually moved the stick. Using a boundary value of .5 gives the control a bit more stability. (And obviously this is the type of thing you would need to tweak to see what "feels" right.) 

      All in all, I added roughly 25 lines of code to my game to add gamepad support. That rocks.

      Game On!

      Hopefully you've seen that, while there are definitely some idiosyncrasies, the Gamepad API now has support in two major browsers, and it's something I think developers really should start considering for their games.

      Resources

      Here's a few additional resources to help you learn more about the Gamepad API.

      References


      Bone-Based Unity 2D Animation: Introduction

      $
      0
      0

      In this tutorial, we will focus on the bone-based 2D animation tools provided by the Unity engine. The main idea is to present and teach the fundamentals of 2D animation in order for you to apply it to your own games. In this post, we'll set up the project, define the assets, and do the initial preparations for the animation.

      Before we start the tutorial, we would like to thank Chenguang (DragonBonesTeam) for providing us with the game art used to produce this tutorial series.

      Who is This Tutorial For?

      This tutorial is primarily aimed at two groups of game developers:

      • Those who are unfamiliar with Unity at all.
      • Those who are familiar with Unity, but not the Unity 2D engine and tools.

      We assume that you have some programming skills, so we won't cover the code in depth. In order to follow this tutorial, you will of course need to download Unity.

      For a quick start using Unity, follow our previous tutorial that introduces you to the Unity 2D environment and its tools and characteristics. We strongly recommend that you do this if you are not familiar with Unity.

      Final Preview

      This demo shows the animated dragon we're aiming for:

      Project Setup

      Launch Unity and create a new project by selecting New Project... from the File menu. The Project Wizard will appear. Now, create a new 2D project, followed by a new folder called Sprites (inside your Assets directory). 

      Now that you have the project folder organized, it's time to import the game assets. You can find them in the Assets folder of this tutorial's GitHub repo. (You can just click Download ZIP on the latter page if you're not familiar with GitHub.) Note that this folder includes assets for the whole tutorial series, so there are some that you won't use until later on.

      Bone Animation vs Sprite Atlases

      Before moving on, compare the following two images:

      In the first image, the dragon is divided into several body parts (head, body, arms, and so on). In the second, the ninja is shown in several poses, with a sequence of poses for different actions. This lets you clearly imagine how the avatar will move in your game.

      The ninja sprite is what we call a sprite sheet or sprite atlas. This type of sprite was very popular on the classic 2D games, and it's still very common today. 

      The dragon sprite requires a more recent 2D animation technique, normally called bone-based animation. As the name suggests, the animation will be on a per-bone basis, where each body bone can have a specific action or animation. Having all the main body parts of the character separated allows the developers to create the animations directly in the engine. This new animation technique is very similar to what is used in 3D animation.

      In this tutorial, we're going to focus on bone-based animation. However, note that Unity does not do true bone-based animation, so we will simulate it.

      Preparing The Sprite For Animation

      Drag the sprite file to the editor and drop it on the Sprites folder, like so:

      Before any character is ready for animation, you need to add a Scene to the project. Create a Scenes folder in your Assets directory, then create a new scene and save it as Test.scene within this folder. At the end of this step, you should have something like this:

      Now, still in the Project tab, select the dragon sprite, then look at the Inspector panel:

      As you can see in the Sprite Mode property in the Inspector, the Sprite Mode is set to Single. This means that the engine will use the entire texture as a whole when creating a new sprite. Since we have the body parts separated in the dragon, we don't want that to happen. We therefore need to change the Sprite Mode from Single to Multiple

      When you change the option, a new button labelled Sprite Editor appears:

      Currently, the Sprite Editor slicing tool does not work well on compressed images. In order to ensure the best result for the animated sprites, you need to change the Format value on the bottom of the Inspector tab from the default option, Compressed, to Truecolor. Then, click Apply.

      Now, select the dragon sprite and click the Sprite Editor button. A new window will pop up:

      In the upper left corner of the window, you will find the Slice button. Click on it, and another menu will pop up:

      This menu allows you to change the parameters of how the sprite will be sliced by the engine. If you set the slices to Automatic, the engine will try to detect the different parts of the character you have in the image. You can define a minimum size for the slices, a pivot (the point around which the slice rotates) and one of three methods:

      • Delete Existing will replace any existing slices.
      • Smart will try to create new slices while retaining or adjusting the existing ones.
      • Safe will add new slices without modifying the existing ones.

      You can also set the Type parameter to Grid. This will give you other options:

      As in the automatic mode, you can select the pivot point of the sprite, but you also have an option to define the pixel size. This value determines the height and width of the tiles in pixels. 

      For this particular image, select the Automatic mode and press the Slice button. The result should be similar to this:

      As you can see, the editor sliced the various parts of the sprite into different rectangles. These are the parts you are going to use to build your character. As mentioned above, this will not be a perfect bone animation but each part will be animated separately.

      If you double-click in one of the generated rectangles, a pop up panel will open with the properties of that particular part of the sprite:

      You can change the name of the generated sprite, its position, its size, and its pivot point. You can also change the position and size values by dragging the blue points on the rectangles' vertices. The blue circle on the center of the selected rectangle indicates the pivot point.

      For this sprite, it is safe to let Unity to create the individual sprites automatically. However, in more complex sprites you may want to define the sprites manually. You can do this by clicking and dragging the left mouse button over the image to define a rectangle.

      Once you release the mouse button, Unity will create a sprite from that rectangle.

      You can press the Trim button to adjust the rectangle to the sprite. Then, just repeat this process to all the sprites you want to generate.

      Since the automatic mode works fine for this image, you don't have to define the sprites manually.

      Adjusting the Pivot Points

      The next thing to do is to adjust the pivot points on the various generated sprites. This step is very important for the animation. 

      Basically, you need to to drag the pivot point to the area where the sprite will join the parent body part. For example, you want to move the head's pivot near to the neck area. This will make sure that, when you animate the character, all movements, for example the rotations, will orient around that point, allowing the character to move in a realistic way. If you left the pivot points in their original places, you would end up with strange animations, since the character would not be able to move in a realistic way.

      Think of the pivot points of the members as the joints of a doll. In order for the doll to move, the joints must be correctly placed, right? The same rules apply for the pivot points.

      To move the pivot point, drag the blue circle at the center of each sprite to the correct place (which is the point where it should connect to the parent body part). In the following image you can see the head pivot in its correct place:

      The tail part should look like this:

      Did you get the idea? Great! Repeat the process for the remaining parts. (You can leave the pivot for the black spot in its center; we'll explain more about this in the next section.) Remember, you want a dragon animation, not a Frankenstein animation.

      Once you're finished, click Apply:

      If you take a quick look at the folder where you have the sprites, you will be able to see that the dragon sprite now has an arrow next to it:

      Press the arrow and you will be able to see all the parts that comprise our dragon character separately:

      Assembling the Character

      Now that you have your character sliced into different sprites, you can start placing the sprites into the scene. Since the dragon is composed of several body parts, you need to build the character. 

      The first thing to do is drag the black dot of the dragon sprite to the scene. This object will work as a center of mass for your character. Later on, you will focus your attention there; however, for now, just know that this is the base for your character.

      Now, take the body of the dragon and place it over the black dot, like so:

      Repeat this process until you have assembled your dragon. By the end it should look something like this:

      You finally have your dragon ready—however, as you may notice, it looks weird. Some parts that should be under the body are over it, or vice-versa. That happens because we added the dragon parts without any specific order. 

      Before we solve that issue, let's turn the dragon sprite into a single game object. As you may have noticed, right now the several parts of the dragon work as individual game objects—you need to group them into a single game object before you can start to animate them. 

      In order to correctly group all the sprites, use the sprite with the black dot as the main game object; all the other body parts should be grouped under the sprite mass. Just drag a sprite on to the black dot sprite within the Hierarchy to group it under the black dot.

      On the next image you can see how the sprite hierarchy should look like after you have grouped the game objects.

      Before moving on, rename your base game object to Dragon. When you move the Dragon game object, you can now move all the parts of the character on the scene. 

      But what if you want to move just one single sprite? For instance, if you want to move just the hand, you know that the arm is connected to the hand, so, if you move it, all the hand should move too, correct? If you try to do this, you will see that is not the case. When you select the arm and move it, the remaining parts of the body stay still. So, in order to move the complete body part, you need to create a hierarchy inside your sprite.

      To make this process more intuitive, rename the body parts (by right-clicking and selecting Rename) with their respective names, like so:

      Regarding the hierarchy, think of the character as a tree, with roots, a trunk, and branches. The black dot acts like the root of the tree; when you move it, all the character body moves. After the root comes the trunk; in this case, your trunk will be the body of the character, so this will be the next sprite in the hierarchy. All the other body parts are branches of the tree. However, you can still have branches of branches like, for example, in the tail—the Tail Tip is a branch of the Tail, and so on..

      Organize the sprites of your character following this hierarchy:

      Now, if you move the upper arm, all the parts of the arm will follow. Great, isn't it?

      Re-Ordering the Sprites

      Before you can start animating the character, there is still one last detail we need to take care of. As we discussed, the sprite parts are not being drawn in the correct order. To solve this, you must change the value of the Order in Layer parameter for each individual sprite.

      In order to be sure that the tutorial is successful, please use the following values for each Sprite:

      • Dragon: 0
      • Body: 3
      • Head: 4
      • Left Leg: 4
      • Left Upper Arm: 5
      • Left Arm: 4
      • Left Hand: 5
      • Right Leg: 1
      • Right Upper Arm: 2
      • Right Arm: 1
      • Right Hand: 2
      • Tail: 4
      • Tail Tip: 5

      By the end, your dragon should look something like this:

      To finish this part, just center your character to the screen. Do this by changing the Transform values of the center position to (0, 0, 0).

      Next Time

      This concludes the first part of the series. You now have a 2D character with the correct sprite order and hierarchy.

      If you have any questions or feedback on what we've covered so far, feel free to leave a comment below.

      References

      How to Make an Indie Game Trailer With No Budget

      $
      0
      0

      You have finally finished making a truly unique and amazing game—congratulations! Now comes the hard part: getting people to play it.

      If you are anything like me, then you have likely spent all of your time and energy (and money) on actually creating your project, and don't have a lot of patience or funds left over for the most important part of the game development journey: marketing. Luckily for you, you likely already have everything you need to create a professional looking gameplay trailer for your game. In just a couple of hours, you could be well on your way to YouTube glory!

      Why Does Your Game Need a Trailer?

      Looking at the App Store, Google Play store, and Steam lately, it's easy to see that the marketplace is getting crowded. The number one challenge faced by every indie game developer is getting their product noticed. You need to come out of the gate in the initial weeks and months of launch with all barrels of your promotional arsenal loaded and firing.

      There is no better way to show people why your product is awesome than with a short, well put together trailer detailing why your game is special; and also telling people where they can get it!

      What Do Your Need?

      To make a simple (but awesome) gameplay trailer, you need the following:

      1. A computer (hopefully you have one of these already)
      2. Video editing software (I use iMovie, which comes free with OS X)
      3. Video screen-captures of your game
      4. Background music
      5. A decent font to use for your text
      6. Still screenshots (optional)

      Always check the licensing of all assets that you use. Ensure that you have the rights to distribute it in video form, as well as within your game. 

      Choosing Software

      There are a ton of options available for free (or nearly free) video editing software available. The screenshots that follow will be of my software of choice, but of course you are not restricted to using just one option. 

      Several great free options are:

      1. iMovie 10 (Mac, free with OS 10.9)
      2. Windows Movie Maker (Windows, free)
      3. Open BroadCaster Software (Windows, https://obsproject.com/)

      When choosing software, the most important aspect is to choose a product that you find easy for you to use, and that is readily accessible. Here are two great examples. I use a visual-based software, iMovie, available for Mac:

      1. Sidebar Asset Library (where your video, sound, and image files will show up)
      2. Clip Browser
      3. Project Preview Pane
      4. Video Timeline
      5. Audio Timeline
      6. Sidebar Content Library
      7. Menu Bar

      Another popular choice for video editing is Adobe Photoshop. As of version CS6, a powerful video editor has been incorporated into the program. 

      Here is the standard interface for video in Photoshop:

      Photoshop grants access to all the editing tools available for standard still images for use with video files, but with all that power can come a slightly larger barrier to entry. 

      Plenty of tutorials exist online for using various programs; what I will say is, you should find one that works well for you, without putting up too many walls. The point is to be able to build a trailer without taking you away from working on your game.

      Gameplay Video

      We can't talk about making a trailer without having a game to make a trailer about! So here, take a gander at the amazing new game: Flying Sky Ace, exclusive to this tutorial:

      This is the sample video file that we will be using over the course of this discussion to create our trailer from. I use a product called Reflector (which has a free version) to capture screenshots and video live from my devices to make trailers and sneak peeks from. If you're on Windows, you could use FRAPS instead.

      This is very important to note: I never use emulators when taking video that I intend to use for production or marketing purposes. The simple reason for this is that I always want my trailers and promotional material to be reflective of the actual experience. Emulators can be buggy and jarring, and you want the best possible version of your project showing through these videos.

      To make your video editing as simple as possible, remove all background music from the game before taking the video capture. Leave the sound effects, though! 

      Later we will add a background music track to the entire video, and by removing the music from the gameplay video capture, our process just got a ton easier. Leaving in the sound effects will help to grab the audiences attention during the trailer, and help to keep the action during the video grounded.

      Audio Assets

      Aside from the gameplay video, you will need to choose the background music for your trailer. Fortunately, you likely already have a pool of audio resources to choose from from your game. To make things simple, choose a single background music loop that is at least as long as your trailer will be. 

      By avoiding cutting different audio tracks, we will greatly simplify our editing process, and avoid creating jarring thematic changes over the course of our trailer. We don't need any additional sound effects or voice overs, because we left the effects in from our video captures! That should again make things much easier down the line.

      I've chosen to use the track Rainbow for this trailer. Make sure that the audio track you choose follows the theme of your game, but try to keep things up-tempo; the function of a trailer is to generate excitement for your game, after all.

      Still Shots

      I have included still shots as an optional component to your trailer. They can be effectively used as background elements in a pinch, but I would caution against using them too much. A trailer is most effective when it is visually interesting, and a still image is inherently boring. 

      If you are looking to convey a textual message to your audience, try to keep the action flowing in the background at the same time. We will look at some ways to accomplish this later on.

      One great use for a still image for your game trailer is as a final splash screen. You can have your trailer end with this image for a few seconds, and convey important information such as social network links, the game's website, and the release window. 

      Jump into your favourite image editing software, and either create it on a black background, or modify one of your existing still images. You'll end up with something like this:

      Importing Assets

      Let's look at importing your assets into our video editing program. I'll run through the process with iMovie 10, but the basic process should be similar for whatever software you're using. 

      Create a new project, and import your video, audio and image assets. In iMovie, this is done by clicking the Import icon in the Menu Bar to bring up a file navigator.

      Locate the folder containing your video, music and image files and click Import All to bring the assets into your workflow.

      After importing your asset files, the Clip Browser will now be populated with media. Audio files will show up as green timeline artifacts, video files as timeline clips, and images as single frames with a camera icon on them. 

      Select audio or video frame sequences by clicking-and-draging over desired sections, resulting in a yellow-framed bounding box. To select an image, simply click on it. When you have made a selection, drag it down into the timeline to populate it in your desired order. You can always move sections around later, so don't get too bogged down early on by trying to make this look perfect.

      Lights! Camera!

      Okay, now let's begin to build something resembling a game trailer. Select some sections of clips and drag them into your timeline. Next, click on each in the timeline and detach the audio from the video (Modify > Detach Audio). Also, drag in your background music to the audio timeline. 

      You should be left with something like this:

      Why did we bother with detaching the video audio? To be honest, you might not need to, but I find it a useful step. Detaching the audio gives you control over its tempo, its fading, and most importantly its volume. You may find the sound effects from the game drown out the background music or voice over if you happen to include it, and this gives you a level of control you wouldn't otherwise have. 

      If you want to have a look at how the trailer builds out right now, press the Space bar to begin a playback in the preview panel. Press Space again to pause the playback, and use the mouse or the \ key to move the playback cursor back to the start of the timeline. These commands are common to most video editing software, but may differ slightly depending on your program of choice.

      Move clips around until you find a pattern that you like. Keep in mind that video editing is very fluid, and you will be changing everything a lot while you flesh out this trailer. The key is to just keep working and don't get too bogged down by any one step. 

      Speaking of fleshing out this trailer, we could sure use a way to communicate some information to our audience...

      Building a Better Trailer

      Textual information is presented in the form of titles. In Photoshop, you can use the built-in textual editor to overlay titles onto your video. Place titles in keyframes throughout the timeline, and then perform transitions and fades on that text object in the layer tree to give it the appearance of motion and fluidity within your movie.

      In dedicated video editing software, it is often much easier than this to add titles to our movie. If you are using iMovie, look at the Sidebar Content Library in the lower left corner of our interface and you will see a widget just for these. Click it to populate the Clip Browser with all sorts of goodies. If you hover your mouse over any one of them, it will allow you to see a preview of what it would look like in your project.


      Titles are used in two ways, as an overlay element to your clip and as their own "clip" segment. Play with all of the options available to you and decide what titles best suit your game and trailer. Video editing is very much an art form, so telling you what to use would be a disservice. Just work within your theme and you will be fine. 

      Here's what I did to Flying Sky Ace:

      At the end of the video, notice how it has a nice fade to black? That is the first example of some finishing touches that we are about to add to our trailer. The rest of the video seems choppy in comparison, and that's because we haven't added any transition effects between our clips yet.

      Finishing Touches

      A transition creates a visual cue tying two scenes together. If you have ever watched the Star Wars films—particularly the prequels—you have seen them used to almost embarrassing effect. We will now look at using a few transitions to help smooth out our trailer, without going overboard. 

      As it stands, your timeline should look something like this:

      A transition element is visually indicated on the timeline in iMovie by the grey box with two arrows. Other programs will represent them in a similar manner.

      As a rule, I always use a transition between two clips in my trailers. Having a cut between two clips without any form of fade or dissolve will seem jarring to your audience, as you likely experienced in the last video. In iMovie, the transitions menu is available in the content library. In other programs, they are similarly accessible. Experiment by dragging in various transitions and playing with the timing and variety available to you within your program of choice.

      Again, there is no right or wrong. As a general rule, I like to stick to one or two types of transitions and one or two forms of titles within my trailers. I find that by staying consistent, my videos seem more cohesive. Play with it and find what works best for you. Here is what I ended up with:

      Your final timeline will look something like this:

      For a final finishing touch, I added a fade-out to the background sound file. In iMovie, this is accomplished by clicking and dragging on the volume at the very end of the timeline representation for the audio file. 

      With the trailer made and published to the web, there is only one more facet of the process to consider...

      Selling Your Game

      As indie game developers, we typically have to wear a lot of different hats. Depending on your setup and team, you could be a programmer, artist, audio-tech, musician, director, producer, and finally salesman. I have two rules about marketing:

      1. Never ask anyone to play your game; instead, focus on telling them why they should. 
      2. It doesn't matter how awesome my game is if no-one knows about it. 

      Marketing begins long before you release your game. Your trailer needs to be both the introduction to your game, and also the final push in guiding people to the decision that they simply must give it a whirl.

      Focus on the gameplay, atmosphere, mechanics and features that your game provides. Leave an impression. Post links to your trailer on websites, Facebook, Twitter, and so on. Your advertising campaign will end the moment you let it. Good luck!

      Conclusion

      I hope that this tutorial has helped you on your path to making a sweet trailer for your game. What's more, I hope that you've realized that you can do it for little to no money, and with a time commitment of about an evening. 

      You already have everything you need. Your game works, so take some video of it (free). You have a computer, so grab some free editing software (iMovie, Windows Movie Maker) or if you have Photoshop CS6, you already have everything you need. If you have music for your game—and you should—use it in your promotional tools too! (Just make sure to check those licenses.)

      Thanks for reading! I'd love to see the trailers you make for your own games—drop a comment below or send me a message! 

      References

      • Rainbow: Gichco; CC0 Public Domain
      • Gun Effect: www.rustltd.com; CC0 Public Domain
      • Engine Noise: engine_takeoff.wav; dklon; CC-BY 3.0
      • Explosion : artisticdude; CC0 Public Domain
      • Shimmer: The Berklee College of Music, qubodup; CC-BY 3.0
      • Tappy Plane Graphics/Font Package: “www.kenney.nl” C/O opengameart.com; CCO Public Domain
      • Clapperboard by sortagreat icons from the Noun Project

      All About Karma: Decision Making and Morality in Games

      $
      0
      0

      As video games progress as an entertainment medium, they are becoming increasingly complicated. While there is still room for simple mechanic-driven games, there has been a noticeable trend in the industry towards expanding the narrative and emotional scope of video games. Many studios now use phrases like evolving narrative, dynamic choices, moral consequence and realistic character interactions as key pillars of their marketing campaigns.

      But these aren't just empty marketing catchphrases; many games actually follow through with these promises, offering experiences that delight on both an emotional and narrative level. However, video games are still experiences driven by interactivity, and even the most compelling narratives must function within the confines of strictly defined gameplay systems.

      In this article, we'll look at some of the various systems developers have used to allow player agency to affect their narratives, from various morality systems to more simple solutions. While most of these systems go beyond the scope of small team game development, understanding the pros and cons of their designs, and the trade-offs they make between simplicity and scope, can be useful to development at any scale.

      Good vs Evil: The Infamous Series

      At first glance, the Infamous games look like your typical fantasy open world fare: you are given control of a super-powered character and have an entire city to play around in. Unlike many open world games, however, the Infamous series aims to differentiate itself by presenting the player with a moral choice. Every game in the series shares the same central narrative theme: if you had superpowers, would you use them for good or for evil?

      This karmic decision between good and evil lies at the center of the Infamous experience, with an ever-present good-vs-evil (hero-vs-infamous) slider representing a player's karmic alignment. Throughout each playthrough, the player is constantly presented with decisions which are explicitly stated by the game as being considered either good or evil, with each resulting in a slight shift toward either hero status or infamous status, respectively. 

      However, this system only gives the illusion of choice; since the best and most interesting abilities can only be unlocked by becoming extremely good or extremely evil, it is in the player's best interest to pick an alignment at the beginning and stick with it until the end.

      Looking wicked cool is always a benefit of being evil, as long as you don't mind the color red.

      This type of purely binary system comes with one very clear advantage: each Infamous game is ostensibly two entirely separate experiences. With a modified story and set of powers, both the narrative and the gameplay are altered depending on the player's choice of morality. This encourages and almost demands multiple playthroughs, increasing the value of the game enormously. Even more importantly, this type of system allows developers to more easily create entirely distinct good and evil experiences.

      Because players are committed to one path, there is less variation in possible player decisions, meaning drastically different content can be created for the two distinct play styles. Doing this would not be possible in a system with more varied player choices, due to the sheer volume of content creation required to cater to every possible scenario.

      Unfortunately, this type of system also comes with a significant disadvantage: the player has virtually no impact on the story beyond their initial decision to be good or evil. Rather than presenting an evolving narrative with high player agency, this type of system is more akin to choosing which one of two separate video games to play. Though they are interesting when played side by side due their distinctiveness, each individual playthrough feels like a linear experience, devoid of any semblance of dynamic narrative or role playing. Depending on the type of game you wish to make, this may or may not be a deal breaker.

      Good and Evil: The Mass Effect Series

      The morality system used in the Mass Effect series is conceptually very similar to the one found in the Infamous games. Players are presented with opportunities to take both good and evil actions, and, depending on what choices they make, their character becomes slightly more good or evil. 

      The key difference is that these alignments, known as paragon andrenegade, are measured separately on two independent scales, with the player gaining paragon points for good actions and renegade points for evil ones. This means that, unlike in the Infamous games, being good and evil are not mutually exclusive, with points towards renegade not removing points towards paragon and vice-versa.

      Though a seemingly small change, this modification completely alters the core functioning of the experience. Though it is not possible to max out both the paragon and renegade bars, bonuses are tiered and mostly story-based, meaning that being purely good or evil is not necessarily better than having a more rounded moral disposition. Success in gameplay is therefore no longer tied to rigidly following a specific alignment, which truly opens up the decision making process.

      With this more flexible system, players are given the freedom to make decisions based on their narrative implications, and this offers many benefits to the experience. Chief among these is the ability for the player to properly role-play and have an effect on the game's story in a way that feels organic. Because paragon and renegade points are measured independently, it becomes possible for a player to make some story-based decisions that are counter to their favored alignment, without the fear of ruining their chances for specific endings or bonuses based on morality.

      Check out how paragon and renegade occupy their own separate bars, I wasn't lying.

      Though players are still likely to primarily follow one karmic path, the game's narrative is still made more engrossing, as players can evaluate the moral and narrative implications of each choice independently of the others. This is in stark contrast to the illusion of choice they have in Infamous's system, in which the player simply goes along with their initial decision even if they disagree with the outcome it presents.

      However, this system is not perfect, and comes with one major shortcoming: pulling it off requires the creation of an enormous amount of content. Since players can not be expected to follow one of two specific series of decisions, the game must be able to create convincing scenarios for a wide range of possible story states.

      It gets even harder: these various scenarios must link together into one cohesive narrative, to avoid the game feeling disjointed or its characters unrealistic. However, the developers must exercise caution, because if too little varied content is created and too many decisions link back to the same scenarios, this system can leave decisions feeling inconsequential. 

      Although it is difficult to pull off, this system is truly effective in creating an open narrative while still giving players the ability to clearly chose between good and evil, a thematic element that many gamers enjoy.

      Approval System: Dragon Age: Origins

      This system, seen in Dragon Age: Origins, is interesting to look at because of how different it is from the more common karma systems seen in most games. Rather than measure the "righteousness" or "evilness" of your character, the approval system focuses entirely on the opinions your party members hold of you. There is no good-vs-evil slider, just independent approval ratings for each character in your party. These ratings can go from -100 to +100, expressing the character's level of dislike or admiration for the player respectively.

      Approval ratings are important as they come with tangible gameplay bonuses and consequences: a high approval rating can mean an increase in stats for the party member, and when an approval rating reaches -100 there is a risk of the character no longer accepting your leadership and defecting from the party entirely. Perhaps even more significantly, approval ratings also have important narrative consequences: new dialogue options and even the chance for romance can result from high approval.

      The only party member who will never leave your side, no matter what you do.

      This system is particularly interesting because it allows players to distance themselves from choosing to play as a good or evil character, and instead opens up decision making to be more about individual characters' personalities, creating a more human and realistic approach to player choice. When faced with difficult scenarios, the player is encouraged to act according to the values of those surrounding them rather than some isolated moral predisposition they may have. This more closely emulates real human interaction, and the emotional impact of these decisions is thus greatly increased.

      In addition, this system also greatly enriches the emotional significance of romantic relationships in the game. Since romance can only be achieved with a high enough approval rating, players must often make choices they don't agree with or even sometimes disappoint their most compatible party members in order to woo their desired lover. This is incredibly interesting from a story telling standpoint, and adds even more complexity to the role playing in the game.

      The approval system doesn't have very many flaws; it is an extremely effective design for a gameplay system revolving around player choice and NPC approval. However, it is a very specific system that can't really be used outside of that gameplay style. In a game without party members, or a game more focused on the individual personality of the main character, this type of system would be impossible to properly implement. 

      Although it may not be easily adapted into a personal project, the approval system is interesting to look at, as it provides a great example of how a rigid gameplay system can be used to create an experience with a dynamic narrative and emotional depth.

      The Choice: Various

      Here we have the choice, a very clever system implemented in a range of games. This system, if you can even call it that, is defined by a single decision making point that divides the rest of the game's narrative. In the case of most games employing the choice, this decision comes near or right at the end of the game, and offers the player a way to drastically alter the story's ending.

      These types of decisions typically have extreme narrative significance—for example, saving or destroying the world, or killing off main characters. However, on a conceptual level, there is no reason these choices could not be more subtle.

      The reason this technique is so clever lies in how incredibly lightweight it is, both from a design and implementation standpoint. Provided you place your narrative-altering decision right at the end of the game, very little additional content needs to be created to offer even a multitude of different endings. People tend to remember the end and beginning of things much better than they do the middle, and this means that even offering a single decision near the end of the experience can leave the player with a significant sense of involvement in the story.

      The choice usually takes place right at the end of the game, so to avoid any spoilers here's some pretty Bastion scenery.

      Additionally, since so little content needs to be created, it is entirely reasonable to have these types of decisions lead to wildly different outcomes. This provides the ability to create sweeping narrative changes that can elicit strong emotional reactions in players—something that is much more difficult to do with choices that have a smaller narrative impact.

      Unfortunately, this ease of implementation does come with some predictable drawbacks. Though it can trick players into leaving a game with the feeling that they affected the plot, their actual involvement in the story or on their character's development on a moment to moment basis is non-existent. This means that role playing isn't possible, and gameplay can't be affected by player choices, unlike traditional morality systems.

      In fact, this technique doesn't even perform remotely the same type of function as the more complex systems we looked at earlier. However, in the right type of game, something simple like this can be hugely effective and even sometimes preferable to a more complicated solution. This is especially true for games made with a low budget and small teams, where creation of the content required to support other types of systems is often impossible.

      Conclusion

      Emotional and narrative depth are quickly becoming important facets of many different genres of video games. The systems we've looked at are only a few of the ways developers have tackled the issue of combining narrative freedom with traditionally rigid gameplay mechanics. None of these systems are perfect for every game, but understanding their core functioning and design philosophies should prove to be helpful if and when you decide to tackle this challenge in a game of your own.
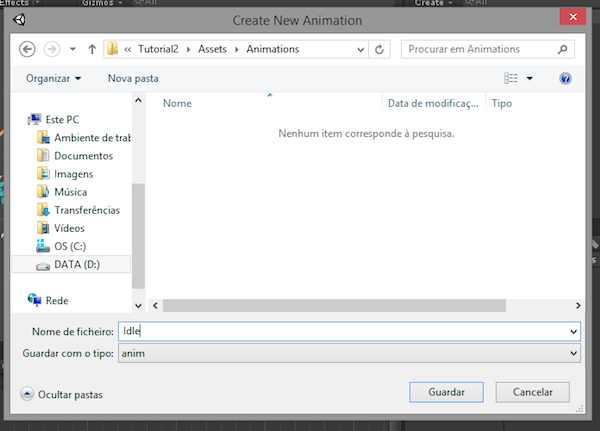
      Bone-Based Unity 2D Animation: Creating the Actual Animations

      $
      0
      0

      In this series, we're focusing on the bone-based 2D animation tools provided by the Unity engine. The main idea is to present and teach the fundamentals of 2D animation in order for you to apply it to your own games. In this tutorial, we'll add the idle, jump, and fall animations.

      Before we start the tutorial, we would like to thank Chenguang (DragonBonesTeam) for providing us with the game art used to produce this tutorial series.

      Where We Left Off

      In the previous tutorial, we imported a 2D sprite representing the game character, sliced it with the Unity Sprite Editor, and constructed the base of the character. If you haven't completed the previous tutorial we strongly recommend that you do so, since you are going to need the 2D character in order to follow this tutorial.

      Final Preview

      This demo shows the animated dragon we're aiming for—hit Space to make it jump:

      General Animation Theory

      There are several important concepts that you need to keep in mind while animating. For the purpose of this tutorial, we will assume that you have no experience with animation (2D or 3D), and that you've never worked with animation software before.

      Animation, as we know it, has evolved from paint to digital. There are dozens of hybrid animation techniques, but all of those share the same base principles, like lip-syncing, squash or walking cycles.

      In order to understand animation, you must first learn the concept of a frame. A frame is one of many still images that compose an animation. If you pause a cartoon, the image that your TV shows would be of a single frame.

      The main difference between traditional animation and computer animation lies in the tools used. Traditional animation is a very hands-on process, where the artists would have to draw or compose thousands of individual frames. Computer animation removes the need for many tools and, generally, simplifies the whole process. 

      For example, whereas with traditional animation the artist would have to draw almost every single frame of an animation, with computer animation the artist can use what we call key frame points. These key frame points, as the name specifies, are key stages of the animation. Basically, the artist creates those key frame points, and the computer interpolates between them to create the missing frames. As you can imagine, this type of process is much less labor-intensive.

      You can define a key frame as a single still image in an animated sequence that takes place at an important point in that sequence. A good example would be in an animation of rock falling: the original position of the rock in the air would be a key frame, and the end position of the rock on the ground would be another. The computer would then generate all the other frames. We call the frames between key frames tweened frames, and they are the responsible for creating the illusion of motion.

      The frame can also be used as a unit of time. For example, you can say that an animation lasts 20 frames. The real duration of any animation depends of the frame rate, which can vary with the format of the animation. In North America and Japan the standard is 30 frames per second (fps), while across the rest of the world the standard is usually 25 fps.

      Animations

      Since you now know the basics of animation and computer animation specifically, let's now return to Unity to start animating our character.

      The first step is to create a folder in the Assets directory called animations, in which you will save your characters' animations.

      Next, open the Animation panel in Unity (Window > Animation):

      As you can see, the panel contains a horizontal time line, a record button, a play button, and a couple of buttons for navigating through the frames. 

      Grab the Animation window and dock it next to the Console tab (note that you are using the 2D layout created in the Unity 2D Arkanoid tutorial). This way, you can work on your scene with the animation panel still open.

      Idle Animation

      You will create three different animations for the dragon: an idle animation, a jump animation, and a fall animation. 

      To create the first animation, select the Dragon game object and click Add Curve on the Animation panel. A new window will ask you to name the animation file and the destination folder to save it in. Unity animation files have .anim extension, and you will save them in the Animations folder you created earlier. Create the Idle.anim file.

      As you may notice, once you save the file, several things change in the editor layout:

      If you take a look at the play buttons at the top of your scene, you will notice that they have become red. In the Animation panel the record button is now red too, and you'll see a red line across the timeline. This means you are in record mode. Also, if you look at the Inspector, you will see that Unity has automatically added a new component to your game object: the Animator.

      The Animator component is a reference to an Animator Controller that is used to set up behavior on a character. This includes a setup for State Machines, Blend Trees and events that can be controlled by script. Basically, the Animator is the link between the character and its behaviour.

      We will cover the Animator component with more depth later; for now, let's just focus on the animation. In your Dragon game object, select the Head:

      On the Animation time-line, drag the red line to 1:00 (one minute in).

      Now, on the Inspector, set the Z Rotation to 7.9. As you may notice, you now have some small shapes on your timeline. These marks indicate the key frames of the animation.

      Move the red line to 2:00 and set the Z Rotation of the head to 0.

      Press the record button again to deactivate the record mode. You can now press the play button to test your animation. If everything worked, the head of your dragon should be bobbing up and down.
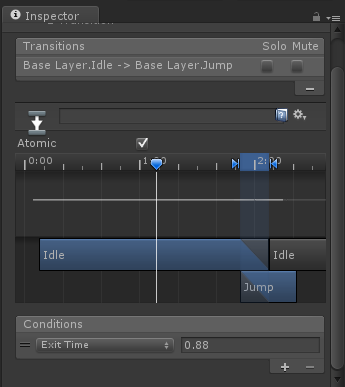
      Adjusting the Animation

      The dragon head seems to be rotating a bit too much. Since we just want a little nod, we need to edit the animation. 

      Turn the record mode on again by pressing the button, and move the red line to 1:00 minute. Alter the Z Rotation value to 2.05.

      Press the record button to exit record mode and test the animation again. 

      As you can see, to edit an animation, you just need to select the desired key frame and change it. If you need to change the timing of an animation—for example if the animation is too fast or too slow—you can drag the mark in the timeline to the desired frame.

      Okay, now you have the head animated, but you want to animate the entire body. Since you built your character as a hierarchy instead of isolated game objects, you don't need to create a single animation for each part of the body; instead, just hit the button marked Add Curve and select a different body part. Click the button and select the dragon's tail.

      Try to make the tail go up and down. Just like you did before, use the Z Rotation axis and the timeline between zero and two minutes. 
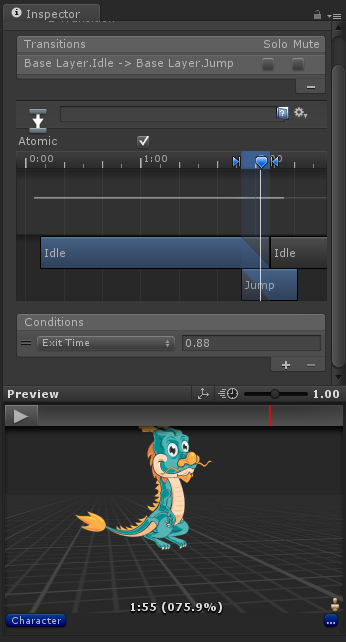
      Thanks to the hierarchy you created, when you move the tail the engine automatically moves the tip as well. However, you can also animate the tip individually if you select it.

      Great! Now animate the rest of the body parts for the idle animation. Take the time you need to edit the animation until you are completely satisfied. Animation takes time and you never get the results you want on the first try. By the end, your timeline should look similar to this:
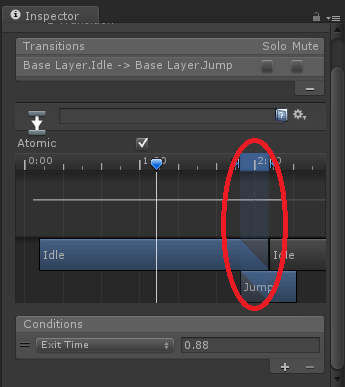
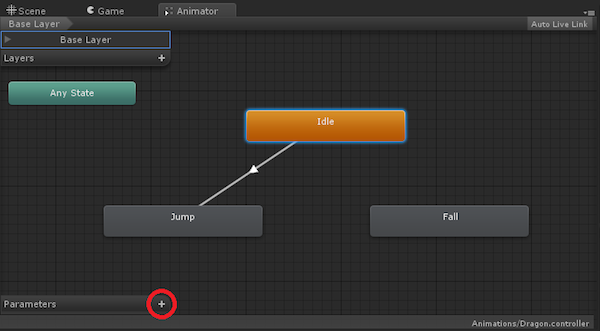
      Note that, for the Idle animation, you don't change any values of the dragon's centre of mass (the black dot).

      The Jump Animation

      For the Jump animation, you will need to create a new animation file. To do that, in the Animation panel, click on the label that says Idle and select Create New Clip.

      Name it Jump.anim and save it in the Animations folder.

      For this animation, you want to make your dragon look up while jumping. Since we've already cover the basics of creating animations using Unity, we'll just give you some hints rather than walking you through the process.

      As you did before, you need to select the Dragon game object and start by adding curves. Let's start with the head; this animation will be a short one, so 0:30 seconds will do. Rotate the head on the Z-axis to look up.

      To prevent the head being completely static, you can add a little motion to it. You can achieve this by adding a little rotation.
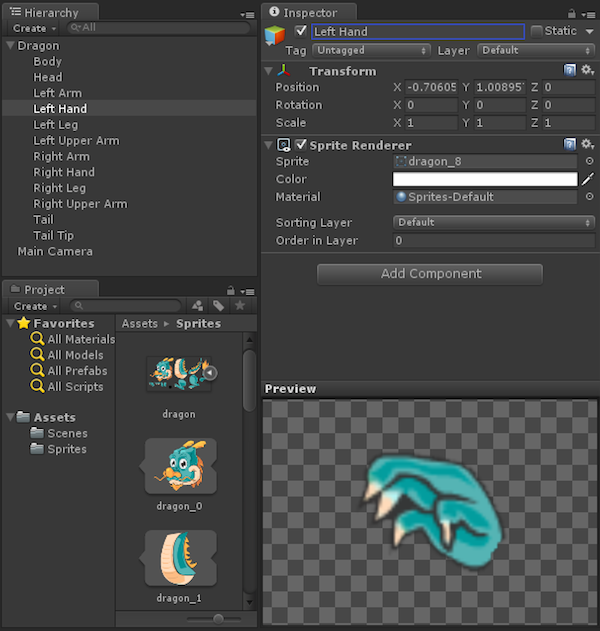
      Repeat the process for the remaining body parts. Keep in mind that the animation should look like the character is in mid-air. 
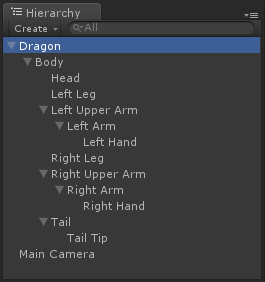
      We will teach you how to make the complete jump later on. For reference, try to get your character in poses similar to the following one:

      Have you done it? Nice!

      Now, let's focus on the final animation: the fall animation.

      The Fall Animation

      Your character can now jump up, but two parts compose a full jump: the jump itself, where the character is lifted from the floor, and the fall, when the character moves back down again. Right now you are missing the second part of the jump, the Fall animation.

      Just like before, in the Animation panel, click on the label with the current animation name and select Create New Clip.

      Save the new animation in the Animations folder with the name Fall.anim.

      This time, you want the character to look down while falling. To do that, you need to press the Add Curve button and start posing the dragon. Just like the Jump animation, 30 seconds will work for this case.

      Repeat the process of selecting the body parts and creating the respective key frames for the entire character (except for the black dot). Once again, you can add middle key frames just to make sure that the character is not static during the falling.

      Next Time

      This concludes the second tutorial explaining how to create a bone-based 2D animation with Unity. You have now learned the basics of animation and used key frames to create three types of animations. Next time, you will connect the different animations, blend them and call them by script.

      If you have any questions or feedback on what we've covered so far, please leave a comment below.

      References

      • Dragon sprite sheet: used with permission from Chenguang from DragonBonesTeam

      Marketing Your Indie Game: The Single Most Important Thing That No One Knows How to Do

      $
      0
      0

      Once upon a time, marketing was considered taboo and almost completely ignored by indie game developers. These days, most devs recognize its importance and do make some effort, but do little to differentiate themselves from the masses. In this article, we explore the art of marketing, and how you can use it to gain much-needed exposure for your game.

      Related Posts

      What's the Problem?

      The independent gaming world will forever remember 2008. It was around that time that a few innovative developers released what would go on to become critically acclaimed, genre-busting masterpieces. Games like Braid and World of Goo helped us remember what guerrilla game development was really about: creativity, passion and, above all, breaking boundaries. Combine their success with the launch of the App Store that July, and the result was millions of wannabe coders and small-time designers starstruck by the prospect of riches and gamedev glory.

      The vast majority of these newbie developers needed time to refine their craft, and released games that garnered very little attention, mainly because they weren't all that good. Suffice it to say, they usually didn't make much money. 

      But then there were the seasoned developers who created good, and sometimes great, games. In fact, their games were so good that many of them believed the gaming community would welcome them with open arms, and buy their products by the truckload.

      Most of them didn't make any money either.

      If they can do it why cant you
      If they can do it, why can't you?
       

      So what was the problem?  Well, game development became so accessible that everyone started creating games, which proved both a blessing and a curse. With so many games being released every day, gaining recognition suddenly became very difficult, regardless of the quality of the game. In short, for all their hard work, most developers failed to properly market their games—and this is still true today.

      When to Begin Marketing Your Game

      Before we get into specifics, it is important to dispel the common notion that marketing can only begin after a game is released. As most of you already know, a game draws most of its sales within the first few weeks, and even days, of release. If the proper channels don't already know about your title by the time it's launched, your sales during this critical window are going to suffer.  

      So, instead of waiting until the eleventh hour, follow this general rule:

      • Begin your marketing campaign the moment you have something that illustrates the fundamental mechanics and look of your game.

      Whether it's one finished level, a mocked up (quality) screenshot using Photoshop, or a small demo that displays a nuance of your game, it is imperative that you start generating hype as soon as there is something—anything—worth showing to the public. From that point forward you should be promoting the progress of your game on a semi-regular basis.

      Tip: Although it's imperative to start marketing your game early, the last thing you want to do is to start posting early, unpolished screenshots of your game all over the web, especially if you're still in the programmer art phase of development. Google isn't too keen on removing such images, and trust me when I say that they will haunt you for the life-cycle of your development. 

      What Every Game Development Team Should Be Doing

      Okay, so you've decided to launch your campaign months before your game's targeted release date. Good. So now what? Let's start with the essentials. You'll need:

      • A website: Whether your website acts as a home base for all of your games, or just the one you're currently working on, it needs to be updated frequently and departmentalized. The home page should feature an extended overview, captivating screenshots (a picture of your UI isn't all that exciting), and relevant links. You'll also need a media page that houses images or videos.
      • To do the social media thing: Sorry, there's really no avoiding it. At the very least you should have a Facebook page and a Twitter profile. If your game is small or mid-sized this is probably enough, but in theory you could subscribe to dozens of social media outlets. More on this below. 
      • A development blog: While development blogs are less essential than a website and a strong social media presence, gamers and developers alike love to read about the personal struggles and triumphs associated with making a game. Keep it personal, as if you're speaking directly to your readers. Humanize yourself and viewers will connect with and appreciate your plight. Post as frequently as necessary, but try to avoid posting about every little bug fix or new art piece. It's enough simply to prove that your game is coming along.
      • Trailers: This comes a bit later, but is probably one of the single most important things you can do to get people excited to play your game. Don't overload it with cheesy titles, and don't think you have to be an expert cinematographer to produce a compelling video. Instead, target each facet of gameplay at least once, clearly display the game's title and the name of your company (you do have one, right?), and keep the cut scenes down to a minimum.

      You can never have too many trailers. Triple-A games and movies release dozens of teasers, spotlight and full trailers, and they do so for good reason. If you do decide to release multiple videos, you can ignore the previous rule and tailor each one to a specific aspect of gameplay. One could be a combat demo, another a introduction to the game world and the story, and a third solely dedicated to your protagonist. Be sure to space them out—it's the best way to generate hype.

      See also: How to Make an Indie Game Trailer With No Budget.

      Publicize Yourself

      You can create all the websites, dev blogs, and trailers in the world, but if no one knows who you are, they're not going to matter. Perhaps the toughest part about marketing a game is making the public aware that it exists. Once they know about it, the rest is actually pretty easy. Well, it also helps if your game is, you know... good.

      Let's break down the different ways that you can get people talking about your game without cramming it down their throats.

      So now that I signed up for an account why isnt anyone following me
      So, now that I signed up for an account, why isn't anyone following me?

      Social Media

      We've already mentioned that social media is an integral part of the marketing process. Fair enough, but how do you transition from relative unknown to Internet superstar?

      Tips for Posting on Twitter

      Of all the social media outlets, Twitter is the one that affords developers the easiest access to potential fans, members of the press and other burgeoning developers. Use it, learn the science behind it, and master it. Here are a few tips:

      • Do not use Twitter to approach random members of the press—no one likes a beggar. Instead, view it as an opportunity to see what they're plugging and what genres of gaming they feel most passionate about. Feel free to reply to their Tweets, but only if you have something engaging to add to the conversation. If you're lucky they'll toss you a follow. And then, when you Tweet about your game, there's a chance they'll see them. 
      • Going further, if a member of the press favorites or retweets one of your posts, don't dismiss it. That's not to say you should immediately request a preview of your half-finished game, but it's a firm indicator that when your game is ready to be showcased, someone might have genuine interest in plugging it. 
      • Post your game development updates during peak hours, ideally somewhere between 11am and 11pm EST. Better yet, post them twice—once in the morning and once during the evening hours. (The reason being that if you only post updates during the middle of the night, then by the time your followers check their feed your post will have already been long buried.)
      • There's a tendency among game developers to follow just about anyone who is making an independent game. These "Serial Followers" care more about receiving a follow in return than they do about your game development team.  And if you dare to not follow them in return, they'll drop you faster than Mario can say "It's-a me."
      • Don't become a "Serial Follower." Instead, follow those who you are genuinely interested in hearing from. Indie developers that you admire are a good starting point. Your favorite indie gaming sites should be included as well. In the beginning it's OK to follow more people than people that follow you, but it's far more preferable to follow 500 people and have 1,000 followers than to follow 2,500 people and have 3,000 followers. If you find yourself falling into the latter category, chances are you've become a "Serial Follower." Do you follow?
      • #gamedev and #ScreenshotSaturday are your friends. Look them up.

      Other Social Media Tips

      • The IndieGaming subreddit is a great place to link your YouTube trailers, preview, reviews and game demos. Save the Steam Greenlight plugs for /r/greenlightquality. And whatever you do, don't inundate your reddit post title with flashy buzzwords. "Innovative 2D RPG with pioneering game mechanics and epic storyline" doesn't tell me much. 
      • Your website should link to your social media accounts. Your Twitter account should have links to your Facebook page and website. Your Facebook page... you get the point. 
      • It's worse to have a grossly outdated Facebook page and website than none at all. Keep things current. 
      • If you must relay your gamedev failings to the Internet, try to be funny about it. Same goes for your announcements.

      To illustrate the last point, this recent Twitter post fared particularly well for us:

      "After two years of toiling, sleepless night and neglected wives we're finally close to releasing an #EchoesofEternea game demo. #gamedev"

      As did this musing:

      "The difference between coding a 2-hour platformer and a 20-hour RPG: 62 gray hairs, 7 doctor co-payments, and 2,000 hours. #gamedev"

      Gaming Booths

      Despite the theory that all game developers are vampires who dwell in dark basements, getting out into the light of day and attending public gatherings is one of the smartest things you can do to promote your game. I promise you won't turn to ash.

      But in order to snag a booth at one of the bigger conventions like PAX, you'll have to reserve a portion of your meager budget for travel and venue expenses. If you have the money it's well worth the effort. If you're on a tighter budget, consider submitting to Indie Mega Booth. Through them, qualified game developers can have their game showcased at PAX for as little as $500—quite the bargain. 

      Better yet, you can submit your game to IndieCade for a paltry 80 bucks. Now, that won't guarantee you entry into the festival, but if you are accepted, you'll gain a slew of additional exposure, the likes of which supersede your upfront costs by a colossal margin. 

      Even if you can't afford a booth or are rejected from festivals, go to conventions anyhow and make good use of your social suave. Hand out flyers, physical CDs of your demo, a slip of paper that says "Buy My Game"—anything so that gamers won't instantly forget who you are.

      See, as a game developer it's important to connect with other developers, but it's arguably more important to connect with the people who will actually be playing your game. Gaming conventions will allow you to do that and more. By meeting with your target audience face to face, it will further humanize you and your efforts. In addition, it will give gamers the opportunity to play your game, and you the chance to receive meaningful feedback.

      See also: Tips for Game Conference Success.

      Crowdsourcing

      Crowdsourcing is generally thought of as a way to procure a budget for your game, but it's also useful as a marketing device. Our current project, Hiro Fodder: A Blue Hope, benefited from crowdsourcing in several ways.

      Firstly, it forced us to create a video and write a detailed description about our product. Secondly, our page was hit tens of thousands of times over the course of a month. So even though we only got a little over 300 people to back the project, it was great exposure for our little RPG. Finally, and this was something that we didn't anticipate, we spent a lot of time communicating with other developers, even going as far as to sign up as the programmers for another project that had over 1,500 backers. We've since grown very close with the developers behind Echoes of Eternea and have become fully immersed in helping their game become a reality.

      Now if only we had realized just how long developing two 20-30 hour, homegrown RPGs would take! But fear not, we're getting close!

      Kickstarter A great way to make money and friends
      Kickstarter: A great way to make money and friends.
       

      The great thing about crowdsourcing is that a lot of smaller indie game journalists keep up with new campaigns. Several journalists wrote articles about Hiro Fodder without even asking us first. We have since established a great working relationship with these writers, and will definitely be calling on them when the game gets closer to release.

      See also: A No-Name Developer's Guide to Succeeding on Kickstarter and Kickstarter Post-Mortem for Hiro Fodder: A Blue Hope.

      Contacting the Press

      One could easily write an entire article on dealing with the media. It is such a critical part of running a successful marketing campaign that overlooking it would already place your game at a severe disadvantage. But it's one thing to communicate your game to the press; it's another to do it effectively.

      Here are a few tips:

      • Be realistic: Before you contact any of the major players in the gaming community, assess what you hope to achieve. You're probably not going to get IGN to write a feature piece on your Match-3 game, but you may get a smaller indie-focused mag to give you a shot. Once your game garners enough press from smaller sources, you should start taking more chances. No harm is going to come out of telling Kotaku or Joystiq about your upcoming game.
      • Target the right websites: It may seem painfully obvious, but if you're targeting a mobile device, don't contact PC mags. You'd be surprised how often game developers make grievous missteps like emailing PC Gamer about their revolutionary new game for Android devices.
      • Be yourself: You're not writing a cover letter, so don't treat your emails to press members like one. Starting your email with lines like "[Company X] is proud to bring you an innovative gaming experience like no other..." is off-putting. Instead start with something simple, like "Hello." Tell them who you are and a little about your game. Provide them with a few simple links to your media or demo. If you can say what you have to say in fewer words, do so. Remember, these guys probably receive dozens of emails each and every day from developers just like you. Be humble, be straight to the point and never, ever tell them how much you love their site. Sucking up is not a virtue.
      People actually send emails like this but you wont
      People actually send emails like this, but you won't.
       

      When dealing with the press via email:

      • Don't forget to send members of the press working copies of your game. 
      • Don't cram your opinions down their throats. You might think your game is fun and awesome, but let the press draw their own conclusions.
      • Don't forget to include your unique selling point. This is usually a game mechanic that's particular to your game. For instance, our unique selling point is the ability to store accumulated Action Points for future rounds, allowing you to unleash powerful attacks at the risk of leaving your character vulnerable while charging up. Is it revolutionary? No. But unique, yes. 
      • Don't wait. Reviews will hardly help you three weeks after your game is released. Better to have the press mention your game in the weeks and months before it's due to launch. 

      Late Stage Marketing

      By the time your game hits alpha, you should really consider a few of the more recently available marketing options:

      • Alphafunding: Mid-sized online distributors like Desura offer this service, which allows fans to play your incomplete game and watch it evolve. Even better, they're allowed to contribute money to your game. It's sort of like Kickstarter, except the only thing you're obligated to provide to your fans is an awesome game. It's a really sweet deal, and an awesome way to get people pumped about your upcoming release.
      • Steam Greenlight: At the initial writing of this article, getting your game Greenlit was a difficult task. These days, so many games are accepted that the real hurdle is making your game stand out among the masses. But that doesn't mean you shouldn't place your game on Greenlight. Quite the contrary. The site is visited by tens of thousands of gamers, and you are guaranteed to win some of them over with your game, most of whom will purchase it from your personal website or another distribution portal that isn't Steam. It's not as prestigious as it was a year ago, but Greenlight is still an opportunity that should not be missed. See also: Tips for Getting Greenlit on Steam Greenlight.
      • Press Releases: Press releases probably won't help that much unless your game already has a solid following. But if you ran a sound marketing campaign, there's a good chance it might. Target major distributors like PRWeb and smaller ones tailored towards indies. You should probably only do this about a week before the game is released.
      • Other avenues: If you're an active streamer on Twitch or belong to forum communities, now would be an excellent time to let the public know that your game is nearing release. Just don't become a member of a bunch of well-established communities for the sole purpose of plugging your game. It comes across as obnoxious. 
      Definitely a good thing for indies
      Definitely a good thing for indies.
       

      Conclusion

      There you have it. Marketing your game is probably as important as debugging and polishing it. Without marketing, you're completely reliant on gamers knowing about your game without you telling them. Now, if you win a major contest or get picked up by a major distributor, that could very well happen, but for the rest of us, it won't.

      It's not entirely necessary to do everything listed in this article, but at the very least you should:

      • Create a website.
      • Create an account and post regularly on Twitter. 
      • Post a YouTube video of your trailer.
      • Contact a few game journalists who have shown prior interest in your type of game. (Remember, keep your emails short and personal.)
      • Place it on Steam Greenlight (as long as it's not super-casual).

      Do at least that, and you'll stand a chance of developing your brand. Happy marketing!

        Viewing all 728 articles
        Browse latest View live